© 2008 Pokémon. © 1995-2008 Nintendo/Creatures Inc./GAME FREAK inc. Developed by Ambrella.
Trademarks are properties of their respective owners. Wii is a trademark of Nintendo.
Assembly Tips
Warning! Paper craft assembly requires the use of scissors. Small children should ask a parent or
•
guardian for help.
It will take approximately two hours to cut out and assemble the parts into a complete Turtwig.
•
For best results, use a glue that dries quickly. Toothpicks can be useful for applying glue to
•
small areas.
Make sure to fold along all of the dotted lines before applying glue.
•
When folding, it’s easier to complete all of the outward folds before you complete the inward folds.
•
When you need to apply glue, use only a small amount. Press firmly with your fingers, and give the
•
glue time to dry.
Assemble the pieces one at a time, and be very careful with each one.
•
If you do, your completed Turtwig will look great!
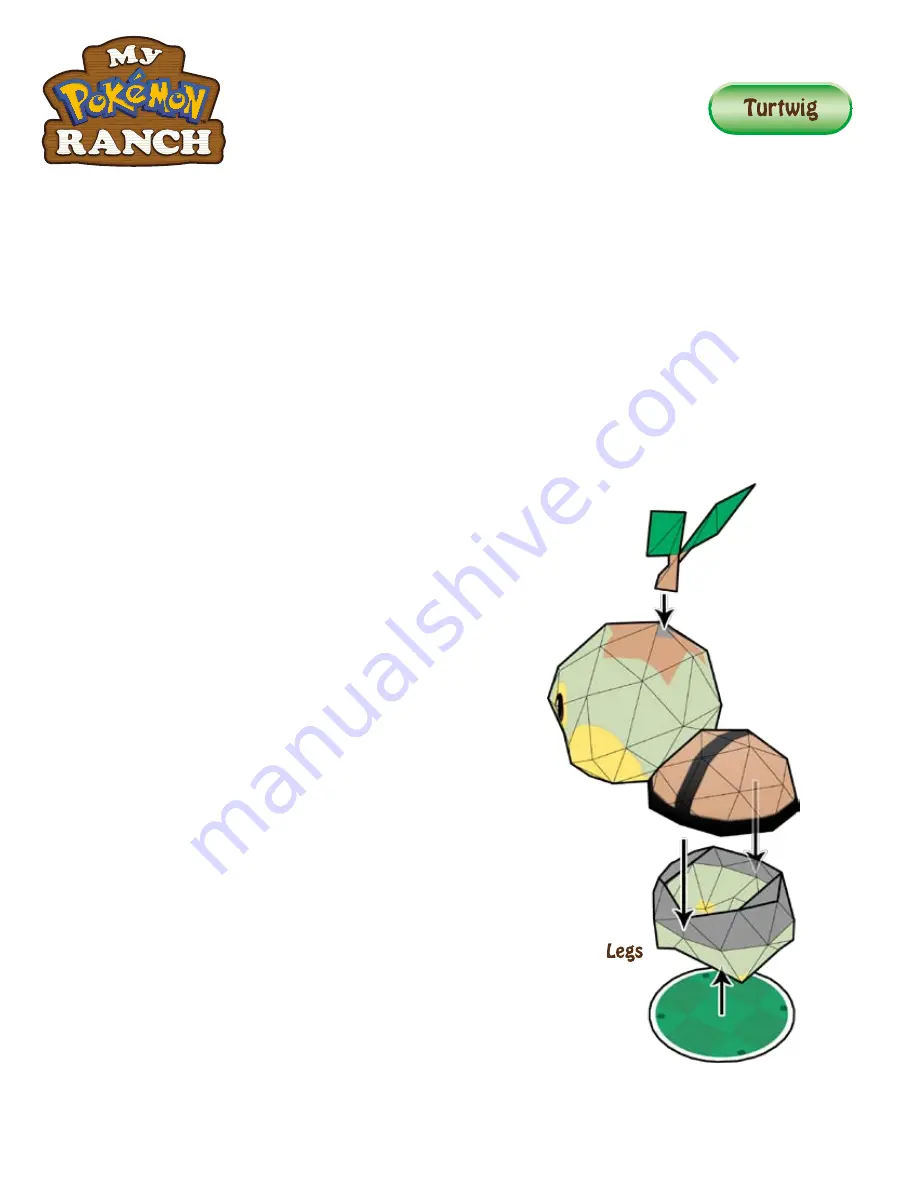
Leaf
First, glue the white areas on the stem, then glue the
back of the Leaves. Press the Leaf pieces firmly together
to make them stick.
Face
Fold and glue the Face and the Neck pieces, then glue
the Face to the Neck. Fold and glue the Shell, and finally
glue the Shell to the Face and Neck.
Body
Fold and glue the Legs and Tail pieces
separately. When they are complete, glue the
Legs and Tail together, starting with the Tail.
Finishing Touches
Apply plenty of glue to the gray areas on
top of Turtwig’s Head and Body. Then, attach
the Leaf to the head and the top of the Shell
to the Body. Put glue on the bottoms of
Turtwig’s feet, and attach them to the Stand
at the
●
marks.
Face
Stand
Tail
Leaf
Neck
Shell


