background image


Instruction manual                                                                                PP14-366 

3/7 


III. Assembly 

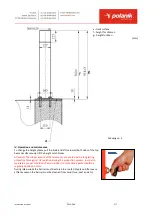
The barrier is designed to be mounted on the synthetic surface of the water jump pit edge, provided that under the 
synthetic surface there is a concrete base layer made of concrete class C20/25 or higher and min. 130 - 150 mm thick.  
 
If the base layer does not comply with the mentioned requirements, two foundation blocks are to be made according 
to the below diagram.  


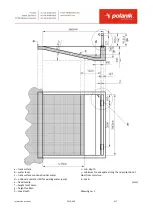
[mm] 

1.


the edge of the water jump pit  

2.


foundation block, minimal dimensions: 500 x 500 x 500 [mm] made of min. C20/25 concrete  

 
To install the barrier to the edge of the water jump pit use the included steel expansion anchors HLC 16x140/90  
according to 

their producer’s instructions (see 

www.hilti.com

). The installation is done in the following way: 


1)


screw the barrier legs to the top beam with the included screws, 


2)


position the barrier on the edge of the water jump pit according to the drawing no. 1 and no. 2 (pages 4 and 
5), mark the points where to drill the wholes,  

3)


use the drill bit dia. 16 mm to drill wholes min. 130-150 mm deep, 

4)


clean the wholes (e. g. with vacuum cleaner)  

5)


position the barrier on the edge of the water pit, 

6)


put the anchors into the wholes, 

7)


screw down the nuts with approximate force 50 Nm.   


Summary of Contents for PP14-366

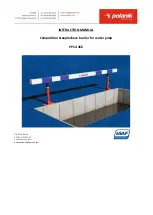
Page 1: ...INSTRUCTION MANUAL Competition steeplechase barrier for water jump PP14 366 File 2018 06 04 PRODUCT SUPPORT Pawel Ciechanowski p ciechanowski polanik com ...

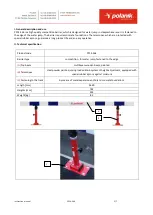
Page 2: ...cial rubber aprons guarantee a long product life and an easy operation II Technical specification Product code PP14 366 Barrier type competition for water jump fastened to the edge A Top beam multilayer wooden beam painted B Telescopes steel powder painted spring loaded knob system of height adjustment equipped with special rubber aprons against moisture C Fastening to the track by means of metal ...

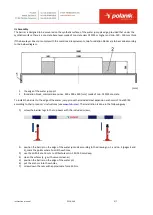
Page 3: ... of min C20 25 concrete To install the barrier to the edge of the water jump pit use the included steel expansion anchors HLC 16x140 90 according to their producer s instructions see www hilti com The installation is done in the following way 1 screw the barrier legs to the top beam with the included screws 2 position the barrier on the edge of the water jump pit according to the drawing no 1 and ...

Page 4: ...el c track surface continued under water d optional concrete infill for existing water jumps e fixed hurdle f height for Women g height for Men h max depth i min depth j minimum for adequate strength and protection of steel from moisture k drain mm Drawing no 1 ...

Page 5: ...l the height catch blocks Attention The rubber aprons of the telescopes are coated with a long lasting protection film against UV radiation during the production process in order to maintain a proper condition of apron rubber UV protection agents should be regularly applied on them During idle periods the barrier must be stored in a roofed dry place After every athletics season the barrier must be...

Page 6: ...nd foil The product needs to be assembled VI Product images PP14 366 2018 Polanik The producer reserves the right to introduce without warning changes in product constructions and colours Package s dimensions cm contents 1 barrier length 410 width 17 height 30 Volume m3 0 21 Gross weight kg 86 ...

Page 7: ...Instruction manual PP14 366 7 7 VII IAAF Certificate ...

Reviews: