background image


Instruction manual 

S14-250 ver. 2020 

12/15 

4. Remarks on maintenance and operating 

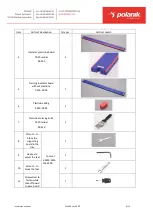
Plasticine strips deform during training sessions and competitions. There are two indicator plasticine boards (item 4), one 
training indicator board without plasticine (item 5), one plasticine block  and one forming knife (item 7) in the set. Thanks 
to the two indicator boards you are able to replace the one with the deformed plasticine strips with the other one very 
quickly. It is recommended that one should substitute plasticine board (item 4) with indicator board without plasticine 
(item 5) for intensive training sessions. Training indicator board (item 5) is thinner and does not require the  plasticine 
forming.               

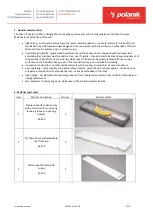
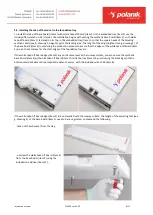
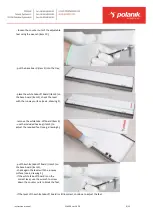
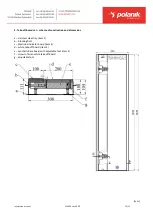
Dents and defects in the plasticine layers should be filled up and leveled. First one ought to apply thick layers of 

plasticine (item 6) on the damaged areas. Then the layers are to be leveled with the forming knife (item 7), as it is shown 
below. 


Attention! While storing or using plasticine should be protected against high temperatures (ove

r 40 °C), because 

otherwise it can change its shape and dimensions, and in extreme cases it can become a liquid. 

To ensure great aesthetics and high comfort for jumpers we use natural raw materials like wood and plywood. The 

materials are not so durable as synthetic ones. Thus the wooden take-off board parts (white take-off board and 

indicator boards) wear out faster and they need to be replaced. In order to maintain the parts in good condition they 

should be removed from the embedded tray after competitions and training sessions and stored in a dry roofed place. It 

is recommended that the embedded stainless steel tray (item 1) should be sheltered with the stainless steel cover (see 

page 14). Any defects in paint coating revealed during thorough regular inspections of the wooden parts must be 

repaired with wood paint or impregnant. Synthetic base board (item 2), stainless steel foundation tray (item 1) and 

stainless steel blanking covers (available separately) do not require any additional maintenance actions.  


Even though the wooden elements are impregnated and protected with paint, a prolonged contact with water can 

devastate or deform them. 

The  white  take-off  board  (item  3)  can  be,  turned  over and  screwed  again  to  the  synthetic  base  board.  That  prolongs 
sign

ificantly the product’s life.


Even the best technical solutions cannot substitute for common sense. The usage of the product must take place under 
the supervision of qualified sports arena staff and trainers. The producer shall not be liable for any incidents caused by 
the improper take-off board installation, assembly or its misuse. 


Summary of Contents for S14-250

Page 1: ...mp and triple jump take off board set with stainless steel foundation tray and synthetic adjustable base board S14 250 ver XI 2020 NEW TECHNOLOGY EASIER OPERATION File 2021 03 27 PRODUCT SUPPORT Pawel Ciechanowski p ciechanowski polanik com ...

Page 2: ...ial damages in connection with the purchase or use of POLANIK products or costs over the original cost of the product Specific warranty terms 1 Even though the wooden elements are impregnated and protected with paint a prolonged contact with water can devastate or deform them That is why it is obligatory to dismount take off board wooden elements after training or competition and store them in a d...

Page 3: ... the white take off board can be quickly leveled with the runway surface with the included hex key even if the foundation tray is not installed horizontally innovative construction constituted by elements which are easy to assemble transport and store easy operating fast assembly and disassembly processes which take 15 minutes approx can be done by one person provided that the foundation tray is a...

Page 4: ... Training indicator board without plasticine S 250 02 03 1 6 Plasticine 300 g S 250 02 01 1 7 Plasticine forming knife 2020 model K9 250 1 8 Wrench to block the supporting board in the tray Tool set S 0250 ZM3 S14 250R 1 9 Hex key to adjust the feet 1 10 Wrench to block the feet 1 11 Screwdriver to fasten white take off board to base board 1 ...

Page 5: ... is in the distance of 1 3 m for long jump to the landing pit edge that is closer to the take off line the IAAF international competition rules 13 m for men and 11 m for women to the landing pit edge that is closer to the take off line the IAAF international competition rules For any other competition the distance shall be adjusted to competitors level The installation point of the tray item 1 of ...

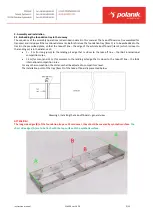
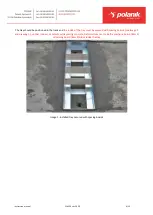
Page 6: ...and the inside of the tray must be secured with spacing boards see image 1 and drawing 2 so that it does not deform while placing concrete Deformations can make the plasticine board item 4 or training board item 5 block inside the tray Image 1 Installed tray secured with spacing boards ...

Page 7: ...ndation tray Draining tubes ought to be positioned vertically in the spaces of the foundation tray and should go past the concrete layer During the embedding process of the tray item 1 draining tubes can stick out over the foundation tray bottom After the concrete setting the sticking tube ends are to be cut off as close to the tray bottom as possible to ensure the correct water outflow ...

Page 8: ... process to ensure that the edges of the white take off board item 3 are on the same level as the short edges of the foundation tray are If the white take off board edges item 3 are on the same level as the runway surface you can secure the synthetic base board item 2 with white take off board item 3 inside the tray item 1 by unscrewing the blocking synthetic bolts counterclockwise until perceptib...

Page 9: ...see k drawing 3 remove the white take off board item 3 use the included hex key item 9 to adjust the required feet see g drawing 3 put the white take off board item 3 on the base board item 2 check again the level with the runway surface see k drawing 3 if the white take off board is on the correct level use the wrench to screw down the counter nuts to block the feet if the level of the white take...

Page 10: ...te take off board item 3 are properly mounted in the tray item 1 the indicator boards need to be installed Put the plasticine indicator board item 4 or training indicator board item 5 into the tray next to the white take off board item 3 and the set is ready for use Image 2 Set ready for use mounted in the runway ...

Page 11: ...ne indicator board item 4 d white take off board item 3 e synthetic base board with adjustable feet item 2 f screw to fasten white take off board g adjustable foot h concrete foundation i ground j draining tube item 1 k synthetic surface of runway Drawing 3 Installed take off board set in embedded tray ...

Page 12: ...w materials like wood and plywood The materials are not so durable as synthetic ones Thus the wooden take off board parts white take off board and indicator boards wear out faster and they need to be replaced In order to maintain the parts in good condition they should be removed from the embedded tray after competitions and training sessions and stored in a dry roofed place It is recommended that...

Page 13: ...t scheme of construction and dimensions a stainless steel tray item 1 b blocking bolt c plasticine indicator board item 4 d white take off board item 3 e synthetic base board with adjustable feet item 2 f screw to fasten white take off board g adjustable foot mm ...

Page 14: ...less steel cover with edges for competition take off board PBN14 S0250 Stainless steel cover for take off competition boards secures the inside of the board tray special edges for installing synthetic surface 6 adjustable feet in the range of 20 mm strong ribbed construction Equipped with edges for easy application of synthetic surface 3 Plasticine straps for indicator board 2020 model P8x31 2020 ...

Page 15: ...Instruction manual S14 250 ver 2020 15 15 7 IAAF certificate ...

Reviews: