Page 6
Page 3
INSTALLATION NOTES & TROUBLESHOOTING GUIDE
OPERATION & MAINTENANCE INSTRUCTIONS
Installation Notes
When there is no flow, the water in the cell will become warm, as the UV disinfection system lamp is always on. To
remedy this, run cold water tap anywhere in the house for a minute to flush out the warm water.
As the system requires time to reach its full operating capacity, please allow the disinfection system to operate 3-5
minutes prior to using the water from unit. In addition, to clear any air or debris form the system, open the faucet and
allow water to run through the disinfection system for 2-3 minutes.
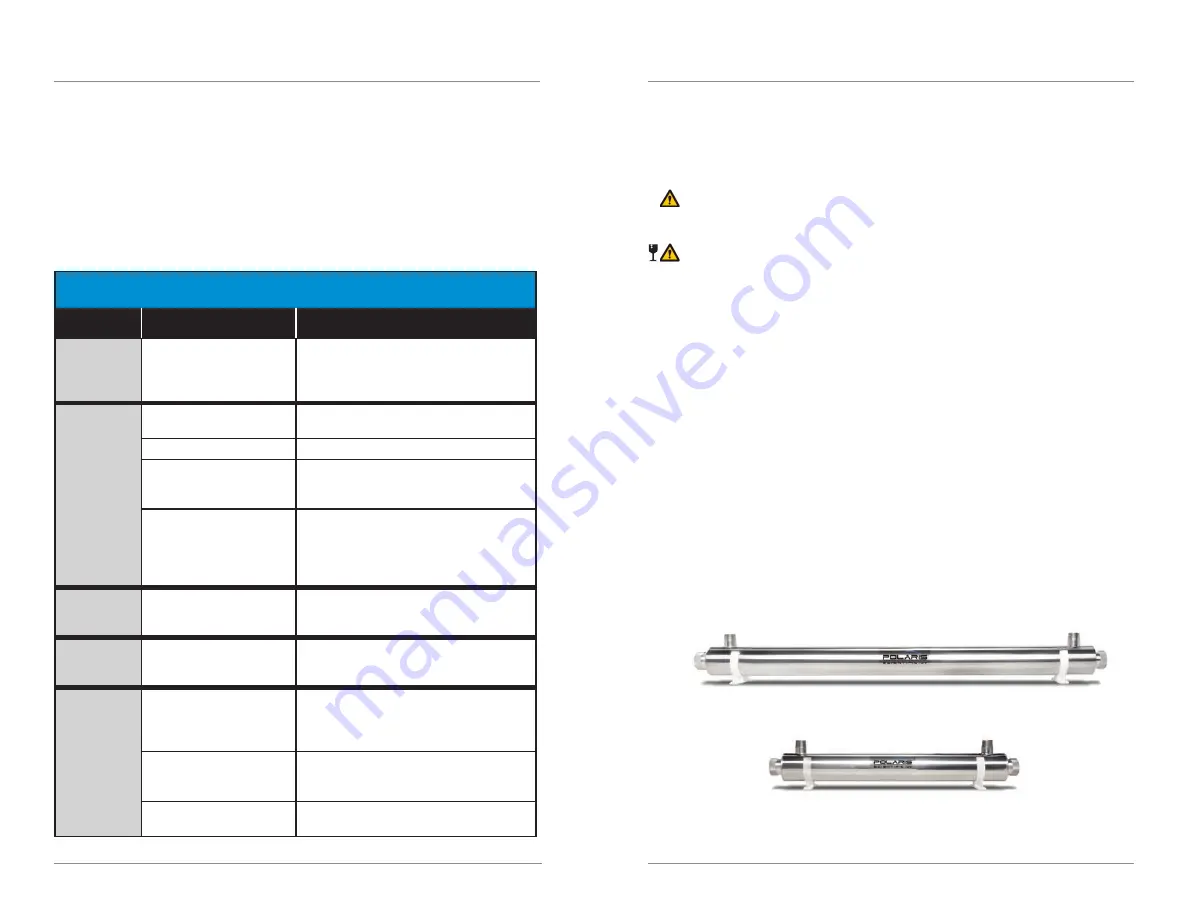
Troubleshooting Guide
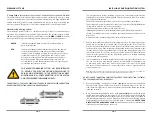
B. Quartz Sleeve Replacement And/Or Cleaning:
If the water contains any hardness minerals (calcium or magnesium), iron or
manganese, the quartz sleeve will require periodic cleaning. To remove the quartz
sleeve, first the UV lamp as outlined above:
a) Shut off water supply and drain all lines.
b) Drain the UV chamber (use a small bucket under the unit to prevent a spill),
using drain port provided.
c) Remove nuts from chamber, checking for the free floating spring inside
sleeve at the opposite end to the lamp connection (do not allow quartz
sleeve to fall).
d) Carefully remove O-rings from the quartz sleeve. As the O-ring may tend to
adhere to the quartz sleeve, it is recommended to replace the O-rings annually.
e) Clean the quartz sleeve with a cloth soaked in
CLR
, vinegar or some other
mild acid and then rinse avoiding the introduction of any water to the inside
of the sleeve.
f) Re-assemble the quartz sleeve with spring in the UV chamber allowing the
sleeve to protrude an equal distance from both ends of the UV chamber.
g) Wet the O-rings and slide onto each end of the quartz sleeve and reassemble
the gland nuts (hand tight is sufficient).
h) Re-tighten all connections, turn on water and check for leaks.
i) Re-install the UV lamp and lamp connector as per prior instructions.
j) Reconnect system to power source.
Note:
If the system is put on a temporary by-pass or if it becomes contaminated after the disinfection system,
it will be necessary to shock the system with household bleach for a full 20 minutes before resuming use of the water.
CAUTION:
When performing any work on the disinfection system unplug the unit first and
never look directly at the burning UV lamp.
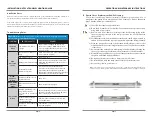
SYMPTOM
POSSIBLE CAUSES
REMEDY
PRESSURE
DROP
The sediment pre-filter is
clogged
Replace filter cartridge with appropriate
five micron cartridge. NOTE: Check source
of water supply as fluctuations may occur in
source pressure
HIGH
BACTERIA
COUNT
Quartz sleeve is stained or
dirty
Clean sleeve with scale cleaner and eliminate
source staining problem
The UV lamp is spent
Replace UV lamp
Change in feedwater quality
Have the source water tested to ensure it is
still within the allowable parameters for use
with this unit
Contamination after
disinfection system
It is imperative that the effluent water
stream be shocked with chlorine after the
water leaves the disinfection system the
disinfection system must have a bacteria free
distribution system to work effectively
WARM
PRODUCT
WATER
Common problem caused
by infrequent use
Run water
WARM WATER
APPEARS
“MILKY”
Caused by air in the water
lines
Run water until air is purged
UNIT LEAKING
WATER
Problem with O-ring seals
(on gland nuts and/or
sensor probe on monitored
units)
Ensure the O-ring is in place, check for cuts or
abrasions, clean O-ring, moisten with water
and re-install, replace if necessary
Condensation on reactor
chamber caused by
excessive humidity
Check location of disinfection system and
control humidity
Inadequate inlet/outlet port
connections
Check thread connections, re-seal with Teflon
tape and re-tighten
UVA-12C
UVA-6C


