BRAKES
9.19
REAR CALIPER
REMOVAL/INSPECTION
1.
Clean caliper area before removal.
2.
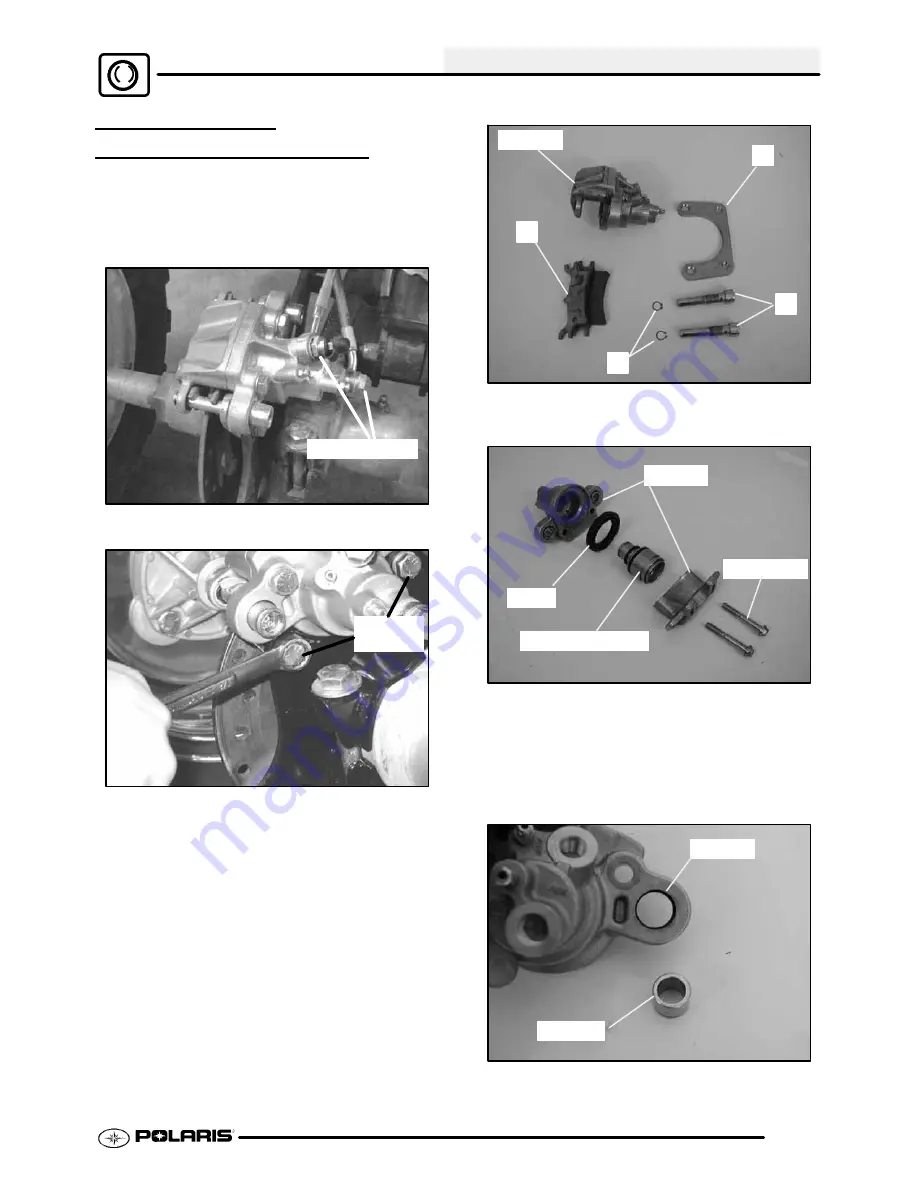
Remove hand brake (inner) and auxiliary brake
(outer) lines. Place a container to catch brake
fluid draining from brake lines.
Remove Lines
3.
Remove the two caliper bolts and the caliper.
Remove
Bolts
4.
Remove the slide bolt snap rings (A), the slide
pins (B), the bracket pad (C), and the brake pads
(D).
A
Caliper
B
C
D
5.
Remove the anvil bolts and separate caliper
halves and remove pistons with piston pliers.
Seal
Piston & O--rings
Caliper
Anvil Bolts
6.
Remove seals and O-rings.
Clean the O-ring
grooves.
7.
Clean disc, caliper body, and pistons with brake
cleaner or alcohol.
8.
Remove the slide bolt bushings.
Inspect the
bushings and O--rings and replace if necessary.
Bushing
O--ring
PartShark.com
877-999-5686
Summary of Contents for 2009 Trail Blazer 330
Page 94: ...ENGINE 3 48 NOTES P a r t S h a r k c o m 8 7 7 9 9 9 5 6 8 6 ...
Page 110: ...FUEL SYSTEM CARBURETION 4 16 NOTES P a r t S h a r k c o m 8 7 7 9 9 9 5 6 8 6 ...
Page 124: ...BODY STEERING SUSPENSION 5 14 NOTES P a r t S h a r k c o m 8 7 7 9 9 9 5 6 8 6 ...
Page 196: ...ELECTRICAL 10 4 REVERSE LIMIT SYSTEM P a r t S h a r k c o m 8 7 7 9 9 9 5 6 8 6 ...
Page 226: ...ELECTRICAL 10 34 NOTES P a r t S h a r k c o m 8 7 7 9 9 9 5 6 8 6 ...
Page 227: ...ELECTRICAL WIRING DIAGRAM 2009 TRAIL BOSS P a r t S h a r k c o m 8 7 7 9 9 9 5 6 8 6 ...
Page 228: ...ELECTRICAL WIRING DIAGRAM 2009 TRAIL BOSS P a r t S h a r k c o m 8 7 7 9 9 9 5 6 8 6 ...
Page 229: ...ELECTRICAL WIRING DIAGRAM 2009 TRAIL BLAZER P a r t S h a r k c o m 8 7 7 9 9 9 5 6 8 6 ...
Page 230: ...ELECTRICAL WIRING DIAGRAM 2009 TRAIL BLAZER P a r t S h a r k c o m 8 7 7 9 9 9 5 6 8 6 ...


