5.23
BODY / STEERING / SUSPENSION
5
9924125 - 2013
RANGER
RZR / RZR S / RZR 4 Service Manual
© Copyright 2012 Polaris Sales Inc.
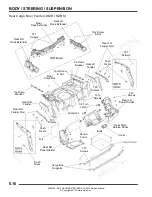
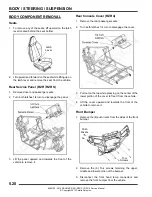
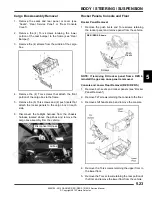
Cargo Box Assembly Removal
1.
Remove the seats and rear panel or cover (see
“Seats”, “Rear Service Panel” or “Rear Console
Cover”).
2.
Remove the (4) Torx screws retaining the lower
portion of the rear bumper to the frame (see “Rear
Bumper”).
3.
Remove the (4) screws from the middle of the cargo
box.
4.
Remove the (4) Torx screws that attach the front
portion of the cargo box to the frame.
5.
Remove the (6) Torx screws and (2) push rivets that
attach the rocker panels to the cargo box on each
side.
6.
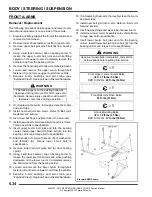
Disconnect the taillight harness from the chassis
harness located above the airbox and remove the
cargo box assembly from the vehicle.
Rocker Panels, Console and Floor
Rocker Panel Removal
1.
Remove the push rivets and Torx screws retaining
the rocker panel and remove panel from the vehicle.
NOTE: If removing RH rocker panel from a RZR 4,
reinstall the gas cap once panel is removed.
Console and Lower Floor Removal (RZR / RZR S)
1.
Remove both seats and rocker panels (see “Rocker
Panel Removal”).
2.
Remove T27 screws retaining the console to the floor.
3.
Remove shift handle knob and remove the console.
4.
Remove the Torx screws retaining the upper floor to
the lower floor.
5.
Remove the Torx screws retaining the rear portion of
the floor and remove the lower floor from the vehicle.
Disconnect Harness
Airbox
Push
Rivets
Screws
RZR / RZR S Shown
PRELIMINARY
VERSION
Summary of Contents for 2013 RANGER RZR
Page 417: ...2013 RANGER RZR 800...
Page 418: ...2013 RANGER RZR 800...
Page 419: ...2013 RANGER RZR 800 EPS...
Page 420: ...2013 RANGER RZR 800 EPS...
Page 421: ...2013 RANGER RZR S 800...
Page 422: ...2013 RANGER RZR S 800...
Page 423: ...2013 RANGER RZR S 800 INT L...
Page 424: ...2013 RANGER RZR S 800 INT L...
Page 425: ...2013 RANGER RZR 4 800...
Page 426: ...2013 RANGER RZR 4 800...
Page 427: ...2013 RANGER RZR 4 800 EPS...
Page 428: ...2013 RANGER RZR 4 800 EPS...

