Recording
23
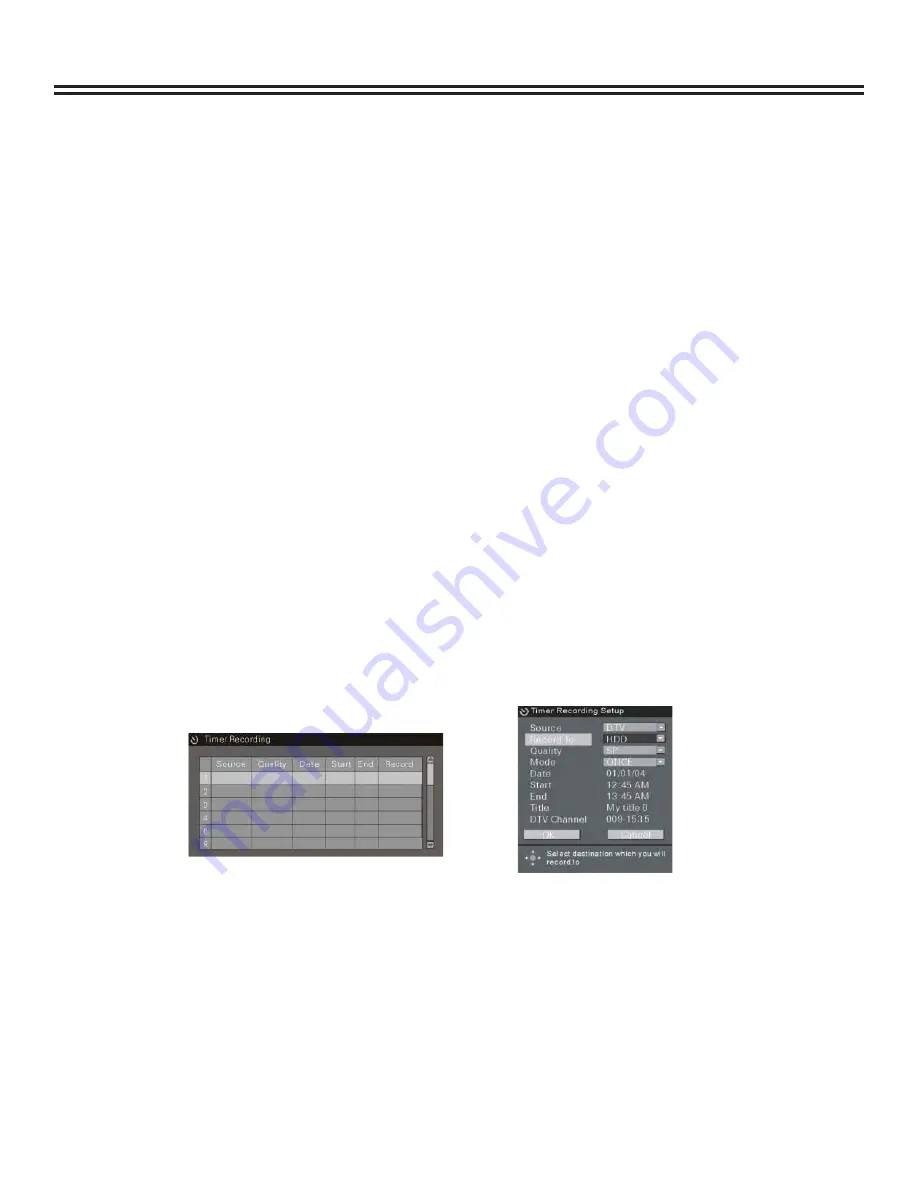
TIMER RECORDING:
Press timer button on the remote control.
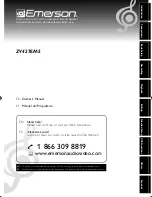
Press ENTER. A dialog box will appear.
Source: press ENTER. Use right arrow then up and down arrows to select the input source or
DTV scanned channel.
Record To: press ENTER. Use right arrow then up and down arrows to select to record to the
HDD or DVD
Quality: press ENTER. Use right arrow then up and down arrows to select the recording quality
Mode: press ENTER. Use right arrow then up and down arrows to select recording
occurrence(s)
Date: press ENTER. Use right arrow and then up and down arrows to set the start date
Start: press ENTER. Use right arrow and then up and down arrows to set the start time
End: press ENTER. Use right arrow and then up and down arrows to set the stop time
Title: use right arrow and then up and down arrows to change letters and name the recording
(up to eight letters)
DVT Channel: press ENTER. Use right arrow then up and down arrows to set the recording
channel
Select OK when complete. If you are watching another program when the timer recording is
preparing to record, three minutes before the start recording time, a dialog box will appear.
This allows you to cancel the timed recording. If you do not cancel the recording, the unit will
automatically record the program and change to the timer record programmed channel. You
will not be able to change channels while the unit is recording. To see the progress of the timer
recording, press DISPLAY.
To stop a timer recording while the unit is recording, press STOP.
To cancel a timer recording, highlight the programmed recording and press ADD/CLEAR.
TIME SHIFT RECORDING:
Don’t miss a scene from a live broadcast. If you have to step away from watching a live broadcast,
follow these steps:
Press TIMESHIFT, then PAUSE. This will start recording the current channel and pause the live
TV.
When you are ready to resume watching your program, press PLAY.
To return to live TV (and bypass your recording), press TIMESHIFT.
1.
2.
a.
b.
c.
d.
e.
f.
g.
h.
i.
3.
4.
5.
1.
2.
3.


