


14
ENGLISH
02
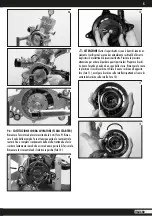
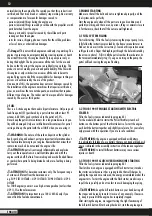
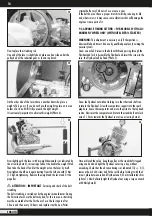
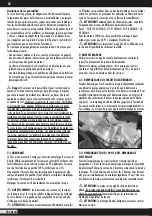
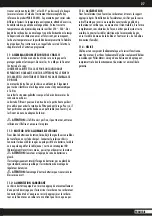
How to place the stretching rod
One end of the lever is slightly bent: place one bent side under the
pulley hub of the reduction gear as shown in photo 3.
03
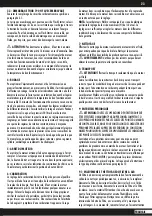
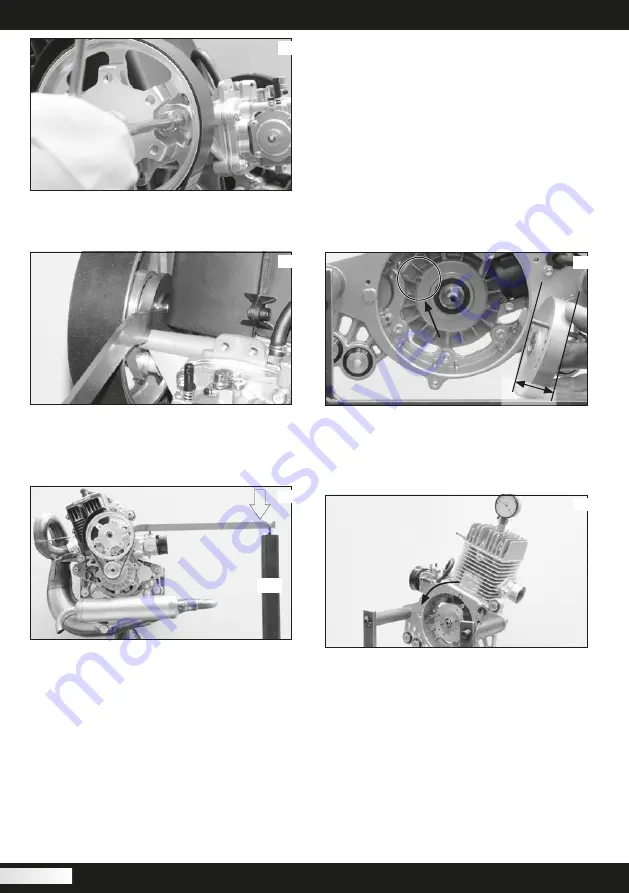
On the other side of the lever there is another bent side: place a
weight of 6 kg on it. If you do not have the weight to place on it use a
holder of 6 lit. and fill it till you reach the right weight.
It is extremely important to observe this weight (Photo 4).
04
6 Kg.
Now slightly push the lever with its weight downwards (as indicated by
the arrow in photo 4), increasing of about the double the weight fitted.
Then take the hand off and let the weight act on the lever by itself.
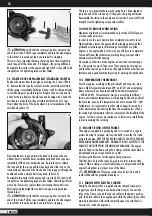
Now tighten the M7 nuts again starting from the left one with 15Nm
(1.5 Kgf.m) tightening. Remove the weight and the lever and fit the
propeller.
!
ATTENTION – IMPORTANT
-Servicing and check of the belt
stretching.
The belt stretching is carried out by the engine’s manufacturer. During
the first minutes of use the belt may bed; for this reason, a stretching
must be executed after the first hour of use. Check it again after
5 hours and then every 10 hours and replace it with a new Polini
original belt every 50 hours of use or once a year.
If the belt does not have a proper stretch it will slip, reducing its life
and, what is worst, it may cause some vibrations that will damage the
engine or some parts of it.
9.3 ADVANCE TIMING SETTING – FOR MODELS WITH ALU-
MINUM FLYWHEEL ONLY (WITHOUT ELECTRIC STARTER)
WARNING:
This adjustment is necessary only if the ignition is
disassembled and it must be done by qualified people only owning the
necessary tools.
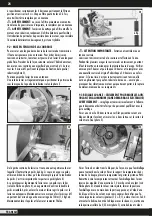
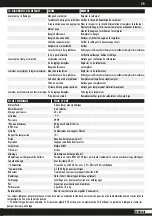
Screw one m.5x30 screw in the hole with thread passing through the
flywheel and lock it. Assemble the flywheel and insert the screw in the
case: the flywheel will be fixed (Photo 5).
05
30
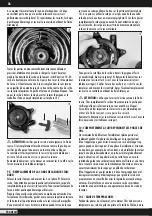
Screw the flywheel nut without locking it so that the crankshaft can
rotate in the flywheel. Screw the comparator support into the spark
plug hose, house the comparator and move the piston to the top dead
centre. Now reset the comparator and rotate the crankshaft ant-clock
wise of 1,
2
mm towards the flywheel sense (see arrow in photo 6).
06
Once achieved the value, keep the pulley or the crankshaft stopped
using one hand and tight the flywheel nut using a key, without
exceeding. Check that the advance timing is as indicated (1,2+/- 0,1),
remove the m.5x30 screw and fit the coil. Before locking it with the 2
screws, place between coil and flywheel one 0,35 mm calibrated shim
(photo 7). Now definitely tight the flywheel nut using a torque wrench
at 40Nm (photo 8).
Summary of Contents for THOR 190 HF
Page 33: ......


