background image


Politec Srl | Manual MANA DT SMA + DT3 

 Ver 2.5.2 

37 


4)


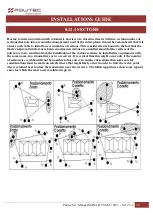
Through the TRANSMITTER lens shifts, find the maximum optical alignment based on the Buzzer and 
LEDs (with high brightness), the increase in the frequency of flashing (until the LEDs is fix on and the 
whistle of the corresponding BUZZER) indicate a better ALIGNMENT. 


5)


With a FULL rotation on the horizontal RX lens, is carried out the SCANNING of the optical signal. 


6)


Rotating the lens RX find the maximum value of ALIGNMENT corresponding to the LEDs (with high 
brightness) FIXED and the whistle of the BUZZER CONTINUOUS. 


7)


Exit the function of by repressing the ALIGNMENT TEST button for about 3 seconds on both optics 
(TX-RX) making sure that the orange LED TEST is shown in original condition.  

 
NB

you can SEE the calibration value through the multimeter on each optical receiver. For this procedure, you 

must have the pair of lenses (T-RX) in TEST.


 TEST 

BUTTON 

ORANGE 

LED  

Summary of Contents for MANA DT SMA + DT3

Page 1: ...Infrared barrier for perimeter protection range 250 m SMA technology and RS485 output Installation Manual 1 1 1 1 1 1 1 1...

Page 2: ...14 7 SERIAL CONNECTION TO ADEBUS Pag 15 Connection to serial port for each column Pag 15 8 MICROWAVE Pag 16 TX MOTHER BOARD Pag 16 RX MOTHER BOARD Pag 17 Configuration dip switche Pag 18 CONNECTIONS...

Page 3: ...Pag 45 PROGRAMMING START UP Pag 46 FIXED FUNCTION ADJUSTMENT Pag 47 TECHNICAL CHARACTERISTICS DT3 Pag 47 11 BARRIER TECHNICAL CHARACTERISTICS Pag 48 Installation recommendation Verify that the beam to...

Page 4: ...IN COMPONENT LIST N DESCRIPTION 1 Top cap 2 IR cover 3 Aluminium profile 4 Aluminium base 5 Motherboard IR 6 Optics TX RX 7 Motherboard MW TX RX 8 Parable TX RX 9 Heather 10 Terminal block 11 Supply b...

Page 5: ...litec Srl Manual MANA DT SMA DT3 Ver 2 5 2 5 2 ASSEMBLING THE CABLEPIT 7 Insert the highlighted edge into other section and fix with screws 8 Insert the third section in the same way and fix with scre...

Page 6: ...Politec Srl Manual MANA DT SMA DT3 Ver 2 5 2 6 9 Enlarge the two opposite walls of cable pit to allow the positioning of last section 10 Insert and well fix the missing screws...

Page 7: ...op edge of it at same level of ground POSSIBLE CORRECTION OF THE INCORRECT POSITIONING Placement should be perpendicular to the ground If the base is not in perfectly at ground level is possible to ad...

Page 8: ...0 2 nut M8 1 perforated plate 1 plate 2 black sheath insulating 4 anchor screw barrier Move the screw 60mm as shown in the figure in the perforated plate and screw the bolt lock Place the plate in the...

Page 9: ...Politec Srl Manual MANA DT SMA DT3 Ver 2 5 2 9 Insert the sheath the transformer then again the sheath and plate and fix everything with the nut Follow the wiring instruction in the manual...

Page 10: ...DECRIPTION Power Connectors terminal 8 1 2 19 Vac Input to be connected to the transformer 3 4 13 8 Vdc Output for power infrared 5 6 24 Vac Input to be connected to the transformer 7 8 24 Vac Output...

Page 11: ...talled 5 A delayed protecting heaters circuits 6 Circuit fuse Normally it installed by 0 8 A slow protecting Tx or Rx and infrared circuits 7 J7 It forces the output of the power supply 24 Vac for the...

Page 12: ...ac ex 2x0 75 to prevent input of disorders of the AC voltage on the barrier Note is absolutely necessary to shield the cable that provides 12 Vdc power supply and put the metal braid to ground The cab...

Page 13: ...1 A The cable that carries power from the transformer to MANA must be as short as possible and must be shielded with shield to negative The two wires must be connected to terminals 1 2 of the power c...

Page 14: ...14 10 1 CONNECTION TO BACKUP BATTERY Inside each column is provided space to house a rechargeable Lead up to 12V 7Ah The battery is normally recharged by the internal supply via a current limiter FUSE...

Page 15: ...BUS Each column can be connected via the RS485 bus to the control panel ADEBUS for planning monitoring and managing local or remote system For more information refer to Manual ADEBUS EXPLORER 7 1 Conn...

Page 16: ...of double barrier microwave using the synchronized output Output 2 3 LED The Led insert jumpers inserted in position 2 3 enables the power of Led Output and Led VDC indicating the presence of their t...

Page 17: ...ness of the signal the walk test and the test alignment see table previous page Permette di verificare le tensioni di alimentazione il valore di sensibilit la bont del segnale il walk test e il test d...

Page 18: ...ctivated with the Walk Test selector functions Continuous beep Alarm Sound intermittently variable Tell sensitive area 8 3 CONFIGURATION DIP SWITCH 1 LEDS Insert LED bar for Test Alignment 2 FIELD Dis...

Page 19: ...he receiver cavity by electrostatic discharge and damage resulting from installation 8 5 SENSITIVE ZONE The sensitive area depends on the distance Tx Rx the sensitivity and the type of antenna The dia...

Page 20: ...e vicinity of the columns is on the same apparatus is the distance from the ground the sensitivity is set to the Rx circuit The recommended height for installation of a conventional type is approximat...

Page 21: ...ns power transformer and tamper circuit 1 Check the various connections the power transformer to the circuit the battery the power circuit to circuit and transmitter cavities RX Vedi pagg 10 13 2 Powe...

Page 22: ...it red and 2 yellow LEDs for Led test alignment too Verify that on the board RX the leds alarm and Channel are on Otherwise proceed with the electronic alignment 8 9 WALK TEST 1 Turn the knobs sensiti...

Page 23: ...nner is displayed on the Voltmeter sensitivity value Note that small values indicate a higher value of sensitivity 0V maximum sensitivity 9V minimum sensitivity Calibration is performed taking into ac...

Page 24: ...tween adjacent sections are annulled should at the vertices of the polygon cross resulting from the installation of the various sections be installed two equipment with the same name two transmitters...

Page 25: ...etal fences placed behind the equipment night cause distorsions to the sensitive beam especially and might cause movement detection in unexpected spots with subsequent likely generation of false alarm...

Page 26: ...D RX1 RX2 0V to AND RANDOM Alarm output NO NA 5 16 BEAM 12 Vcc exclude RX1 0 V exclude RX1 RX2 Alarm output NC NC 6 17 S LOW NEGATIVE OPEN COLLECTOR open in case of fog Alarm output C COM 7 18 A MASK...

Page 27: ...2 27 9 2 CONNECTION AND SETTINGS HEATERS The power of the heaters is by default set to 24 V ac or dc but you can set it to 12 VDC repositioning the jumper on MES9C and on each optical as shown 24V Hea...

Page 28: ...NC IN Clamp 9 SYNC OUT Clamp 20 The synchronisms have to be connected according to the diagram above the Sync out corresponds to the TX part of the column and will have to be connected to the Sync in...

Page 29: ...amp terminal numbers are related to the image of p 11 DIP4 in OFF 1 2 3 4 5 6 7 8 9 10 11 12 ON Canal RX 1 2 3 4 ON Canal TX 1 2 3 4 ON 19 20 19 20 8 9 8 9 SYNC IN Clamp 8 SYNC OUT Clamp 19 SYNC IN Cl...

Page 30: ...select the transmission channel 1 to 3 default is set to channel 1 on the bench of 4 the selected channel must be the same on both TX and RX boards Note for information and for other configuration of...

Page 31: ...nual MANA DT SMA DT3 Ver 2 5 2 31 COLUMN 1 COLUMN 2 Canal TX 1 2 3 4 ON Canal RX 1 2 3 4 ON Canal TX 1 2 3 4 ON Canal RX 1 2 3 4 ON COLUMN 1 COLUMN 2 TX4 RX4 TX3 RX3 TX2 RX2 TX1 RX1 TX4 RX4 TX3 RX3 TX...

Page 32: ...occur the correct operation of TX optics The power of the heaters is set by default to 24V you can use 12V by changing the configuration of the jumper SW4 The voltage can be both AC and DC Note The se...

Page 33: ...the heaters is set by default to 24V you can use 12V by changing the configuration of the jumper SW4 The voltage can be both AC and DC In jumper J4 is possible to read the signal value in volts Note T...

Page 34: ...X SETTINGS 3 OPTICS The setting of the DIP SWITCHES on the lenses is set 1 2 3 4 5 6 7 1 2 3 4 5 6 1 2 3 4 5 6 7 1 2 3 4 5 6 RX2 ON TX2 ON RX3 ON TX3 ON RX4 ON TX4 ON It should be set to ON the DIP on...

Page 35: ...f transmitters and receivers in the direction of each other by adjusting the lens holder horizontally through the manual movement after loosening the locking screw on the joint and vertically through...

Page 36: ...the corresponding optical TEST 1 or 2 or 3 or 4 on coral receiver checking the position of the DIP switch 7 to ON and pressing the dedicated button for 3 seconds until the the BUZZER and the LED TEST...

Page 37: ...lens is carried out the SCANNING of the optical signal 6 Rotating the lens RX find the maximum value of ALIGNMENT corresponding to the LEDs with high brightness FIXED and the whistle of the BUZZER CO...

Page 38: ...x3 RX3 Tx2 RX2 Tx1 RX1 1 Put in test the optical TX1 and RX1 if present see p 11 12 and proceed with the calibration as explained 2 Put in test the optical TX2 and RX2 if present see p 11 12 and proce...

Page 39: ...2 RX3 and RX4 Make sure that it still aligned with RX1 2 Put in test the optical TX2 and RX1 if present see p 11 12 and proceed with the calibration as explained on p 13 and 14 REPEAT the setting of R...

Page 40: ...SUPPLY LED Red 2 ALARM LED ALM Red 3 MASKING LED MASK Green 4 DISQ LED S LOW Green 5 HEATINGS LED HTR Yellow 6 SYNCHRONISM SYNC Yellow 7 TRIMMER Response time adjustment 8 TEST J7 9 DIP SWITCH 12 Func...

Page 41: ...terminal in the presence of an attempt to blindness it can obtain the signaling ANTIMASK N B In normal operation the LED should be OFF In the event that is either on or flashing check the setting of t...

Page 42: ...on remotely DIP6 must remain OFF 7 BEAM OFF 1 In the ON position is obtained the exclusion of the first beam in the bottom while the remaining continue to function The function can also be programmed...

Page 43: ...ot in use OFF Optical sync operation with transmission frequency 3 4 CH 4 ON Wire sync not in use OFF Optical sync operation with transmission frequency 4 only 2 transmitter active 4 DIP SWITCH RX TER...

Page 44: ...ross by walk By adjusting the potentiometer counterclockwise to increase the trip time up to 500ms In this condition ensures that the alarm of a person walking through the barrier with the advantage o...

Page 45: ...en collector negative OPERATING TEMPERATURE 25 C 65 C Available Kit heaters for temperatures down to 50 C ADJUSTMENT ANGLE 10 vertical 180 horizontal DETECTION OPTIONS And Or on Rx AND 1 2 BEAMS EXCLU...

Page 46: ...eneral alarm 12 GREEN LED MW It lights up in case of MW alarm 13 MICROWAVE 24Ghz MW SENSOR POWER LED FOR DETECTION TEST Activate with the Dip Switch number 4 the functionality of detection LED 1 2 3 4...

Page 47: ...the correct adjustment SELF DIAGNOSYS The system performs a check every 50sec of the micronda functionality In case of malfunction it is signaled by the flashing of dedicated LED GREEN 10 4 TECHNICAL...

Page 48: ...bile Da 10 a 20 kg per barriera OPERATING TEMP 25 C 65 C SUPPLY 230Vac 50hz HEATERS 24 Vac Internal supplier ELECTRONIC COMP 13 8 Vdc Internal supplier POWER CONS 13 8Vdc Tx e Rx 290 mA per column 24V...

Reviews: