background image

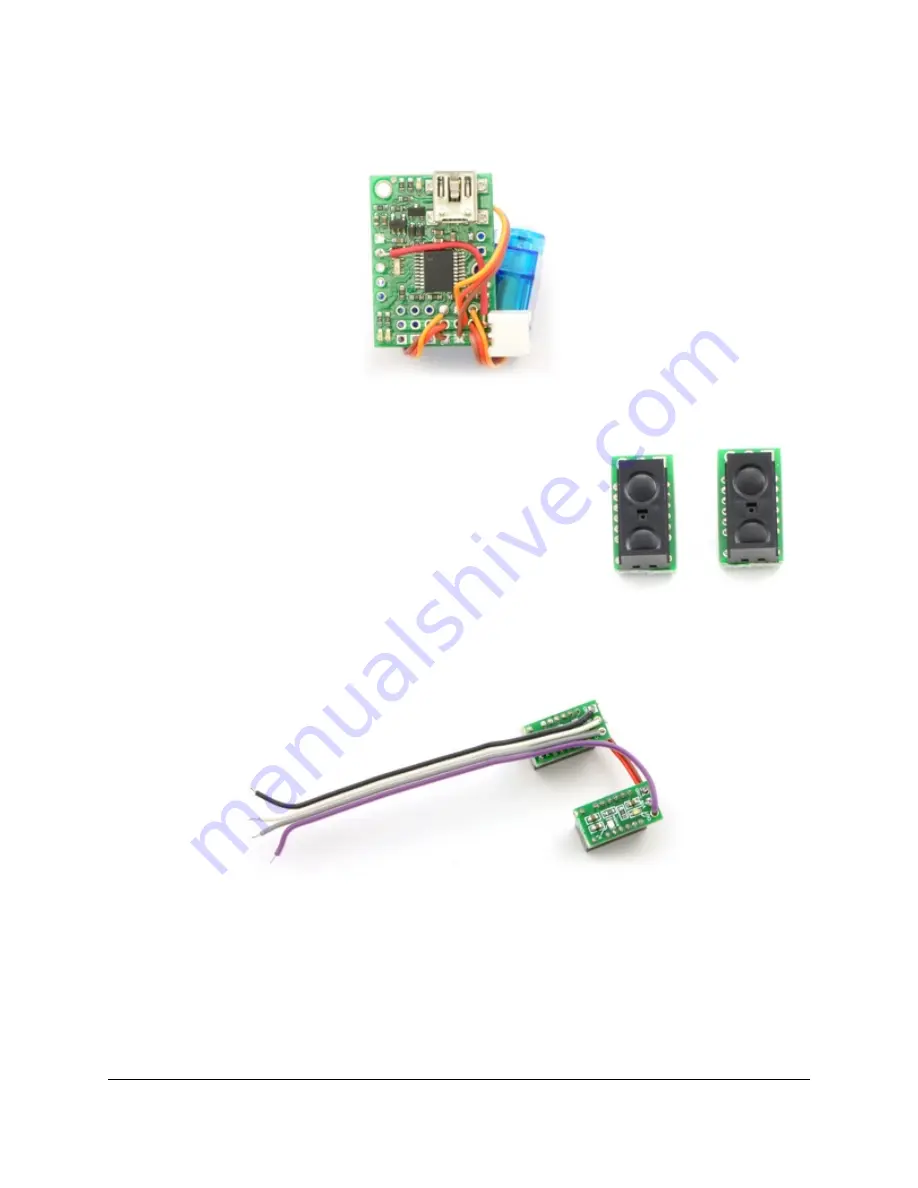
Digital distance sensors with

trimmed carrier boards.

Continue, soldering the right servo to channel 0 and the left servo to channel 2, so that the
servos are arranged in the same relative positions as the ports.

Connecting the servos to ports

0, 1, and 2 on the Micro Maestro.

Cut the sensor boards with a rotary tool, grinding wheel,
diagonal cutters, or a jeweler’s saw, removing the part
containing the unneeded mounting hole, so that they are as
small as possible. (Make sure you do not cut any traces.)
Then solder them to a cable so that you can connect them to
the Maestro. The example below uses a 4-wire ribbon cable,
sharing the power and ground connections for the two
sensors. Ribbon cable makes the assembly relatively clean,
but you can use whatever wire you have available. Look
ahead in the instructions to see where the sensors are going
to go, and make sure that you have a long enough cable.
Think about how to keep the wires close to the body and out
of the way of the legs and servos.

Soldering the sensors to a four-pin cable.

Solder the sensor power and ground to +5V and ground on the Maestro, and connect the
outputs of the right and left sensors to channels 3 and 4, respectively. Note that we use +5V
instead of the battery voltage so that the Maestro channels will never see higher voltages
– and another benefit is that the sensors will work under USB power, without the battery
plugged in.

Sample Project: Simple Hexapod Walker

© 2001–2010 Pololu Corporation

3. Construction

Page 8 of 21

Summary of Contents for Sample Project: Simple Hexapod Walker

Page 1: ...ls and Tools 3 3 Construction 5 4 Sequencing the Hexapod Gait 15 5 Using a Script for Obstacle Avoidance 18 6 Suggested Modifications and Improvements 20 7 Conclusion and Community 21 Sample Project S...

Page 2: ...The 2 high hexapod is capable of walking forward and backward and can turn left and right Two forward looking distance sensors provide obstacle avoidance The brain of the hexapod is the Pololu Micro...

Page 3: ...harp GP2Y0D810Z0F Digital Distance Sensor 10cm This is a tiny distance sensor with a long enough range to keep your hexapod out of trouble 1 1171 Battery Pack 4 8 V 150mAh This battery pack will provi...

Page 4: ...anged slightly since this sample project was written Versions shipping now have solid black cases instead of transparent blue ones and a portion of the top plane on the opposite side of the output sha...

Page 5: ...tep 2 Set up the Maestro for self power With your battery disconnected attach a wire red from the positive terminal of the battery connector to VIN Take care not to short or damage any of the componen...

Page 6: ...header included with the Maestro temporarily connect a servo to port 0 Make sure to connect the wires correctly with the brown or black wire connected to ground You should hear a short high pitched wh...

Page 7: ...the servos and sensors to the Micro Maestro This step requires patience and care A second pair of hands could be very useful Use solder to tin the leads of the servos so that they can be connected ini...

Page 8: ...onnections for the two sensors Ribbon cable makes the assembly relatively clean but you can use whatever wire you have available Look ahead in the instructions to see where the sensors are going to go...

Page 9: ...object is detected If the LEDs are always on you probably forgot to set the ports to inputs in Step 3 Step 6 Construct the legs Unfold the paper clips into straight pieces of wire Pliers make ugly de...

Page 10: ...h 1 25 1 75 1 75 and 1 25 like this The middle legs of the hexapod The segments at the end should be 1 25 in length Hot glue the legs onto servo horns Use a straight horn for the middle legs and cross...

Page 11: ...neutral positions as shown in the picture Fix them in place with the included screws holding the legs as you tighten them so that you do not apply torque to the fragile servo gears Glue the Maestro to...

Page 12: ...e hexapod flush with the bottom so that there will be as much clearance as possible Make sure that the middle legs have plenty of room to turn left and right without hitting the battery Glue the senso...

Page 13: ...ms and maximums Set the neutral positions as the Go to values for each servo and set Min and Max values so that your hexapod will never destroy itself Adjust the angles of the wires so that all six fe...

Page 14: ...ou might want to do is to add a dab of hot glue to each foot so that the metal is less likely to scratch up your work surface Your hexapod is now ready to be programmed Sample Project Simple Hexapod W...

Page 15: ...chieves forward motion by pushing those feet backwards against the ground while the other feet move forward through the air Then the hexapod shifts its weight to the other three feet and moves forward...

Page 16: ...dle legs touching the ground Frame 1 down legs move back front legs move forward Frame 2 weight shifted to the other tripod Sample Project Simple Hexapod Walker 2001 2010 Pololu Corporation 4 Sequenci...

Page 17: ...select the Run script on startup option on the Script tab and apply settings your hexapod will automatically start to walk You can now disconnect it from USB and allow it to walk on its own Reconnect...

Page 18: ...customize this to get the behavior you want start back up if both sensors see an object left_sensor right_sensor logical_and if back back back goto start endif back up and turn right if the left sens...

Page 19: ...frame_0_2 Frame 2 100 6528 frame_1 Frame 3 120 4992 6976 frame_0_2 Frame 0 return sub frame_0_1_2 2 servo 1 servo 0 servo delay return sub frame_0_2 2 servo 0 servo delay return sub frame_1 1 servo d...

Page 20: ...and detect obstacles sooner Alternative servos the entire design could be scaled up A power switch so that the battery does not have to be unplugged over and over Boost regulation http www pololu com...

Page 21: ...re your projects We would love to hear about your experiences and we would be delighted to see any improvements or alterations you make We will post hexapod projects submitted by others below Hexapod...

Reviews: