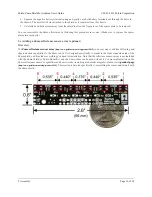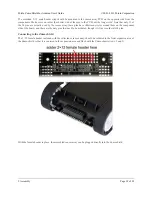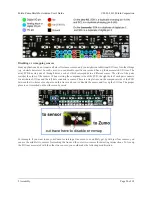
a Zumo reflectance sensor array, you will have more room to work if you do the soldering before adding the sumo
blade.)
Note:
There is a small chance the mounting tabs of the blade can cause shorts where it contacts the shield if
the PCB solder mask is not thick enough, so we recommend adding some electrical tape or other insulating
material between the blade and shield.
To install the blade, first bend its mounting tabs to the appropriate angle. Next, place them on top of the shield so that
the holes line up with the two front mounting holes and insert the two
longer
(5/16″) #2-56 machine screws (included
with the shield) through the blade, shield, spacer plate, and chassis. Be careful when adjusting the angle of the sumo
blade while it is mounted to the chassis, as this can crack the acrylic spacer plate if you apply sudden or excessive
force. We recommend you do not try bending the blade while it is mounted to the chassis.
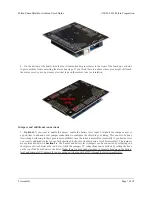
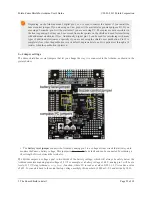
14. Solder each motor lead to the shield, then trim off the excess length of wire.
Pololu Zumo Shield for Arduino User's Guide
© 2001–2013 Pololu Corporation
2. Assembly
Page 11 of 38

