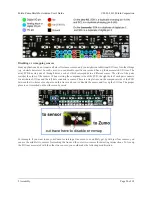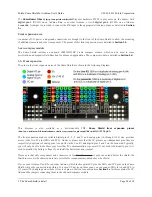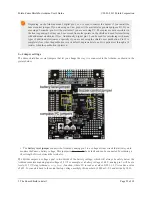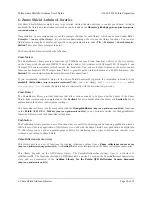
sufficient for border detection. With the
Zumo Shield Arduino Libraries
[http://www.pololu.com/docs/0J57/6]
installed,
the sketch file can be opened in Arduino by selecting
File > Examples > ZumoExamples > BorderDetect
.
You might need to edit a few things in this sketch to make it work well with your Zumo:
• If one or both of your motors have been connected backwards, uncomment lines 48 and/or 49 to correct their
directions.
• Adjust the speeds and durations in lines 13-17. Generally, lower speeds and shorter durations should work
better with faster motors, while higher speeds and longer durations should be more appropriate for slower
motors. We found that these default values worked well with a Zumo using
75:1 HP motors
[http://www.pololu.com/catalog/product/2361]
.
• Finally, the sensor reading threshold used to differentiate between black and white surfaces, defined on line
10, might need to be changed to suit your environment.
Upload the sketch to an Arduino mounted on a Zumo, place the Zumo on a sumo ring (or a similar large dark surface
with a light border), and press the user pushbutton. Be ready to catch the Zumo in case it drives off the ring! If
everything works right, the Zumo should sound a countdown with its buzzer and then start driving forward until it
detects the ring border; it should then back up, turn, and continue. If not, try adjusting some of the parameters as
described above. Here are some specific troubleshooting tips:
• If the Zumo overshoots the ring border, try lowering
FORWARD_SPEED
(especially if it is going very fast) or
reducing
QTR_THRESHOLD
.
• If the Zumo stops at the border but turns too much or not enough before continuing, adjust
TURN_SPEED
and/
or
TURN_DURATION
.
• If you do not hear any sound from the buzzer, make sure you have the
buzzer control jumper
[http://www.pololu.com/docs/0J57/3.c]
configured correctly for your Arduino.
The ability to wander around while staying inside a sumo ring is enough to allow a Zumo to compete as a basic sumo
robot, but a more advanced robot might be able to detect its opponent and drive toward it directly. As a next step, you
might consider adding more sensors, such as
range finders
[http://www.pololu.com/catalog/category/79]
, to allow the Zumo
to find its opponent instead of relying on luck to make contact.
7.c. Maze solver
This example program demonstrates how a Zumo with a
reflectance sensor array
[http://www.pololu.com/catalog/
product/1419]
can be programmed to follow lines and solve a line maze. With the
Zumo Shield Arduino Libraries
[http://www.pololu.com/docs/0J57/6]
installed, the sketch file can be opened in Arduino by selecting
File > Examples >
ZumoExamples > BorderDetect
.
This maze solver implementation is very similar to our maze solving example for the
3pi robot
[http://www.pololu.com/catalog/product/975]
, and the concepts and strategies involved are explained in detail in
Section 8
of the
3pi robot user’s guide
[http://www.pololu.com/docs/0J21]
.
7.d. Using the compass
This example program demonstrates using the magnetometer in the Zumo Shield’s LSM303DLHC 3-axis compass
module (described in section
Section 3.d
) to help the Zumo coordinate ninety-degree turns and drive in squares.
With the
Zumo Shield Arduino Libraries
[http://www.pololu.com/docs/0J57/6]
installed, the sketch file can be opened
in Arduino by selecting
File > Examples > ZumoExamples > Compass
. This example also requires the
LSM303
library
[https://github.com/pololu/LSM303]
to be installed.
Pololu Zumo Shield for Arduino User's Guide
© 2001–2013 Pololu Corporation
7. Example projects
Page 34 of 38


