19
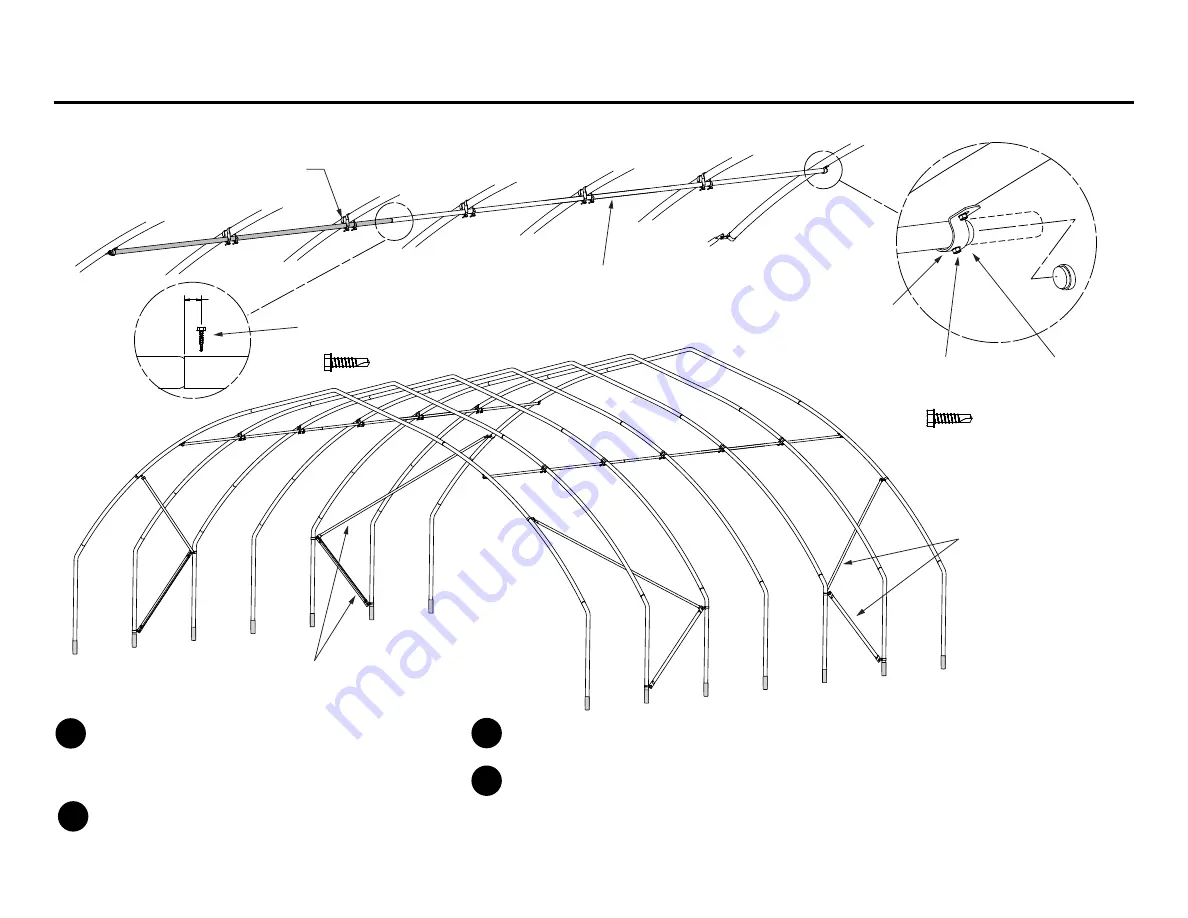
Adding Main Frames and Extending Side Purlins
Continue to add the rest of the Main Frames. You may want
to work in stages and install the Truss Purlins (HP3340) as
you go along. After the End Frame is installed, you need to
add the four Cross Braces. See steps 1–4 on page 17.
Insert new Truss Purlin sections onto the swaged end
of the previous Truss Purlin until you reach the end. Install
the Cross Connectors (see page 18). Check that each frame
is plumb before you proceed to the next frame.
Use a 1/4
- 14 x 1
Self-drilling Screw screw at each splice.
See Detail A.
After you install the last Purlin on each side, you will need
to trim the end of each Purlin flush with the End Frame. Use
a Purlin Fastener KH1000 and three 1/4
-14 x 1
Self-drill-
ing Screws to attach to End Frame. Insert the Round Black
Plug (RS5000) into the end of each Purlin. See Detail B.
1
End Frame
Cross Connector FT4042
(hardware included)
Purlin Fastener
KH1000
Cut off Purlin
end flush and
add Black Plug
RS5000
Detail A
Detail B
1/4
-14 x 1
Self-Drilling Screws (NB1809)
Truss Purlin
HP3340
Add Diagonal Braces
See page 18.
Add Diagonal Braces
See page 18.
1
1/4
-14 x 1
Self-Drilling Screws
(NB1809)
2
4
3
Instructions on this page apply to 20
& 24
FieldPro Models


