39
Roll-Up Curtain Installation – Part 1
2
24
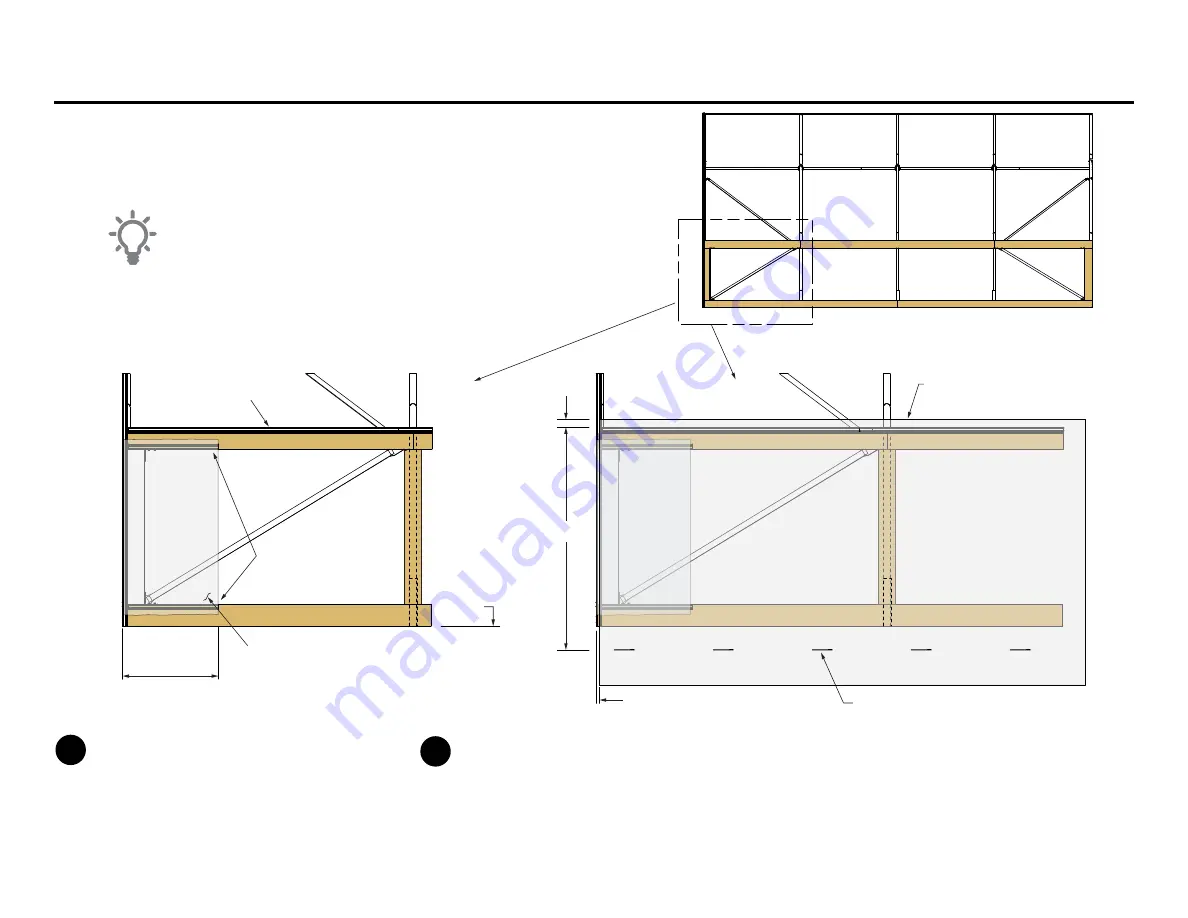
Corner Poly Width
Corner Poly Panel provides additional
weather seal when Poly Curtain is down.
Wiggle Wire Base
Full length
Wiggle Wire Base
24
length
Top of Poly Curtain
Grade
Side View of FieldPro
Corner
Poly Panel
Poly Curtain Panel
56
Place marks on Poly
Poly Curtain edge just inside
the End Frame
Install Wiggle Wire Base flush with top of wood rail
across full length of the FieldPro. Also install two,
(2) 24
lengths of the Wiggle Wire Base to top and
bottom wood rails (each end) as shown above.
Cut a 24
x 48
piece of Poly to use for the Corner
Poly Panel. Use Wiggle Wire to secure this panel in
place.
The Roll-Up Poly Curtain ends should be kept just
inside the End Frames. The top should extend 2
above the top of the upper rail. Begin folding the
Poly into the Wiggle Wire Base and secure with the
Wiggle Wire. Continue securing the Poly Curtain in
place down the entire length of the FieldPro. Make
sure that 2
of Poly always extends above the top
rail—keeping the Poly as even as possible.
After the Poly Curtain top is secured, use a perma-
nent marker to make placement marks down the
entire length of the Poly Curtain. These placement
marks should be drawn at a point 56
down from
the top rail. These marks will help to align the Poly
Curtain with the Roll Up Tube. Proceed to next
page to continue the installation.
1
2
Important Note:
The Roof Poly and End Frame Poly (not
shown) are installed before installing
the Roll-Up Side Curtain. See page 32
for how to install the Roof Poly with the
Roll-Up Side Curtain option.
Instructions on this page apply to 20
& 24
FieldPro Models


