


4
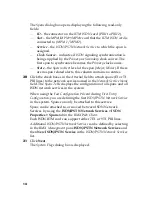
First Entry Power-up
8
Insert the
USB key
with the modified IP addresses in the
USB
port
on the back panel.
9
Power the RMX
ON
.
The parameters in the
lan.cfg
file are uploaded from the USB key to
the RMX’s memory and applied during the power-up sequence.
System power-up sequence may take up to five minutes.
During the first-time power-up the red ERR LED on the RMX’s
front panel remains ON until both the Management and IP
Network Services have been defined.
When the RMX's configuration is completed (including the
Management and IP Network Services), and if there are no System
Errors, the green RDY LED on the CNTL module (on the RMX’s
front panel) turns ON.
10
Remove the
USB key
.
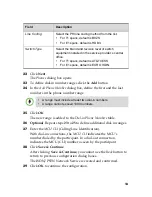
Product Registration and Activation Key Retrieval
Before starting the initial configuration process, register the RMX at the
Polycom Resource Center
website and download the product activation
key file to the computer you will use for the configuration:
1
Using a Web browser, connect to
http://portal.polycom.com
.
2
Login with your
Email Address
and
Password
or register as a new
user.
3
Select the
Product Registration
link.
4
Follow the on-screen instructions for
Product Registration
and
Product Activation
. (The RMX’s serial number is on a sticker on the
back of the unit, if needed.)
5
Write down the
Product Activation Key
number or copy it for later
use.


