8
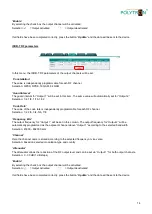
indicates the CPU load, which depends mainly on the input and output bit rate. To ensure an error-free operation,
make sure that 90% processor load will not exceeded.
“Supply voltage“ value should correspond to the specified
range of +12 V
±
1 V
.
6.3 Menu item
“TS input“
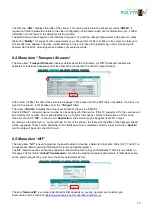
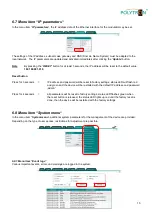
In the menu item
“
TS input
“, all input transport streams will be configured.
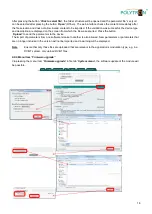
The table contains the list of IPTV sources with all related data. Under
“
Title
“ a name may be manually assigned to
the stream. If the transport stream (or the SDT table) does not contain a title, then the manually assigned title will be
used in the output (e.g. for RTSP).Otherwise, the manually assigned title is for information purposes only.
“
URL / IP
“
displays the URL of the streams. The complete URL including protocol and port number must be entered. If no
protocol is entered, the UDP protocol will automatically assign. If the port number is skipped, default port number
1234 for UDP protocol and 554 for RTSP protocol will be used. The fields
“
User name
“ and “
Password
“ will be only
used for RTSP. In case of a UDP protocol the fields will be ignored.
The status display describes the status of the input stream with 3 different colors.
A green circle indicates that a valid signal has been detected.
A yellow circle indicates the progress of a process. Usually when this is present, RTSP logs appear
while the device attempts to connect to the camera.
A red circle indicates that no valid stream has been detected.
In the field
“
Bitrate
”
,
the measured input bitrate of the stream in Mbit/s will be displayed.
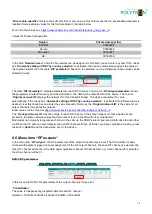
The
“
CC errors
“ field displays continuity counter errors detected in the stream. By clicking on the title “
CC errors
“
,
all counters in the column will be reset. Clicking on the trash symbol icon on the right will remove the corresponding
streams from the stream list. A confirmation window asks for confirmation of the action before the stream is
permanently deleted. New streams can be added manually to the table. For this, the empty fields must be filled in
accordance with the previous explanation and confirmed by clicking
“
Add
”. If all streams have been entered, the
“
Update
“ button must be pressed to accept the stream list.
To edit a stream at the table, simply move with the mouse pointer over the field, press the left mouse button and edit
the stream. After the change, press the <TAB> or <ENTER> button, to activate the button
“
Update
”. After clicking
the button
“
Update
“
,
all changed values will be sent to the device.
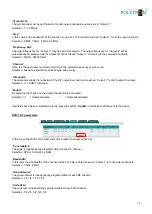
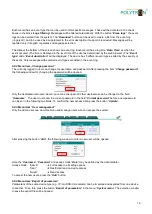
The block
“
Loading of IPTV sources
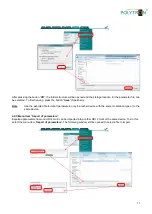
“ allows an automatic insert of IPTV sources. The device supports playlists in
M3U format. After pressing the button
“
Browse
…
“ the * .m3u file can be selected on the PC. By clicking "Open", the
list will be loaded into the table. All unwanted streams can be removed by clicking on the trash symbol icon. To
accept the streams, press the button
“
Update
”.
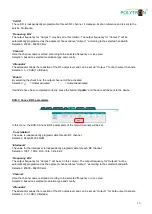
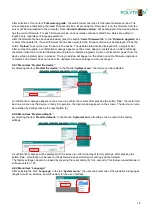
The list of IPTV sources can also be loaded from the SAP-SDP-IP protocol. To do this, click the
“
Load
…
“ button in
the
“
Load from SAP-SDP:
“ area to display a list of available sources.
Summary of Contents for HDI 2 multi
Page 1: ...1 HDI 2 multi IP Modulator IP into DVB C DVB T ISDB T Manual 0902252 V1...
Page 22: ...22 Notes...
Page 23: ...23 Notes...


