VISIT WWW.THEPONDBOSS.NET FOR PRODUCT INFORMATION AND TIPS.
4
EN
3
4
5
6
8
7
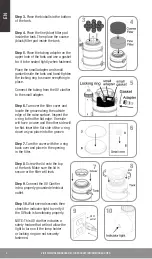
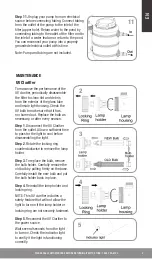
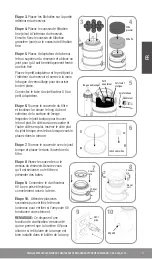
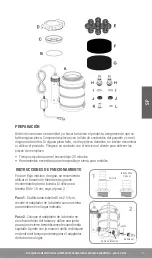
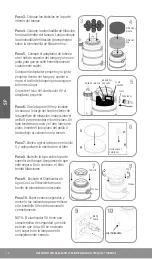
Step 3.
Place the bioballs in the bottom
of the tank.
Step 4.
Place the fine (blue) filter pad
inside the tank. Then place the coarse
(black) filter pad inside the tank.
Step 5.
Place the tubing adapter on the
upper hole of the tank and use a gasket
for it to be sealed tightly when fastened.
Place the small adapter and small
gasket inside the tank and hand-tighten
the locking ring to secure everything in
place.
Connect the tubing from the UV clarifier
to the small adapter.
Step 6.
Turn over the filter cover and
locate the groove along the outside
edge of the raise surface. Inspect the
o-ring to find the flat edge. One side
will have a curve and the other side will
be flat. Insert the flat side of the o-ring
down as you place into the groove.
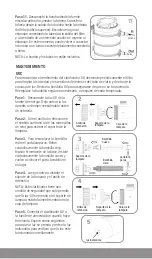
Step 7.
Turn the cover with the o-ring
back over and place in the opening
in the filter.
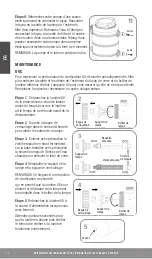
Step 8
. Screw the lid onto the top
of the tank. Make sure the lid is
secure or the filter will leak.
Step
9
. Connect the UV Clarifier
into a properly grounded electrical
outlet.
Step 10.
Wait several seconds then
check the indicator light to verify if
the UV bulb is functioning properly.
NOTE: This UV clarifier includes a
safety feature that will not allow the
light to turn on if the lamp holder
or locking ring are not securely
fastened.
GFCI
outlet
9
10


