User manual
PONSEL
Reference: NOTICE_ACTEON_2010_v001-UK
V: 001
12/56
Comment:
Use an elbowed sensor-holder in tanks that are heavily soiled in order to avoid the build up of
fibres on the perch.
Installation of the pH sensor in the nozzle:
1)
Dismantle the sensor-holder perch then remove the nozzle from the bottom of the perch by removing its
tightening screw.
2)
Introduce a solid wire into the perch then a string.
3)
Take the sensor and remove its protective casing and two ring-type joints.
Henceforth, handle the sensor with care. Breakage of the glass bulb is not covered by the
guarantee.
4)
Attach the end of the sensor to the string and lower it from the top to the bottom of the perch by pulling
on the string.
5)
Remove the string then place the sensor in the nozzle and let it protrude by around twenty centimetres.
6)
Replace only the ring-type joint nearest to the glass part.
7)
Leave the tip of the sensor flush with the end of the nozzle, to within a millimetre. Fasten the sensor in
place by screwing the tightening screw.
8)
Replace the nozzle on the perch and fasten it using the tightening screw.
9)
Set the perch in a vertical position using our stand with slider or other sort of system. Adjust the
immersion parameters so that the nozzle always remains immersed and so that the more than 0.50 cm is
immersed.
10)
Position the sensor so that direction of liquid flow comes from behind the nozzle in order to avoid the
build up of fibres.
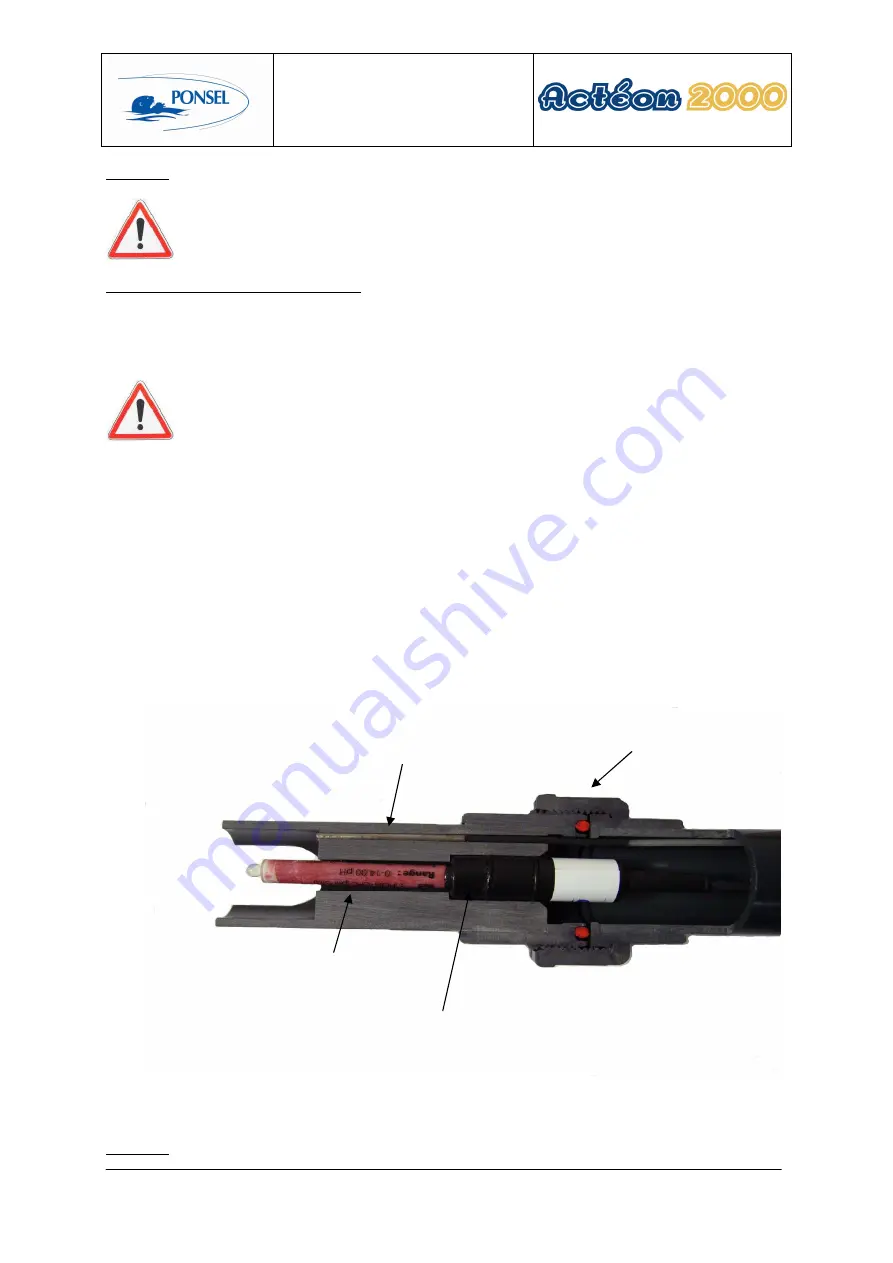
Diagram of the sensor in the nozzle without the cleaning system.
Figure 6– Nozzle for sensor without cleaning system
Comment: The line out cable is to be connected to the ACTEON 200 earth terminal.
Water earth cable
pH SENSOR (PONCPC-PHL-10)
Tightening screw
Nozzle (PONBUSE-PH/EH/T)


