+
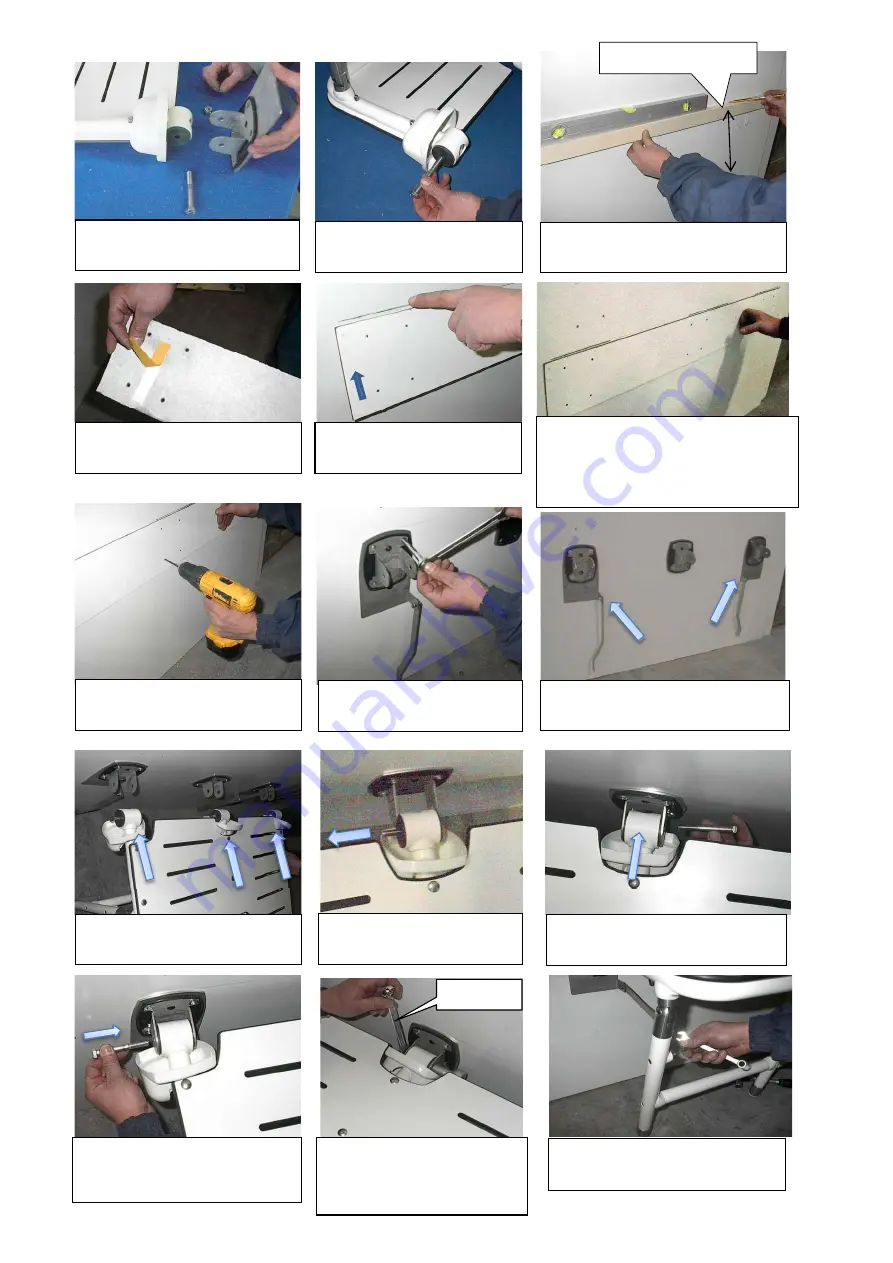
19 inches (485mm)
3 – repeat for all 3 flanges
4 – return pivot bolts to pivot
assembly once the flanges are
unattached
5 – mark a level line on the wall 19”
from the finish floor using a straight
edge
6 – find template and remove
adhesive cover
7 – using the level line as a guide
align the top edge of the
template
8 – check if temporary template is secure.
Check to make sure that there is suitable
backing at each of the 12 pilot hole points.
If backing is not present at all 12 fastening
points STOP and prepare wall before
moving forward with the next step
9 – make a small pilot hole at all 12
fastening points. When finished
remove template
10 – attach flange securely to
the wall use photo 12 as a guide
11 – confirm flange installation
12 – with flange covers pulled back,
position the seat pivot assemblies
near the flange
13 – remove the pivot bolt
14 – align pivot assemblies with the
flange holes.
15 – thread pivot bolt through flange
plate hole, pivot assembly, and out
the other side of the flange plate
hole
16 – tighten the three pivot bolt
and nut to 20N of force. The seat
should move up and down with a
small amount of user efforts, and
should not move independently
17 – refasten the hinge bracket to
each leg
20N


