Step By Step Instructions
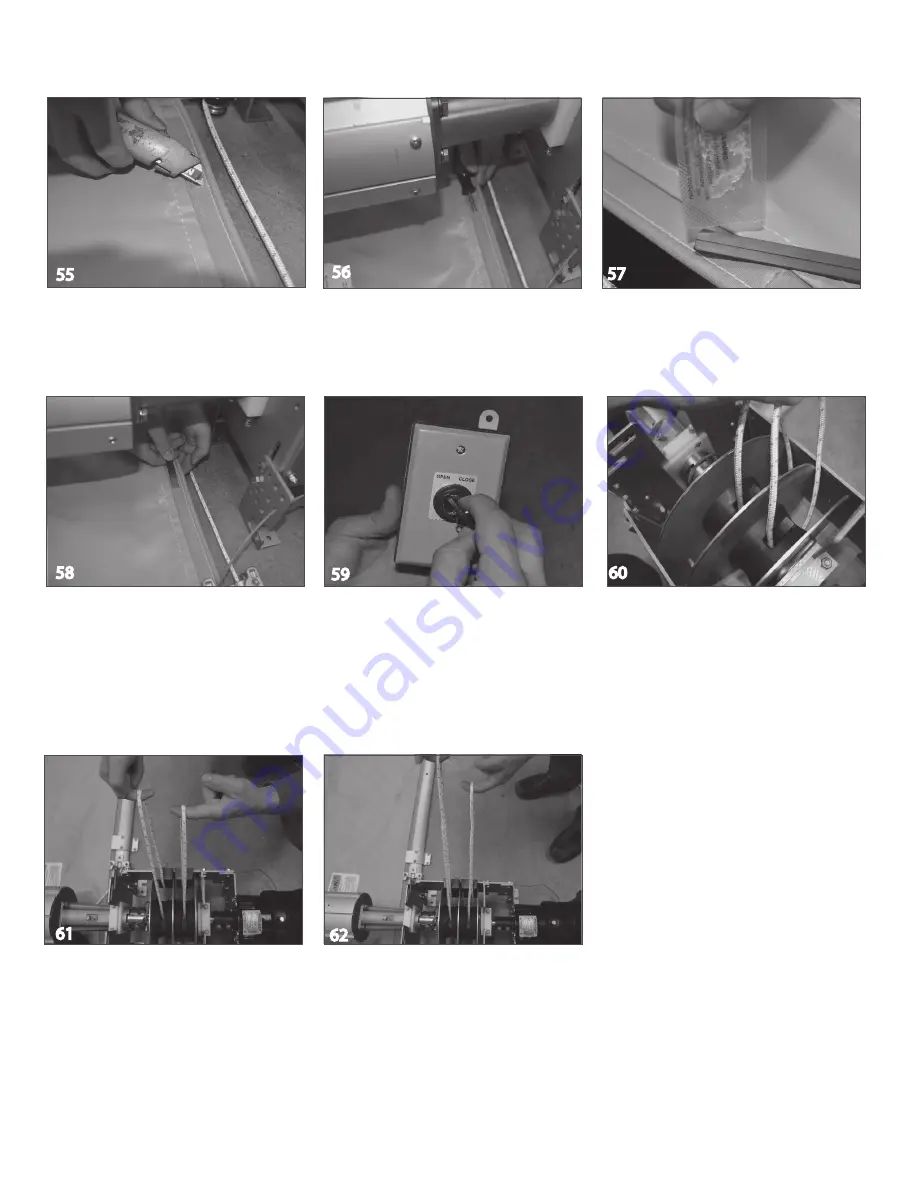
Using a utility knife, carefully cut a slit in
the webbing long enough for the magnet
to be slid through. Be careful not to cut
through the bottom layer of webbing.
Insert a screw driver through the slit in the
webbing to create the pocket for the magnet.
Apply the supplied grease to the magnet.
This will help it slide in the webbing easier.
55
58
57
56
59
If both ropes are the same length, and the
cover doesn’t close squarely, shorten the
rope for the side of the cover that doesn’t
close all the way. The amount that the rope
is shortened is equal to the distance that the
cover needed to travel to close all the way.
After shortening the rope, run the switch in
the cover position while holding the ropes.
If one of the ropes is longer than the other
rope, lift the tabs that secure the ropes to
the rope reel. Shorten this rope, by inserting
more rope into the opening in the reel.
Secure the rope by pushing back down on
the tab.
Adjusting the Ropes
When opening the cover, if both sides of the
cover don’t open squarely, one of the ropes
may need to be adjusted. To adjust the
rope, open the cover all the way. Pull the
excess rope off the rope reel. Pull on the
rope that will adjust the side of the cover
that is closest to the mechanism so it will be
straight with the other side of the cover.
Run the key switch in the open position to
roll the cover up on the roll-up tube.
Check the cover to be sure it rolls up
evenly. Run the cover 6-10 times to make
sure it opens and closes evenly. The cover
fabric installation is now complete.
60
61
Insert the magnet (18) through the slit in the
webbing. Continue pushing the magnet
forward until it is completely inside the
webbing and in line with the mark on the
webbing.
62
© Latham Pool Products, Inc. 201
9
. All rights reserved.
Numbers in parenthesis refer to parts shown on page 3.
19 of 21


