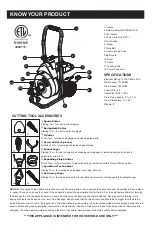
Electrical Rating: 120VAC 60Hz 5.3A
Motor Speed: 1716 RPM
Drum Speed: 202 RPM
Power Cord: 6 ft.
Cable Size: Ø1/2” x 50’L
Drain Pipe Capacity: 2” to 4” I.D.
Drum Dimensions: 13 x 6.3”
Wheels: 8”
UNPACK AND SET-UP
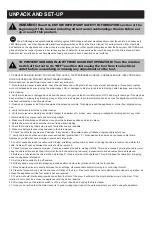
WARNING!
Read the ENTIRE IMPORTANT SAFETY INFORMATION section at the
beginning of this manual including all text under subheadings therein before set
up or use of this product.
TO PREVENT SERIOUS INJURY FROM ACCIDENT OPERATION: Turn the rotation
switch of the tool to its “OFF” position and unplug the tool from its electrical
outlet before assembling or making any adjustments to the tool.
1. Once the drain cleaner is assembled, check the appliance and cutting tools for any signs of wear and damage. If necessary, replace
worn or damaged parts prior to using the drain cleaner. Dull or damaged cutting tools can lead to binding, cable breakage, and slow the
drain cleaning.
2. Verify drain cleaner is unplugged and inspect the power cord, ground fault circuit interrupter (GFCI) and plug for damage. If the plug has
been modified, is missing the grounding prong or if the cord is damaged, to avoid electrical shock, do not use the appliance until the cord
has been replaced by a qualified electrician.
3. Clean any oil, grease or dirt from all equipment handles and controls. This helps prevent the appliance or control from slipping during
use.
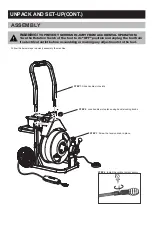
4. Verify foot switch is attached to drain cleaner.
5. Verify drain cleaner is properly assembled. Inspect the appliance for broken, worn, missing, misaligned or binding parts or any other
condition which may prevent safe and normal operation.
6. Make sure that switches and handles move smoothly between positions and lock in place.
7. Rotate the drum and make sure that it turns freely without binding.
8. Check that all warning labels are present, firmly attached and readable.
9. Make sure belt guard is securely fastened to the drain cleaner.
10. Check the cable for any wear and damage. If any section of the cable is worn or flattened, replace cable before use.
11. Verify cable does not have multiple or excessive kinks (greater than 15°). Kinks weaken the cable and can cause cable failure.
Replace any cables that have multiple or excessively large kinks.
12. Look for spaces between the cable coils. Kinking, stretching (pulling cable by hand) or running the cable in reverse can deform the
cable. Cables with spaces between the coils should be replaced.
13. Check for signs of excessive corrosion. Corrosion weakens the cable, making it brittle. This can be caused by storing the cable wet or
using the cable with corrosive chemicals (often found in chemical clog removers). Excessively corroded cable should be replaced.
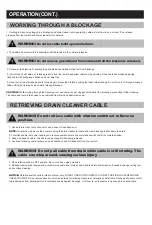
14. Before use, fully retract the cable with no more than 2″ of cable outside of the appliance. This will the keep the cable from “whipping”
when the appliance is turned on.
15. Set the rotation switch to the off position.
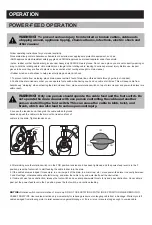
16. With dry hands, plug cord into properly grounded outlet and move the rotation switch into the for position.
17. Move power-feed lever to exactly between f and r settings, otherwise cable will start moving in or out during this test.
18. Press the foot switch and note the direction of rotation of the drum. If the foot switch does not control the drain cleaner’s operation, do
not use the appliance until the foot switch has been repaired.
19. The drum should rotate clockwise when seen from the front of the drum. It will match the drum direction arrow on the drum. If the
rotation is not correct, do not use the appliance until it has been repaired.
20. After inspection, set the rotation switch to off, dry off your hands, and unplug the drain cleaner.
21. Once you’ve verified that the drain cleaner is in good working order, inspect the work area where you will be using the appliance.
TO PREVENT SERIOUS INJURY FROM ELECTRIC SHOCK, TWISTED/BROKEN CABLES, CHEMICAL BURNS, INFECTIONS AND
OTHER CAUSES AND PREVENT DRAIN CLEANER DAMAGE:
Before each use, inspect Drain cleaner and correct any problems.
Wear ANSI-approved splash-resistant safety goggles, NIOSH-approved dust mask/respirator under face shield, and heavy-duty
LEATHER gloves, and other appropriate protective equipment when setting up the Drain Cleaner. For extra protection from chemicals
and bacteria on the appliance and in the work area, wear latex, rubber or other liquid barrier gloves under the heavy-duty LEATHER work
gloves Before use, inspect gloves to be sure they are free of defects or loose sections that could be caught in the Drain Cleaner Cable.
Rubber soled, non-slip shoes can help prevent slipping and electric shock, especially on wet surfaces


