27
7.
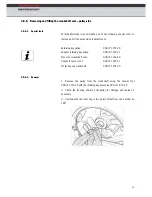
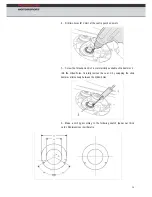
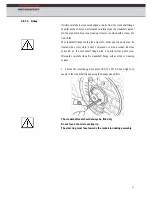
Slide the drill jig up to the seal on the crankshaft flange and position
correctly
8.
Coat the drill bit (Ø 2 mm) with extremely viscous grease
9.
Drill at the specified points
10.
Screw the pointed end of a commercially available slide hammer
alternatively into the two holes and pull-out the seal.
11.
Remove swarf
12.
Thoroughly clean the flange with a cleaning solvent or acetone
3.8.6.3.
Installation
1.
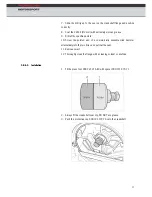
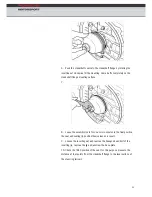
Fit the press tool 000.721.216.40 with spacer 000.721.979.71
2.
Always fit the crankshaft seal dry, DO NOT use grease
3.
Push the protective cap 000.721.979.70 onto the crankshaft
Summary of Contents for 911 GT3R 2010
Page 1: ...Technical Manual Model 2010...
Page 10: ...7 3 3 Engine power and torque curves...
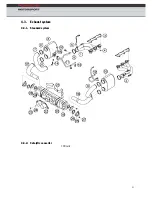
Page 44: ...41 4 3 Exhaust system 4 3 1 Standard system 4 3 2 Catalytic converter 100 cells...
Page 45: ...42...
Page 79: ...76 rm 6 3 2 4 Trailing a 8 mm Buchse 28 mm Buchse...
Page 107: ...104 r 9 2 1 Front bumper 9 2 Exterio...
Page 108: ...105 9 3 Rear wing P1 P12 Left wing support Gurney 10mm...
Page 139: ...136 10 12 Relay and fuse ass 10 12 1 Fuse holder ignment...
Page 141: ...138 10 12 4 MS4 sensor system...


