background image

NOTE:  Audio CD controls are only functional when the AUDIO switch is set to “ON” and
the CD-ROM is NOT inserted into a PC Card slot.

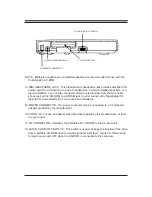
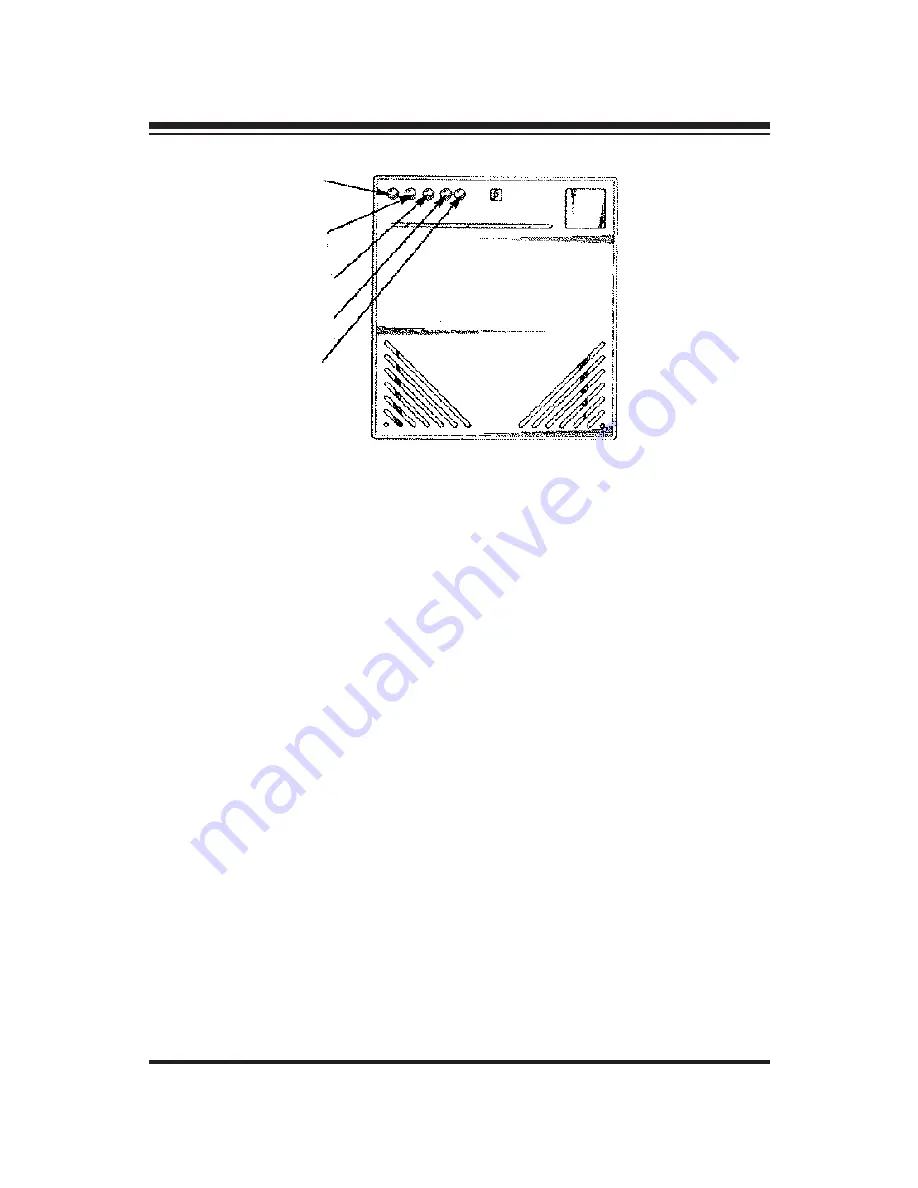
A) PREVIOUS TRACK/RR BUTTON - Pushed once, this control will jump to the begin-

ning of the current song, each subsequent push will cause the unit to jump the begin-
ning of the previous song.  If pushed and held down, the CD Player will quickly move
scan through the current track.

B) PLAY/PAUSE BUTTON - Push this button to start playing an audio CD. Once play is

in progress, pushing this button will cause the CD to pause.  Push the button once
more to resume play.  A long push resets the CD to the 1st track.

C) NEXT TRACK/FF BUTTON - Pushed once, this control will jump to the beginning of

the next song, each subsequent push will cause the unit to jump the beginning of the
following song.  If pushed and held down, the CD player will quickly move forward
through the current track.

D) VOLUME DOWN CONTROL - This control allows the user to lower the volume when

playing an audio CD while listening privately with a pair of mini style headphones con-
nected to the 1/8" headphone jack.

E) VOLUME UP CONTROL - This control allows the user to increase the volume when

playing an audio CD while listening privately with a pair of mini style headphones con-
nected to the 1/8" headphone jack.

A) PREVIOUS
TRACK/RR
BUTTON

B) PLAY/
PAUSE BUTTON

C) NEXT TRACK/
FF BUTTON

D) VOLUME
DOWN CONTROL

E) VOLUME
UP CONTROL

Summary of Contents for ST24XCDR

Page 1: ...Port Inc Portable 24X CD ROM ST24XCDR User Manual...

Page 2: ...ation even if advised of the possibility of such damages In particular the manufacturer shall not have liability for any hardware software or data stored or used with the product including any costs o...

Page 3: ...E 4 Contents List E 4 Part Names and Functions E 5 Installation and Setup E 8 Playing Audio CD s E 9 CD ROM Power Options E 11 Connecting the AC Adapter E 11 Installing Batteries E 12 Micro Power Man...

Page 4: ...t CANNOT be held liable if you damage your computer due to misuse or mishandling of equipment Please take the time to read the installation guide and inspect the contents If anything is missing or dam...

Page 5: ...ive is being accessed D MANUAL EJECT BUTTON In case of no power or other condition where the user is unable to open the loading tray a paper clip may be inserted into the hole which will open the tray...

Page 6: ...s the CD to the 1st track C NEXT TRACK FF BUTTON Pushed once this control will jump to the beginning of the next song each subsequent push will cause the unit to jump the beginning of the following so...

Page 7: ...D audio directly from your sound card speakers B POWER CONNECTOR The power connector may be connected to a 5 Volt power adapter provided by the manufacturer CAUTION Do not use an adapter other than th...

Page 8: ...Boot to Windows 3 Upon bootup Windows should automatically detect the CD ROM and start up the Hardware Wizard If this does not happen refer to the Troubleshooting section 4 Accept ALL default choices...

Page 9: ...lled To load the audio driver follow the steps below note The CD audio driver is not loaded when Windows is installed To load the audio driver you will need the Windows 3 1x diskettes 1 From the progr...

Page 10: ...from the computer s PC Card slot 2 Load an audio CD in the player 3 Use the Music Control Buttons on the top of the Portable 24X CD ROM to listen to your favorite music CDs PREVIOUS TRACK RR BUTTON P...

Page 11: ...the PC Card socket of your computer No external power will be required See section covering the Micro Power Management System When the Audio ON OFF switch is set to ON external power is selected eith...

Page 12: ...3 Disconnect the Power Adapter 4 Turn the drive over slide open the battery trap door remove and replace the batteries close the battery trap door Micro Power Management System The Portable 24X CD ROM...

Page 13: ...d after correct installation of the software drivers the red LED starts to blink during use that indicates that the batteries have become low in charge and will need to be recharged fully 1 1 2 to 2 h...

Page 14: ...to the IMPORTANT NOTICE on page 10 of this manual concerning the recharging of the internal batteries supplied with the unit and follow the proce dures The PC Card will not fit into my Compaq Presari...

Page 15: ...S installation procedures in this manual to install the CD ROM DOS driver For issues not covered in this manual or for general questions you can contact Port Technical Support and Customer Service for...

Page 16: ...and used in accordance with the instruction manual may cause harmful interference to radio communications However there is no guarantee that inter ference will not occur in a particular installation I...

Page 17: ...or other safety hazards may result This is a Class 1 Laser Product This product complies with all applicable safety stan dards DHHS Rules 21 CFR Chapter 1 Subchapter The laser beam generated is total...

Page 18: ...www port com...

Page 19: ......

Reviews: