background image


PMP400 USER MANUAL


Portable Electronics Ltd © 2008 


19/27 


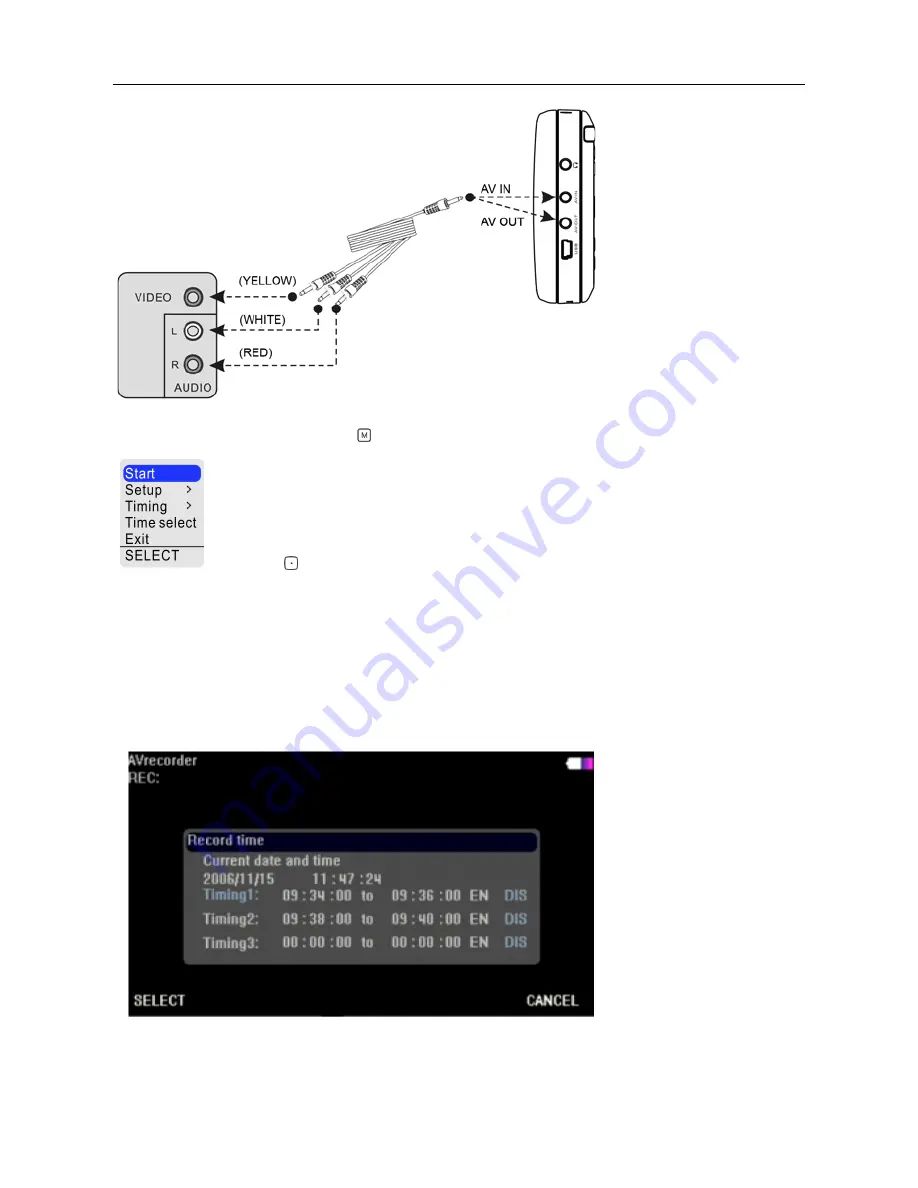
In AVRecorder mode, pressing 

  in the main menu and you will see this. 

  Use the 

  navigation key to select the function you require. 

Start: start recording 
Setup: choose PAL/NTSC/Vidicon 
Timing: 

  Progression – un-timed recording 

  Timing – adjust recording time 

 
Time Select: 


Configure timer to record at pre-defined time 

  The player will turn on at the pre-set time to record if the unit is off and will 

Summary of Contents for pmp 400

Page 1: ...Port able Personal Personal Personal Personal Media Player Media Player Media Player Media Player PMP400 User Manual Ver 2 3 Distributed World Wide exclusively by Portable Electronics Ltd http www hdmp4 com http www portable geek nz ...

Page 2: ...needs We are an online based distribution company providing multi purpose high quality portable gadgets at low price to electronic and computer shops We are extremely picky and we employ very rigorous selection process when sourcing new products We do not like cheap low quality products Hence we only sell the best and only the very best products at some of the lowest price you can find in the mark...

Page 3: ...u 11 12 Music 12 12 1 PLAYING MUSIC FILES 12 12 1 1 Music control 12 12 1 2 ID3 Lyric display 13 12 1 3 Menu 13 13 PHOTO 14 13 1 Viewing Photos 14 13 1 1 Photo Control 15 14 SOUND RECORDER 16 15 E book 17 15 1 1 E book control 17 16 DIGITAL VIDEO RECORDER 18 16 1 TV out 20 17 MANAGE 21 18 SETUP 22 18 1 Audio Setting 23 18 2 Video setting 23 18 3 Power Setting 24 18 4 Timer setting 24 18 5 Language...

Page 4: ...he internal battery of PMP400 by plugging the included charger into the device or using a standard USB port Using Non designated charger may damage the PMP400 The red CHARGE indicator lights up to indicate that the external adapter is connected the battery will charge automatically when the AC adaptor is plugged in the light will disappear once the battery is fully charged Disconnect the charger w...

Page 5: ...ortant data information due to hard disk failure accidental damage lost of the unit etc it is RECOMMENDED that you keep at least one BACKUP of all files loaded onto this player Portable Electronics is not responsible for any loss of information and will not provide any data recovery service In addition we also recommend that you always use the Safely Remove Hardware function in the operating syste...

Page 6: ...Ltd 2008 6 27 7 Standard Accessories After unpacking please check that all the standard accessories listed below are included Note User Manual available online from http www hdmp4 com and Service Certificate may not be included in the package ...

Page 7: ...Portable Electronics Ltd 2008 8 Device schematics PMP400 USER MANUAL schematics USER MANUAL 7 27 ...

Page 8: ...music Upgradable firmware for new features View lyrics while listening to music Long battery life Up to 8h music playback Up to 4h video playback Digital Video Recorder Manual Scheduled recording from TV DVD VCR Camera into DVD quality MPEG4 video via AV connector NTSC PAL TV OUT NTSC PAL Enjoy DVD quality Video on TV with controller transfer photos and other files directly from Replaceable Batter...

Page 9: ...o 4 hour Music 8 hour LCD off 128kbps MP3 Remote Controller range 8m Operating temperature 0 50 C Video Supported format MPEG1 2 4 DIVX3 4 5 6 XVID VOB AVI DAT FRAME 30 frame second Bitrate 8Mbps 720x480 30 frame s Subtitle support SMI SRT subtitle Music Supported format MP3 WMA OGG AC3 Frequency Response 20Hz 20KHz Signal to noise ratio 90dB Balance Equalizer 1 2 3 4 5 Lyric display lrc Photo bro...

Page 10: ...the navigation key or Play Then using the navigation key locate and highlight the desired video file begin video playback by pressing on the navigation key or Play 11 1 1 Video control File Control Navigation Scroll up UP Page up Left Right Page down Down Scroll down Press on navigation key or Play button to play or pause the video During video playback Video resize smaller UP Video Rewind 1x 2x 4...

Page 11: ...e navigation key to select the function you require Set label insert a time stamp label at this location Time play choose this function and select the time you want to start playing the video from Increase time by 5 minutes steps UP Decrease time by 30s Left Right Increase time by 30s Down Decrease time by 5 minutes steps Zoom Press Right on navigation key and choose 4 3 16 9 Zoom Setting enter to...

Page 12: ...tion key UP DOWN LEFT RIGHT 12 1 1 Music control File Control Navigation Scroll up UP Page up Left Right Page down Down Scroll down Press on navigation key or Play button to play or pause the music During music playback Scroll to the music file above UP Fast rewind 30s Left Right Fast forward 30s Down Scroll to the music file below Increase or decrease the VOLUME by pressing Press Stop button to s...

Page 13: ...e the same file name as the music file 12 1 3 Menu To open up the menu press and you will see this Use the navigation key to select the function you require Attribute to display file information Open Play the file Add to add music to the playlist Play playlist play the files on the playlist Check to display the playlist Clear list delete all the files in the play list During music playback press F...

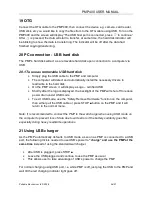
Page 14: ...s 1 2 3 4 5 During playlist music playback press and you will see this Play play the music Remove remove the music from the playlist 13 PHOTO 13 1Viewing Photos The PMP400 supports the viewing of JPEG jpg and Bitmap bmp image files When you click on the Picture icon in the main screen you will enter into the Photo library where you can browse your photo collection using the navigation key UP DOWN ...

Page 15: ...Stop button to exit While browsing through the files press and you will see this Use the navigation key to select the function you require Photo preview preview photos by showing 8 photos per page use the navigation key up down left right to select and browse the photos Attribute to display file information Open open the photo When viewing photos press and you will see this Use the navigation key ...

Page 16: ...e start slide show Music on turn on background music Music off turn off background music 14 SOUND RECORDER Scroll to the VoiceRecord icon in the main menu using the navigation key UP DOWN LEFT RIGHT and enter by pressing on the navigation key Time The default recording time is 0 i e un timed recording You can also set the maximum recording time and the recording will stop when time is up Style cho...

Page 17: ...OP to terminate the recording and press STOP again to exit recording mode 15 E book PMP400 can support TXT files you can copy any TXT file into the TEXT folder in PMP400 When you click on the Text icon in the main menu you will enter into the E book library where you can browse your E book collection using the navigation key UP DOWN LEFT RIGHT 15 1 1 E book control Navigation Control Page up UP Le...

Page 18: ... book at the previously marked location Music on play music from the playlist or Audio folder Music off stop the music playback Goto use the left right navigation key to choose the pages you are after press to enter the page 16 DIGITAL VIDEO RECORDER It is simple to record Video Files using the PMP400 by connecting the AV cable to a TV cable box satellite receiver etc ...

Page 19: ...his Use the navigation key to select the function you require Start start recording Setup choose PAL NTSC Vidicon Timing Progression un timed recording Timing adjust recording time Time Select Configure timer to record at pre defined time The player will turn on at the pre set time to record if the unit is off and will ...

Page 20: ...g recording 16 1TV out With the AV cable properly connected to the TV Click on the Setup icon on the main menu and then choose Video Setting Navigate to the Swap display using UP DOWN Navigation button Then Press LEFT RIGHT to activate TV PAL or TV NTSC output At same time your display will be switched over and displayed on the TV screen Note only one screen i e either TV or LCD will be active at ...

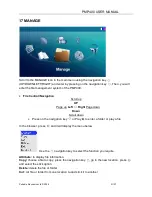
Page 21: ...oll up UP Page up Left Right Page down Down Scroll down Press on the navigation key or Play to enter a folder or play a file In the browser press and it will display the menu below Use the navigation key to select the function you require Attribute to display file information Copy choose a file to copy press the navigation key go to the new location press and select the stick option Delete delete ...

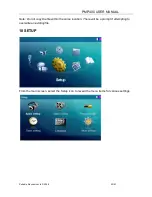
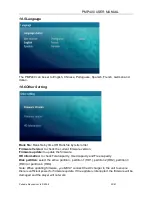
Page 22: ...onics Ltd 2008 22 27 Note Do not copy the file within the same location There will be a prompt if attempting to overwrite an existing file 18 SETUP From the main screen select the Setup icon to reveal the menu items for various settings ...

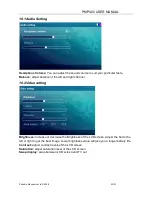
Page 23: ... the left and right channel 18 2Video setting Brightness increase or decrease the Brightness of the LCD screen Adjust the bar to the left or right to get the best image Lower brightness value will give you a longer battery life Contrast adjust contrast levels of the LCD screen Saturation adjust saturation level of the LCD screen Swap display swap between LCD screen and TV out ...

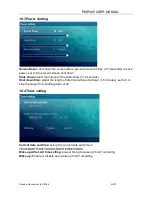
Page 24: ...ust the interval of the slide show 1 10 seconds Shut down time adjust the length of idle time before shut down 1 5 minutes set to 0 to stop the player from shutting down at all 18 4Timer setting Current date and time set up the current date and time in YEAR MONTH DAY HOURS MINUTES SECONDS Wake up AVrecord time setting pre set timing to wake up for AV recording Wake up Enable or disable auto wake u...

Page 25: ... current firmware version Firmware update to update the firmware HD information to check Total capacity Used capacity and Free capacity Disk partition select the active partition partition 1 HD1 partition 2 HD2 partition 3 HD3 or partition 4 HD4 Note When updating firmware you MUST connect the AC charger to the unit to ensure there is sufficient power for firmware update If the update is interrupt...

Page 26: ...play a Logo certified USB Shortly after the logo is displayed the backlight of the PMP will shut off to reduce power drain under USB mode To exit USB mode use the Safely Remove Hardware function on the computer then either pull the USB cable or press STOP button on the PMP and it will return to the normal menu Note It is recommended to connect the PMP to the wall charger when using USB mode on the...

Page 27: ...stions FAQ We apologize that the list of FAQ is not included here because the list of FAQ is simply too long Please visit http www hdmp4 com PMP FAQ for the latest up to date FAQ If your question is not answered in the FAQ you are welcomed to ask in our forum http forum hdmp4 com ...

Reviews: