PMP400 USER MANUAL
Portable Electronics Ltd © 2008
26/27
19 OTG
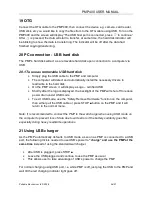
Connect the OTG cable to the PMP400, then connect the device e.g. camera, card reader,
USB stick, etc you would like to copy the files from to the OTG cable using USB. Turn on the
PMP400 and the screen will display “The USB host port is connected, press
to continue.”
After
is pressed, the data will start to transfer, at same time, the hard disk indicator will
be blinking to show the data is transferring. The indicator will be off after the data had
finished copying/transferring.
20 PC connection - USB hard disk
The PMP’s hard disk will act as a removable hard disk upon connection to a computer via
USB.
20.1 To use as removable USB hard disk
•
Simply plug the USB cable to the PMP and computer
•
The computer will detect and automatically install the necessary drivers to
read/write to the hard disk
•
On the PMP screen, it will display a Logo – certified USB
•
Shortly after the logo is displayed, the backlight of the PMP will shut off to reduce
power drain under USB mode
•
To exit USB mode, use the “Safely Remove Hardware” function on the computer,
then either pull the USB cable or press STOP
■
button on the PMP and it will
return to the normal menu.
Note: It is recommended to connect the PMP to the wall charger when using USB mode on
the computer to prevent loss of data due to write errors if the battery suddenly goes flat,
especially during heavy read/write operations.
21 Using USB charger
As the PMP automatically defaults to USB mode as soon as PMP is connected to a USB
port, the following trick is needed to use USB’s power to “charge” and use the PMP at the
same time instead of using the standard wall charger.
•
After USB is plugged, press STOP
■
•
Leave the USB plugged and continue to use the PMP as usual
•
This allows user to take advantage of USB’s power to charge the PMP
For normal charging using USB port, i.e. while PMP is off, just plug the USB to the PMP and
wait till the red charging indicator light goes off.


