Porta
Switch
Broadband Internet Access Services
© 2000-2011 PortaOne, Inc. All rights Reserved. www.portaone.com
51
1.
In the
Networking
section of the Admin-Index page, choose
Nodes.
2.
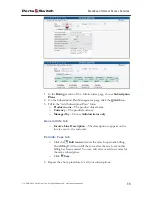
In the Node management window, click the
Add
icon.
3.
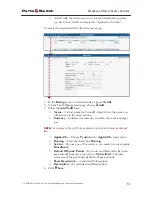
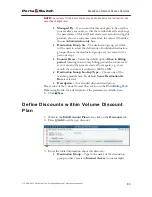
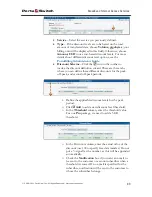
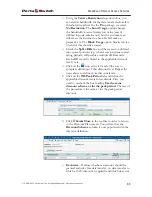
Fill in the New Node form:
o
Node Name
– A short descriptive name for this node (will be
used in the select menus).
o
Manufacturer
- Select
Cisco
.
o
Type
– VoIP node type; select
VOIP-GW
.
o
Node ID
– Cisco server host name (recommended
hostname.domainname
).
o
NAS-IP-Address
– IP address of the gateway.
o
Auth. Translation rule
– Leave this empty for now; see the
Translation Rules
section of the
PortaBilling Administrator
Guide
.
o
RTP Proxying
– Leave the default selection (
Optimal
); this
parameter is applicable only if you use this node for VoIP
services.
o
Radius Client
– Make sure this check-box is enabled, since the
gateway (node) must be able to communicate with PortaBilling
via RADIUS.
o
Radius Key
– Enter the RADIUS secret key you have specified
in the configuration of the gateway.
o
Radius Source IP
– See the
Node ID, NAS IP address, and Radius
source IP
section of the
PortaBilling Administrator Guide
.
Unless your gateway has multiple network interfaces, the value
here should be the same as the NAS-IP-Address.
o
POD Server
– Make sure to check this box to enable interaction
with this server on NAS. The system will send a special
command to this server if an account runs out of balance,
exceeds its data transfer limit, or expires. The POD server will
then terminate the Internet session(s) opened by this account.
4.
Click
Save&Close.
5.
Repeat steps 2-4 until all of your nodes have been entered.
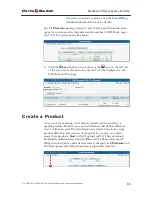
Create a Vendor Tariff
The tariff is a single price list for the use of internet access services. To
provide internet access services successfully, the following tariff should be
created:

