background image

4

5.

Store idle tools. When not in use, tools should be stored in dry, and

high or locked-up place - out of reach of children.
6.

Maintain tools with care. Keep tools sharp and clean for better and

safer performance. Follow instructions for lubricating and changing
accessories. Inspect tool cords periodically and if damaged, have
repaired by authorized service facility. Inspect extension cords
periodically and replace if damaged. Keep handles dry, clean, and free
from oil and grease.
7.

Check for misalignment or binding of moving parts, breakage of

parts, and any other condition that may affect the tool’s operation. If
damaged, have the tool serviced before using. 
Many accidents are
caused by poorly maintained tools.
8.

Use only accessories that are recommended by the manufacturer

for your model. Accessories that may be suitable for one tool may become
hazardous when used on another tool.

SERVICE

1.

Tool service must be performed only by qualified repair personnel.

Service or maintenance performed by unqualified personnel could result in a
risk of injury.
2.

When servicing a tool, use only identical replacement parts. Follow

instructions in the Maintenance Section of this manual. Use of
unauthorized parts or failure to follow Maintenance Instructions may create a
risk of electric shock or injury.

1.

Hold tool by insulated gripping surfaces when performing an

operation where the cutting tools may contact hidden wiring or its own
cord.  
Contact with a “live” wire will make exposed metal parts of the tool
“live” and shock the operator.
2.

Use proper safety equipment. Wear safety goggles for eye protection,

wear hearing protection, and wear a protective mask to minimize breathing in
the fine dust created while sanding. 
3.

Sanding of lead-based paint is not recommended. Lead-based paint

should only be removed by a professional.
4.

Always maintain a firm grip on the sander handles with both hands to

prevent loss of control.
5.

Do not operate sander without all guards and covers securely in

place.
6.

Some wood contains preservatives which can be toxic. Take extra

care to prevent inhalation and skin contact when working with these
materials. Request and follow any safety information available from your
material supplier.

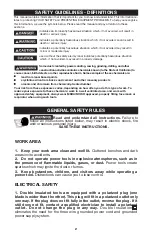
This tool was designed for certain applications. DO NOT

modify and/or use it for any application other than for which it was designed.
If you have any questions relative to its application, DO NOT use the tool
until you have written Porter-Cable and we have advised you.

Technical Service Manager
Porter-Cable Corporation
4825 Highway 45 North
Jackson, TN 38305

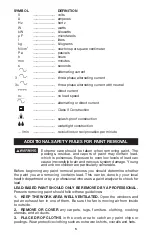
SPECIFIC SAFETY RULES AND SYMBOLS

Summary of Contents for 444

Page 1: ..._____________ Type ___________________________________________ Serial No _______________________________________ IMPORTANT Please make certain that the person who is to use this equipment carefully reads and understands these instructions before starting operations To learn more about Porter Cable visit our website at http www porter cable com Copyright 2003 Porter Cable Corporation MODEL 444VS MO...

Page 2: ...erty damage This manual contains information that is important for you to know and understand This information re lates to protecting YOUR SAFETY and PREVENTING EQUIPMENT PROBLEMS To help you recognize this information we use the symbols below Please read the manual and pay attention to these sections WORK AREA 1 Keep your work area clean and well lit Cluttered benches and dark areas invite accide...

Page 3: ...on the switch or plugging in tools that have the switch ON invites accidents 4 Remove adjusting keys or wrenches before turning the tool ON A wrench or a key that is left attached to a rotating part of the tool may result in personal injury 5 Do not overreach Keep proper footing and balance at all times Proper footing and balance enables better control of the tool in unexpected situations 6 Use sa...

Page 4: ...or failure to follow Maintenance Instructions may create a risk of electric shock or injury 1 Hold tool by insulated gripping surfaces when performing an operation where the cutting tools may contact hidden wiring or its own cord Contact with a live wire will make exposed metal parts of the tool live and shock the operator 2 Use proper safety equipment Wear safety goggles for eye protection wear h...

Page 5: ...ible brain and nervous system damage Young and unborn children are particularly vulnerable Before beginning any paint removal process you should determine whether the paint you are removing contains lead This can be done by your local health department or by a professional who uses a paint analyzer to check for lead LEAD BASED PAINT SHOULD ONLY BE REMOVED BY A PROFESSIONAL Persons removing paint s...

Page 6: ...e detergent or trisodium TSP to wash and mop areas 9 AT THE END OF EACH WORK SESSION put the paint chips and debris in a double plastic bag close it with tape or twist ties and dispose properly 10 REMOVE PROTECTIVE CLOTHING and work shoes in the work area to avoid carrying dust into the rest of the dwelling Wash work clothes separately Wipe shoes off with a wet rag then wash that rag with the work...

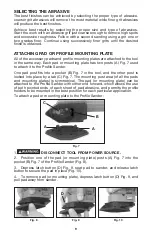
Page 7: ...tems are available as accessories and they may be used with any Porter Cable Model 444 Profile Sander SELECTING A PAD OR PROFILE MOUNTING PLATE Select the sanding pad or profile holder that best fits your application Fig 1 A Diamond Pad for PSA Abrasives The pointed tip of this pad is used for sanding into corners and intricately shaped areas Precut PSA abrasives are used with this pad Fig 2 Lengt...

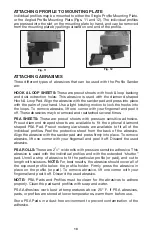
Page 8: ...s the profiles to be used in areas that are inaccessible with the Single Profile Mounting Plate Special PSA Abrasives are available in precut sheets or in rolls that can be cut to fit the various profiles E Offset Shutter Pad This pad permits access to recessed surfaces such as those found on louvered shutters Fig 6 Special PSA Abrasives are available in rolls that can be cut to fit this pad SELEC...

Page 9: ... to attach it to the Profile Sander One pad post fits into a pocket B Fig 7 in the tool and the other post is locked into place by a tab C Fig 7 The mounting post area of all the pads and mounting plates is symmetrical The pad or mounting plate can be attached to the Profile Sander with either end forward which allows the use of both pointed ends of each sheet of pad abrasive and permits the profi...

Page 10: ...ional diamond shaped PSA Pad Precut rectangular sheets are available to fit all of the individual profiles Peel the protective sheet from the back of the abrasive Align the abrasive with the sander pad and press firmly into place To remove abrasive lift one corner with your fingernail and peel it off Discard the used abrasive PSA ROLLS These are 21 2 wide rolls with pressure sensitive adhesive Thi...

Page 11: ...rce with a 1 vacuum hose TO START AND STOP SANDER The tool is equipped with a rocker type switch A Fig 15 labeled ON and OFF 1 Depress OFF Check to see that the power circuit voltage is the same as that shown on the specification plate 2 Connect Sander to power circuit 3 While holding Sander firmly and off the work surface depress ON 4 When you are finished sanding lift the tool off the work and d...

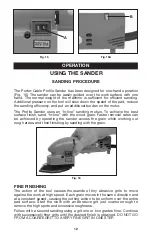
Page 12: ...rates can be achieved by operating the sander across the grain while working out rough areas and then finishing by sanding with the grain FINE FINISHING The action of the tool causes thousands of tiny abrasive grits to move against the work at high speed Each grain moves in the same direction and at a constant speed causing the cutting action to be uniform over the entire pad surface Start the wor...

Page 13: ...de over lapping arcs Do not concentrate on small areas When using liquid removers or heaters to speed the work scrape away all excess paint or varnish with a putty knife or other suitable scraping tool and allow the wood to be cool and dry before sanding DOORS AND MOLDINGS The in line motion of the Profile Sander is ideally suited for use in the recessed corners and on the intricate profiles found...

Page 14: ...ool to your nearest authorized Porter Cable Service Station to be thoroughly cleaned and inspected Have worn parts replaced and lubricate with fresh lubricant Have new brushes installed and test the tool for performance Any loss of power before the above maintenance check may indicate the need for immediate servicing of your tool DO NOT CONTINUE TO OPERATE TOOL UNDER THIS CONDITION If proper opera...

Page 15: ... Service Stations Please visit our Web Site www porter cable com for a catalog or for the name of your nearest supplier Since accessories other than those offered by Porter Cable Delta have not been tested with this product use of such accessories could be hazardous For safest operation only Porter Cable Delta recommended accessories should be used with this product ...

Page 16: ...y other than our Service Centers or Authorized Service Stations ANY IMPLIED WARRANTY INCLUDING THE IMPLIED WARRANTIES OF MERCHANTABILITY AND FITNESS FOR A PARTICULAR PURPOSE WILL LAST ONLY FOR ONE 1 YEAR FROM THE DATE OF PURCHASE To obtain information on warranty performance please write to PORTER CABLE CORPORATION 4825 Highway 45 North Jackson Tennessee 38305 Attention Product Service THE FOREGOI...

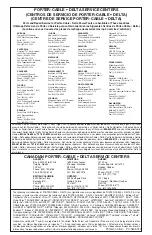
Page 17: ... 731 541 6042 pour obtenir de l aide pour en repérer un Pour obtenir des pièces et accessoires pour les produits Porter Cable Delta s adresser à tout distributeur Porter Cable Delta centre de service agréé ou centre de service d usine Porter Cable Delta Si vous n avez accès à aucun de ces centres appeler le 888 848 5175 et on vous dirigera vers le centre de service d usine Porter Cable Delta le pl...

Reviews: