background image

Hardware Configuration 

PCOM-B217VG-II  

2-5


A57 GND 

B57 GPO2 

C57  TYPE1# D57 

TYPE2# 

A58 P 

B58 P 

C58   D58 


A59 PCIE_TX3- 

B59 PCIE_RX3- 

C59  PEG_RX2- D59 

PEG_TX2- 

A60  GND (FIXED) 

B60  GND (FIXED) 

C60  GND (FIXED)  D60  GND (FIXED) 

A61 P 

B61 P 

C61   D61 


A62 PCIE_TX2- 

B62 PCIE_RX2- 

C62  PEG_RX3- D62 

PEG_TX3- 

A63 GPI1 

B63 GPO3 

C63  RSVD D63 

RSVD 

A64 P 

B64 P 

C64  RSVD D64 

RSVD 

A65 PCIE_TX1- 

B65 PCIE_RX1- 

C65   D65 


A66 GND 

B66 WAKE0# 

C66  PEG_RX4- D66 

PEG_TX4- 

A67 GPI2 

B67 WAKE1# 

C67  RSVD D67 

GND 

A68 P 

B68 P 

C68   D68 


A69 PCIE_TX0- 

B69 PCIE_RX0- 

C69  PEG_RX5- D69 

PEG_TX5- 

A70  GND (FIXED) 

B70  GND (FIXED) 

C70  GND (FIXED)  D70  GND (FIXED) 

A71  

B71  

C71   D71 


A72 LVDS_A0- 

B72 LVDS_B0- 

C72  PEG_RX6- D72 

PEG_TX6- 

A73  

B73  

C73  SDVO_DATA  D73 SDVO_CLK 

A74 LVDS_A1- 

B74 LVDS_B1- 

C74   D74 


A75  

B75  

C75  PEG_RX7- D75 

PEG_TX7- 

A76 LVDS_A2- 

B76 LVDS_B2- 

C76  GND D76 

GND 

A77 LVDS_VDD_EN  B77  

C77  RSVD D77 

IDE_CBLID# 

A78  

B78 LVDS_B3- 

C78   D78 


A79 LVDS_A3- 

B79 LVDS_BKLT_EN  C79  PEG_RX8- D79 

PEG_TX8- 

A80  GND (FIXED) 

B80  GND (FIXED) 

C80  GND (FIXED)  D80  GND (FIXED) 

A81 LV 

B81 LV 

C81   D81 


A82 LVDS_A_CK- 

B82 LVDS_B_CK- 

C82  PEG_RX9- D82 

PEG_TX9- 

A83 LVDS_I2C_CK 

B83 LVDS_BKLT_CTRLC83  RSVD D83 

RSVD 

A84 LVDS_I2C_DAT  B84 VCC_5V_SBY 

C84  GND D84 

GND 

A85 GPI3 

B85 VCC_5V_SBY 

C85  P D85 

A86 KBD_RST# 

B86 VCC_5V_SBY 

C86  PEG_RX10- D86 

PEG_TX10- 

A87 KBD_A20GATE  B87 VCC_5V_SBY 

C87  GND D87 

GND 

A88 PCIE0  B88 SPI_DIS# 

C88  P D88 

A89 PCIE0_CK_REF-  B89 VGA_RED 

C89  PEG_RX11- D89 

PEG_TX11- 

A90  GND (FIXED) 

B90  GND (FIXED) 

C90  GND (FIXED)  D90  GND (FIXED) 

A91 SPI_POWER 

B91 VGA_GRN 

C91  P D91 

A92 SPI_MISO 

B92 VGA_BLU 

C92  PEG_RX12- D92 

PEG_TX12- 

A93 GPO0 

B93 VGA_HSYNC 

C93  GND D93 

GND 

A94 SPI_CLK 

B94 VGA_VSYNC 

C94  P D94 

A95 SPI_MOSI 

B95 VGA_I2C_CK 

C95  PEG_RX13- D95 

PEG_TX13- 

A96 GND 

B96 VGA_I2C_DAT 

C96  GND D96 

GND 

A97 TYPE10# 

B97 SPI_CS# 

C97  RSVD D97 

PEG_ENABLE# 

Summary of Contents for PCOM-B217VG-II

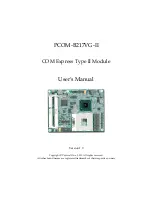
Page 1: ...PCOM B217VG II COM Express Type II Module User s Manual Version 1 0 Copyright Portwell Inc 2011 All rights reserved All other brand names are registered trademarks of their respective owners ...

Page 2: ... 1 3 2 Main Memory 3 1 3 3 Installing the Single Board Computer 3 1 3 3 1 Chipset Component Driver 3 2 3 3 2 Intel Integrated Graphics 3 2 3 3 3 Intel PROSet Gigabit Ethernet Controller 3 2 3 3 4 Audio Controller 3 2 3 3 5 Intel Active Management Technology Intel AMT 3 3 3 4 Clear CMOS Operation 3 3 Chapter 4 BIOS Setup Information 4 1 4 1 Entering Setup Launch System Setup 4 1 4 2 Main 4 2 4 3 Ad...

Page 3: ...m Installation Describes how to properly mount the CPU main memory to get a safe installation and provides a programming guide of Watch Dog Timer function Chapter 4 BIOS Setup Information Specifies the meaning of each setup parameters how to get advanced BIOS performance and update new BIOS In addition POST checkpoint list will give users some guidelines of trouble shooting The content of this man...

Page 4: ...l requirements In the meanwhile its variety functions were also customized to meet the application Compares to the platform that designed from nothing COM Express architecture platform only needs to develop Carrier board Users could keep their know how which related to their core competence in the Carrier board PCOM B217VG are all type II COM Express Module board equipped Intel Sandy Bridge PGA pr...

Page 5: ...PCI Express x16 link Six PCI Express x1 link LVDS Supports 25 to 112MHz single dual channel LVDS interface Single channel LVDS interface support 1 x 18 bpp OR 24 bpp compatible with VESA LVDS color mapping Dual channel LVDS interface support 2 x 18 bpp OR 24 bpp compatible with SPWG Standard Panels Working Group v 3 5 specification TV out no TV out supported SDVO Serial Digital Video Output no SDV...

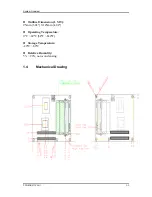
Page 6: ...rview PCOM B217VG II 1 3 z Outline Dimension L X W 95mm 3 74 X 125mm 4 92 z Operating Temperature 0 C 60 C 32 F 140 F z Storage Temperature 20 C 80 C z Relative Humidity 5 90 non condensing 1 4 Mechanical Drawing ...

Page 7: ...System Overview PCOM B217VG II 1 4 1 5 System Architecture ...

Page 8: ... chapter The default settings are indicated with a star sign Ì 2 1 Jumper Setting In order to customize PCOM B217VG II s features for users in the following sections Short means covering a jumper cap over jumper pins Open or N C Not Connected means removing a jumper cap from jumper pins Users can refer to Figure 2 1 and Figure 2 2 for the Jumper locations Figure 2 1 PCOM B217VG II Top side Connect...

Page 9: ...Hardware Configuration PCOM B217VG II 2 2 Figure 2 2 PCOM B217VG II Bottom side Connector Location ...

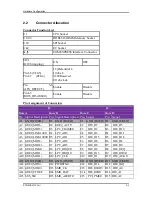
Page 10: ... B1 GND FIXED C1 GND FIXED D1 GND FIXED A2 GBE0_MDI3 B2 GBE0_ACT C2 IDE_D7 D2 IDE_D5 A3 GBE0_MDI3 B3 LPC_FRAME C3 IDE_D6 D3 IDE_D10 A4 GBE0_LINK100 B4 LPC_AD0 C4 IDE_D3 D4 IDE_D11 A5 GBE0_LINK1000 B5 LPC_AD1 C5 IDE_D15 D5 IDE_D12 A6 GBE0_MDI2 B6 LPC_AD2 C6 IDE_D8 D6 IDE_D4 A7 GBE0_MDI2 B7 LPC_AD3 C7 IDE_D9 D7 IDE_D0 A8 GBE0_LINK B8 LPC_DRQ0 C8 IDE_D2 D8 IDE_REQ A9 GBE0_MDI1 B9 LPC_DRQ1 C9 IDE_D13 ...

Page 11: ..._C BE2 D33 PCI_SERR A34 BIOS_DIS0 B34 I2C_DAT C34 PCI_PERR D34 PCI_STOP A35 THRMTRIP B35 THRM C35 PCI_LOCK D35 PCI_TRDY A36 USB6 B36 USB7 C36 PCI_DEVSEL D36 PCI_FRAME A37 USB6 B37 USB7 C37 PCI_IRDY D37 PCI_AD16 A38 USB_6_7_OC B38 USB_4_5_OC C38 PCI_C BE2 D38 PCI_AD18 A39 USB4 B39 USB5 C39 PCI_AD17 D39 PCI_AD20 A40 USB4 B40 USB5 C40 PCI_AD19 D40 PCI_AD22 A41 GND FIXED B41 GND FIXED C41 GND FIXED D4...

Page 12: ... PEG_RX7 D75 PEG_TX7 A76 LVDS_A2 B76 LVDS_B2 C76 GND D76 GND A77 LVDS_VDD_EN B77 LVDS_B3 C77 RSVD D77 IDE_CBLID A78 LVDS_A3 B78 LVDS_B3 C78 PEG_RX8 D78 PEG_TX8 A79 LVDS_A3 B79 LVDS_BKLT_EN C79 PEG_RX8 D79 PEG_TX8 A80 GND FIXED B80 GND FIXED C80 GND FIXED D80 GND FIXED A81 LVDS_A_CK B81 LVDS_B_CK C81 PEG_RX9 D81 PEG_TX9 A82 LVDS_A_CK B82 LVDS_B_CK C82 PEG_RX9 D82 PEG_TX9 A83 LVDS_I2C_CK B83 LVDS_BK...

Page 13: ...TX15 A102RSVD B102 RSVD C102PEG_RX15 D102PEG_TX15 A103RSVD B103RSVD C103GND D103GND A104VCC_12V B104VCC_12V C104VCC_12V D104VCC_12V A105VCC_12V B105VCC_12V C105VCC_12V D105VCC_12V A106VCC_12V B106VCC_12V C106VCC_12V D106VCC_12V A107VCC_12V B107VCC_12V C107VCC_12V D107VCC_12V A108VCC_12V B108VCC_12V C108VCC_12V D108VCC_12V A109VCC_12V B109VCC_12V C109VCC_12V D109VCC_12V A110GND FIXED B110GND FIXED ...

Page 14: ...nterface For system compatibility and stability do not use memory module without brand Memory configuration can be set to either one double sided DIMM in one DIMM socket or two single sided SO DIMM in both sockets Beware of the connection and lock integrity from memory module to socket Inserting improperly it will affect the system reliability Before locking make sure that all modules have been fu...

Page 15: ...anced design to gain an outstanding graphic performance Shared 128 accompany it to 256MB system DDR3 SDRAM with Total Graphics Memory PCOM B217VG II supports VGA DVI LVDS and LVDS dual display This combination makes PCOM B217VG II an excellent piece of multimedia hardware With no additional video adaptor this onboard video will usually be the system display output By adjusting the BIOS setting to ...

Page 16: ...l AMT Please find the latest Intel 6 0 driver from PCOM B217VG II CD title The drivers support Windows 2000 XP Vista Win7 3 4 Clear CMOS Operation There is no backup battery designed on PCOM B217VG II all setting will reset to default when disconnecting PCM B217VG II with carrier board ...

Page 17: ...r to enter the SETUP program Some errors are significant enough to abort the start up 4 1 Entering Setup Launch System Setup Power on the computer and the system will start POST Power On Self Test process When the message below appears on the screen press Del key will enter BIOS setup screen Press Del to enter SETUP If the message disappears before responding and still wish to enter Setup please r...

Page 18: ...stem configurations such as time date etc BIOS Information These items show the firmware of your system Read only System Time The time format is Hour Minute Second Use or to configure system Time System Date The date format is Day Month Date Year Use or to configure system Date ...

Page 19: ... 4 3 Advanced Use this menu to set up the items of special enhanced features Launch PXE OpROM Enable or Disable Boot Option for Legacy Network Devices Launch Storage OpROM Enable or Disable Boot Option for Mass Storage Devices with Option ROM ...

Page 20: ...ncy Timer Value to be programmed into PCI Latency Timer Register The choice 32 64 96 128 160 192 224 248 PCI Bus Clocks VGA Palette Snoop Enables or Disables VGA Palette Registers Snooping PERR Generation Enables or Disables PCI Device to Generate PEER SERR Generation Enables or Disables PCI Device to Generate SEER Relaxed Ordering Enables or Disables PCI Express Device Relaxed Ordering Extended T...

Page 21: ... 256 512 1024 2048 4096 Bytes Maximum Read Request Set Maximum Read Request Size of PCI Express Device or allow system BIOS to select the value The choice Auto 128 256 512 1024 2048 4096 Bytes ASPM Support Set the ASPM Level Force L0 Force all links to L0 State AUTO BIOS auto configure DISABLE Disables ASPM Extended Synch If ENABLED allows generation of Extended Synchronization patterns ACPI setti...

Page 22: ... may be not effective with some OS ACPI Sleep State Select the highest ACPI sleep state the system will enter when the SUSPEND button is pressed The choice Suspend Disabled S1 CPU Stop Clock S3 Suspend to RAM Lock Legacy Resources Enables or Disable Lock of Legacy Resources Trusted Computing Trusted Computing TPM settings TPM SUPPORT Enables or Disable TPM support O S will not show TPM Reset of pl...

Page 23: ... core is enabled Active Processor Cores Number of cores to enable in each processor package Limit CPUID maximum Disabled for Windows XP Execute Disable Bit XD can prevent certain classes of malicious buffer overflow attacks when combined with a supporting OS Windows Server 2003 Sp1 Windows XP SP2 SuSE Linux 9 2 RedHat Enterprise 3 Update 3 Hardware Prefetcher To turn on off the Mid Level Cache L2 ...

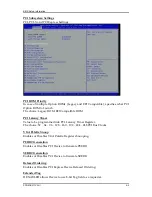
Page 24: ... x2APIC Some 0Ses do not support this Long duration power limit Long duration power limit in Watts Long duration maintained limit Time window which the long duration power is maintained Short duration power limit Short duration power limit in Watts SATA Configuration SATA Controller s Enable or disable SATA Device SATA Mode Selection Determines how SATA controller s operate The choice IDE AHCI RAI...

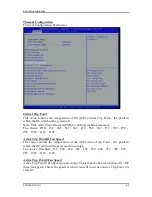
Page 25: ...e choice POR 15C 23C 31C 39C 47C 55C 63C 71C 79C 87C 95C 103C 111C 119C Active Trip Point Hi Fan Speed The value controls the temperature of the ACPI Active Trip Point the point in which the OS will turn the processor fan on high The choice Disabled 15C 23C 31C 39C 47C 55C 63C 71C 79C 87C 95C 103C 111C 119C Active Trip Point 0 Fan Speed Active Trip Point 0 Fan Speed in percentage Value must be bet...

Page 26: ... The choice Disabled 15C 23C 31C 39C 47C 55C 63C 71C 79C 87C 95C 103C 111C 119C Passive TC1 Value The value sets the TC1 value for the ACPI Passive Cooling Formula Range 1 16 Passive TC2 Value The value sets the TC2 value for the ACPI Passive Cooling Formula Range 1 16 Passive TSP Value This item sets the TSP value for the ACPI Passive Cooling Formula It represents in tenths of a second how often ...

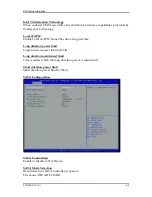
Page 27: ...ermal Sensor Read Enable PCH Thermal Device Enable or disable PCH Thermal Device D31 F6 MCH Temp Read MCH Temperature Read Enable PCH Temp Read PCH Temperature Read Enable CPU Energy Read CPU Energy Read Enable CPU Temp Read CPU Temperature Read Enable Intel TXT LT Configuration Intel Trusted Execution Technology ...

Page 28: ...BIOS Setup Information PCOM B217VG II 4 12 PCH FW Configuration Configuration Management Engine Technology Parameters Firmware Update Configuration Configuration Management Engine Technology Parameters ...

Page 29: ... AT Allow user to login to platform This is strictly for testing only This does not disable AT Services in ME Intel Anti Theft Technology Enable Disable Intel AT in BIOS for testing only Intel Anti Theft Technology Recove Set the number of times Recovery attemped will be allowed Range 1 64 Enter Intel AT Suspend Mode Request that platform enter Intel AT Suspend Mode ...

Page 30: ...in the SPI device Intel AMT Setup Prompt OEMFLag Bit 0 Enable Disable Intel AMT Setup Prompt to wait for hot key to enter setup BIOS Hotkey Pressed OEMFLag Bit 1 Enable Disable BIOS hotkey press MEBx Selection Screen OEMFLag Bit 2 Enable Disable MEBx selection screen Verbose Mebx Output OEMFLag Bit 3 Enable Disable Verbose Mebx Output Hide Un Configure ME Confirmation OEMFLag Bit 6 Hide Un Configu...

Page 31: ...ble Amt Wait Timer Set timer to wait before sending ASF_GET_BOOT_OPTIONS ASF Enable Disable Alert Specification Format Activate Remote Assistance Process Trigger CIRA boot USB Configure Enable Disable USB Configure function PET Progress User can Enable Disable PET Events progress to receive PET events or not Intel AMT SPI Protected Enable Disable Intel AMT SPI write protect WatchDog Enable Disable...

Page 32: ...or EFI applications EHCI Hand off This is a workaround for 0Ses without EHCI hand off support The EHCI ownership change should be claimed by EHCI driver USB transfer time out The time out value for Control Bulk and Interrupt transfers The choice 1 sec 5 sec 10 sec 20 sec Device reset time out USB mass storage device Start Unit Command time out The choice 10 sec 20 sec 30 sec 40 sec Device power up...

Page 33: ...BIOS Setup Information PCOM B217VG II 4 17 Super IO Configuration System Super IO Chip parameters Serial Port 0 Configuration Set Parameters of Serial port 0 COMA ...

Page 34: ...3F8h IRQ 4 IO 3F8h IRQ 3 4 5 6 7 10 11 12 IO 2E8h IRQ 3 4 5 6 7 10 11 12 IO 2E8h IRQ 3 4 5 6 7 10 11 12 Device Mode Change the Serial Port mode Select High Speed or Normal mode mode The Choice Standard Serial Port Mode IrDA 1 0 HP SIR Mode ASKIR Mode Serial Port 0 Configuration Set Parameters of Serial port 0 COMA Serial Port Enable or Disable Serial Port COM ...

Page 35: ...2F8h IRQ 3 4 5 6 7 10 11 12 IO 3E8h IRQ 3 4 5 6 7 10 11 12 IO 2E8h IRQ 3 4 5 6 7 10 11 12 Device Mode Change the Serial Port mode Select High Speed or Normal mode mode The Choice Standard Serial Port Mode IrDA 1 0 HP SIR Mode ASKIR Mode Parallel Port Configuration Set Parameters of Parallel Port LPT LPTE Parallel Port Enable or Disable Parallel Port LPT LPTE ...

Page 36: ...78h IRQ 5 6 7 10 11 12 IO 278h IRQ 5 6 7 10 11 12 IO 38ch IRQ 5 6 7 10 11 12 IO 378h IO 278h IO 38ch Device Mode Change the Printer Port mode The Choice Standard Parallel Port Mode EPP Mode ECP Mode ECP Mode ECP mode CIR Controller Configuration Set Parameters of CIR Controller CIR CIR Controller Enable or Disable CIR Controller ...

Page 37: ...S Setup Information PCOM B217VG II 4 21 Change Settings AUTO IO 3E0h IRQ 10 IO 3E0h IRQ 3 4 5 6 7 10 11 12 IO 2E0h IRQ 3 4 5 6 7 10 11 12 IO 298h IRQ 3 4 5 6 7 10 11 12 H W Monitor Monitor Hardware status ...

Page 38: ...Emergency Management Services EMS allows for remote management of a Windows Server OS through a serial port The choice COM0 Disabled COM4 PCI Dev0 Func0 Disabled Terminal VT UTF8 is the preferred terminal type for out of band management The next best choice is VT100 and then VT100 See above in console Redirection Settings page for more Help with Terminal Type Emulation The choice VT100 VT100 VT UT...

Page 39: ...es This timer detects platform instability caused by wrong clock steeings Turn off unused PCI PCIe clocks Disabled all clocks turned on Enable clocks for empty PCI PCEe slots will be turned off to save power Platform must be powered off for changes to take effect Lock ICC registers All registers all ICC registers will be locked Static only only static ICC registers will be locked The choice Static...

Page 40: ...BIOS Setup Information PCOM B217VG II 4 24 DIV 1S Integrated Clock Control options DIV 2S Integrated Clock Control options ...

Page 41: ...forgotten after reboot This mode of making changes is more likely to cause platform instability and spontaneous restart Apply settings once after reboot Changes will be applied once after the next reboot and then forgotten Use it to try changes that are too aggressive for immediate application Apply settings permanently after reboot Changes will be applied permanently starting after the next reboo...

Page 42: ...C3 Report Enable Disable CPU C3 ACPI C2 report to OS Long duration power limit Long duration power limit in watts 0 means use factory default Long duration maintained Time window which the long duration power is maintained Short duration power limit Short duration power limit in watts 0 means use factory default TCC active offset Offset from factory TCC activation temperature ...

Page 43: ...BIOS Setup Information PCOM B217VG II 4 27 Switchable Graphics Switchable Graphics selections Sandybridge DTS Configuration Sandybridge DTS Configuration Parameters ...

Page 44: ... of Spec ACPI Thermal Management uses EC reported temperature values and DTS SMM is used to handle Out of Spec System Agent SA Configuration System Agent SA parameters VT d Check to enable VT d function on MCH CHAP Device B0 D7 F0 Enable or disable SA CHAP Device Thermal Device B0 D4 F0 Enable or disable SA Thermal Device Enable NB CRID Enable or disable NB CRID WorkAround WatchDogTimer WatchDogTi...

Page 45: ...4 31 Primary Display Select which of IGFX PEG PCI Graphics device should be Primary Display or select SG for Switchable Gfx The choice Auto IGFX PEG PCI SG Internal Graphics Keep IGD enabled based on the setup options The choice Auto Disabled Enabled GTT Size Select the GTT Size The choice 1MB 2MB Aperture Size Select the Aperture Size The choice 128MB 256MB 512MB ...

Page 46: ...lect DVMT 5 0 Total Graphic Memory size used by the Internal Graphics Device The Choice 128M 256M MAX Gfx Low power Mode This option is applicable for SFF only LCD Control LCD Control Primacy IGFX Boot Display Select the video Device which will be activated during POST This has no effect if external graphics present Secondary boot display selection will appear based on your selection VGA modes wil...

Page 47: ...l n Enable with Selected Aggressiveness Level Spread Spectrum clock Chip Hardware Spread is controlled by chip Software Spread is controlled by BIOS TV1 Standard Select the ability to configure a TV Format TV2 Standard Select the ability to configure a TV Minor Format ALS Support Valid only for ACPI Legacy ALS Support through the IGD INT10 function ACPI ALS support through an ACPI ALS driver Activ...

Page 48: ...c1 DMI Vcp Control Enable or disable DMI Vcp DMI Vcm Control Enable or disable DMI Vcm DMI Link ASPM Control Enable or disable the control of Active State Power Management on SA side of the DMI Link The choice Disable L0s L1 L0sL1 DMI Extended Synch Control Enable DMI Extended Synchronization DMI Gen 2 Enable or disable DMI Gen 2 ...

Page 49: ...gure PEG0 B0 D1 F0 Gen1 Gen2 PEG1 Gen X Configure PEG1 B0 D1 F1 Gen1 Gen2 PEG2 Gen X Configure PEG2 B0 D1 F2 Gen1 Gen2 PEG3 Gen X Configure PEG3 B0 D6 F0 Gen1 Gen2 Always Enable PEG To enable the PEG slot PEG ASPM Control ASPM support for the PEG Device This has no effect if PEG is not the currently active device ...

Page 50: ...rol on PEG The choice 6 dB 3 5 dB Memory Configuration Memory Configuration Parameters DIMM profile Select DIMM timing profile that should be used Memory Frequency Maximum Memory Frequency Selections in Mhz ECC Support Enable or disable DDR ECC Support Max TOLUD Maximum Value of TOLUD Dynamic assignment would adjust TOLUD automatically based on largest MMIO length of installed graphic controller ...

Page 51: ... MRC execution Note If ME 5 0MB is present Force cold reset is required Scrambler Seed Generation Off Control Memory Scrambler Seed Generation Enable do not generation scrambler seed Disable Generation scrambler seed always Memory Remap Enable or disable memory remap above 4G Channel A DIMM control Enable or disable dims on channel A The choice Enable Both DIMMs Disable DIMM0 Disable DIMM1 Disable...

Page 52: ...ent PECI Injected Temperature Enable or disable memory temperature to be injected to the processor via PECI EXTTS via TS on Board Enable or disable routing TS on Board ALERT and THERW to EXTTS pins on the PCH EXTTS via TS on DIMM Enable or disable routing TS on DIMM ALERT to EXTTS pin on the PCH Virtual Temperature Sensor VTS Enable or disable Virtual Temperature Sensor VTS ...

Page 53: ...ormation PCOM B217VG II 4 37 GT Power Management Control GT Power Management Control Options RC6 Render Standby Check to enable render standby support GT OverClocking Support Enable or disable GT OverClocking Support ...

Page 54: ...bility Board Capability SUS_PWR_ON_ACK Send Disabled to PCH DeepSx Show DeepSx Policies EC Turbo Control Mode Enable or disable EC Turbo Control mode Azalia Control Detection of the Azalia device Disable Azalia will be unconditionally disabled Enable Azalia will be unconditionally Enabled Auto Azalia will be enabled if present disable otherwise Azalia Docking Support Enable or disable Azalia Docki...

Page 55: ... Compatible Revision ID SMI Lock Enable or disable SMI lockdown BIOIS Lock Enable or disable BIOS Interface lockdown GPIO Lock Enable or disable GPIO lockdown High precision Timer Enable or disable the High Precision Event Timer SLP_S4 Assertion Width Select a minimum assertion width of the SLP_S4 signal Restore AC Power Loss Select AC power state when power is re applied after a power failure Set...

Page 56: ...on EHCI 1 Control the USB EHCI USB 2 0 functions One EHCI controller must always be enabled EHCI 2 Control the USB EHCI USB 2 0 functions One EHCI controller must always be enabled USB Ports Per Port Disable Control Control each of the USB ports 0 9 disabling ...

Page 57: ...ess Clock Gating Enable or disable PCI Express Clock Gating for each root port DMI Link ASPM Control The control of Active State Power Management on both NB side and SB side of the DMI Link DMI Link Extended Synch Control The control of Extended Synch on SB side of the DMI Link ...

Page 58: ...Level Force L0 Force all links to L0 state AUTO BIOS auto configure DISABLE Disables ASPM URR Enable or disable PCI Express Unsupported Request Reporting FER Enable or disable PCI Express Device Fatal Error Reporting NFER Enable or disable PCI Express Device Non Fatal Error Reporting CER Enable or disable PCI Express Device Correctable Error Reporting ...

Page 59: ...le or disable PCI Express Hot Plug Extra Bus Reserved Extra Bus Reserved 0 7 for bridges behind this Root Bridge Reserved Memory Reserved Memory and prefetchable Memory 0 20MB Range for this Root Bridge Reserved I O Reserved I O 4K 8K 12K 16K 20K Range for this Root Bridge PCI Express Root Port 2 Control the PCI Express Root Port ASPM Support Set the ASPM Level Force L0 Force all links to L0 state...

Page 60: ...le Error PME SCI Enable or disable PCI Express PME SCI Hot Plug Enable or disable PCI Express Hot Plug Extra Bus Reserved Extra Bus Reserved 0 7 for bridges behind this Root Bridge Reserved Memory Reserved Memory and prefetchable Memory 0 20MB Range for this Root Bridge Reserved I O Reserved I O 4K 8K 12K 16K 20K Range for this Root Bridge PCI Express Root Port 3 Control the PCI Express Root Port ...

Page 61: ... System Error on Non Fatal Error SECE Enable or disable Root PCI Express System Error on Correctable Error PME SCI Enable or disable PCI Express PME SCI Hot Plug Enable or disable PCI Express Hot Plug Extra Bus Reserved Extra Bus Reserved 0 7 for bridges behind this Root Bridge Reserved Memory Reserved Memory and prefetchable Memory 0 20MB Range for this Root Bridge Reserved I O Reserved I O 4K 8K...

Page 62: ...ion Timer T0 SEFE Enable or disable Root PCI Express System Error on Fatal Error SENFE Enable or disable Root PCI Express System Error on Non Fatal Error SECE Enable or disable Root PCI Express System Error on Correctable Error PME SCI Enable or disable PCI Express PME SCI Hot Plug Enable or disable PCI Express Hot Plug Extra Bus Reserved Extra Bus Reserved 0 7 for bridges behind this Root Bridge ...

Page 63: ...CI Express Device Correctable Error Reporting CTO Enable or disable PCI Express Completion Timer T0 SEFE Enable or disable Root PCI Express System Error on Fatal Error SENFE Enable or disable Root PCI Express System Error on Non Fatal Error SECE Enable or disable Root PCI Express System Error on Correctable Error PME SCI Enable or disable PCI Express PME SCI Hot Plug Enable or disable PCI Express ...

Page 64: ...xpress Device Correctable Error Reporting CER Enable or disable PCI Express Device Correctable Error Reporting CTO Enable or disable PCI Express Completion Timer T0 SEFE Enable or disable Root PCI Express System Error on Fatal Error SENFE Enable or disable Root PCI Express System Error on Non Fatal Error SECE Enable or disable Root PCI Express System Error on Correctable Error PME SCI Enable or di...

Page 65: ...disable PCI Express Device Non Fatal Error Reporting CER Enable or disable PCI Express Device Correctable Error Reporting CER Enable or disable PCI Express Device Correctable Error Reporting CTO Enable or disable PCI Express Completion Timer T0 SEFE Enable or disable Root PCI Express System Error on Fatal Error SENFE Enable or disable Root PCI Express System Error on Non Fatal Error SECE Enable or...

Page 66: ... this Root Bridge Reserved I O Reserved I O 4K 8K 12K 16K 20K Range for this Root Bridge Boot Configuration Setup Prompt Timeout Number of seconds to wait for setup activation key 65535 0xFFFF means indefinite waiting Boot NumLock State Select the keyboard NumLock state Quiet Boot Enable or disable Quiet Boot option ...

Page 67: ...ow disabling GA20 this option is useful when any RT code is executed above 1MB Option ROM Messages Set display mode for Option ROM Interrupt 19 Capture Enable Allows Option ROMs to trap Int 19 Boot Option 1 Sets the system boot order Security Administrator Password Set Setup Administrator Password User Password Set User password ...

Page 68: ...out saving the changes Save Changes and Reset Reset the system after saving the changes Discard Changes and Reset Reset the system without saving the changes Save Changes Save Changes done so far to any of the setup options Discard Changes Discard Changes done so far to any of the setup options Restore Defaults Restore Load Default Values for all the setup options ...

Page 69: ...ults Save the changes done so far as User Defaults Restore User Defaults Restore the User Defaults to all the setup options Lanch EFI Shell from filesystem device Attempts to Launch EFI Shell application Shellx64 efi from one of the available filesystem devices ...

Page 70: ...to hit DEL key and enter the BIOS setup menu to tune up a stable BIOS configuration so that you can wake up your system far well Loading the default optimal setting When prompted with the main setup menu please scroll down to Load Optimal Defaults press Enter and Y to load in default optimal BIOS setup This will force your BIOS setting back to the initial factory configuration It is recommended to...

Page 71: ...rial port to release IRQ 4 Disable COM2 serial port to release IRQ 3 Etc A quick review of the basic IRQ mapping is given below for your reference Interrupt Request Lines IRQ IRQ Current Use Default Use IRQ 0 System ROM System Timer IRQ 1 System ROM Keyboard Event IRQ 2 Unassigned Usable IRQ IRQ 3 System ROM COM2 IRQ 4 System ROM COM1 IRQ 5 Unassigned Usable IRQ IRQ 6 System ROM Diskette Event IRQ...

Page 72: ...ory Address Map Memory Area Size Description 0000 003F 1K Interrupt Area 0040 004F 0 3K BIOS Data Area 0050 006F 0 5K System Data 0070 0E2E 54K DOS 0E2F 0F6B 5K Program Area 0F6C 9BBF 561K Available First Meg Conventional memory end at 623K 9BC0 9CFF 5K Extended BIOS Area 9D00 9FFF 12K Unused A000 AFFF 64K VGA Graphics B000 B7FF 32K Unused B800 BFFF 32K VGA Text C000 CFBF 59K Video ROM CFC0 EFFF 1...

Reviews: