background image

Troubleshooting 

PCOM-

B630VG User’s Manual


A quick review of the basic IRQ mapping is given below for your reference. 
 
 
It  is  then  very  easy  to  find  out  which  IRQ  resource  is  ready  for  additional 
peripherals. If IRQ resource is not enough, please disable some devices listed above 
to release further IRQ numbers. 


5.3 

FAQ 


Symptom: SBC keeps beeping, and no screen has shown. 
 
Solution: 

In fact, each beep sound represents different definition of error message. 

Please refer to table as following: 


Beep sounds 

Meaning 

Action 

One long beep with one 
short beeps 

DRAM error 

Change DRAM or reinstall it 

One long beep constantly  DRAM error 

Change DRAM or reinstall it 

One long beep with two 
short beeps 

Monitor or Display 
Card error 

Please check Monitor connector 
whether it inserts properly 

Beep rapidly 

Power error warning  Please check Power mode setting 


Information & Support 
Question: I forget my password of system BIOS, what am I supposed to do?


Answer: 

You can simply short 2-3 pins on JP20 to clean your password. 

 
Question: How to update the BIOS file of the PCOM-B630VG? 
 
Answer: 

1. Please visit web site of the Portwell download center as below hyperlink 
and register an account.


http://www.portwell.com.tw/support/newmember.php 

                                    2. Input your User name and password to log in the download 

center. 

                                    3. Select the “Search download” to input the keyword “PCOM-

B630VG”. 

                                    4.  Find  the  “BIOS  “page  to  download  the  ROM  file  and  flash 

utility. 

                                    5. Execute the zip file to root of the bootable USB pen drive. 
                                    6.  Insert  your  bootable  USB  pen  drive  in  carrier  board  and 

power-on. 

                                    7.  Input  the  “AFUDOS      XXXXX.ROM  -p  -b  -n”  to  start  to 

update BIOS. (“XXXXX” is the file name of the ROM file.) 

Summary of Contents for PCOM-B630VG

Page 1: ...PCOM B630VG COM Express Type VI with ECC Module User s Manual Version 1 0 Copyright Portwell Inc 2012 All rights reserved All other brand names are registered trademarks of their respective owners ...

Page 2: ...13 3 3 Installing the Module upon the Carrier Board then into the Chassis13 3 3 1 Chipset Component Driver 13 3 3 2 Intel Integrated Graphics Controller 14 3 3 3 Gigabit Ethernet Controller 14 3 3 4 Audio Controller 14 3 4 Clear CMOS Operation 14 3 5 WDT Function 15 3 6 GPIO 16 Chapter 4 BIOS Setup Information 17 2 2 Entering Setup Launch System Setup 18 2 3 Main 19 2 4 System Setup Utility 20 4 4...

Page 3: ...stallation Describes how to properly mount the CPU main memory to get a safe installation and provides a programming guide of Watch Dog Timer function Chapter 4 BIOS Setup Information Specifies the meaning of each setup parameters how to get advanced BIOS performance and update new BIOS In addition POST checkpoint list will give users some guidelines of trouble shooting The content of this manual ...

Page 4: ...ized design to fit in different mechanical requirements In the meanwhile its variety functions were also customized to meet the application Compares to the platform that designed from nothing COM Express architecture platform only needs to develop Carrier board Users could keep their know how which related to their core competence in the Carrier board PCOM B630 is Type VI COM Express Module board ...

Page 5: ...esolution up to 2560x1600 DP Resolution up to 2560x1600 9 PCI Express 7x PCI Express x1 Gen2 5 0GT s 1x PCI Express x16 Gen3 8 0GT s 10 SATA SATA 6 0Gb s x 6 11 USB Port 8 x Universal Serial Bus 2 0 480 Mb s bus comprehends the high speed full speed low speed data ranges 4 of 8 USB2 0 support USB3 0 12 Watchdog Timer Programmable via S W from 1 sec to 255 min 13 LPC LPC Interface 4 bit wide bus op...

Page 6: ...System Overview PCOM B219VG VI ECC 1 3 1 4 Mechanical Drawing ...

Page 7: ...System Overview PCOM B219VG VI ECC 1 4 1 5 System Architecture ...

Page 8: ...onnector J3 COM Express connector raw C and D J4 COM Express connector raw A and B Pin Assignment of Connectors J3 J4 Row A Row B Row C Row D Pin No Signal Description Pin No Signal Description Pin No Signal Description Pin No Signal Description A1 GND FIXED B1 GND FIXED C1 GND FIXED D1 GND FIXED A2 GBE0_MDI3 B2 GBE0_ACT C2 GND D2 GND A3 GBE0_MDI3 B3 LPC_FRAME C3 USB0_SSRX D3 USB0_SSTX A4 GBE0_LIN...

Page 9: ...PCIE_RX6 D19 PCIE_TX6 A20 SATA0_RX B20 SATA1_RX C20 PCIE_RX6 D20 PCIE_TX6 A21 GND FIXED B21 GND FIXED C21 GND FIXED D21 GND FIXED A22 SATA2_TX B22 SATA3_TX C22 NC D22 NC A23 SATA2_TX B23 SATA3_TX C23 NC D23 NC A24 SUS_S5 B24 PWROK C24 DP1_HDP D24 NC A25 SATA2_RX B25 SATA3_RX C25 DP1_LANE4 D25 NC A26 SATA2_RX B26 SATA3_RX C26 DP1_LANE4 D26 DP1_LANE0 A27 BATLOW B27 WDT C27 NC D27 DP1_LANE0 A28 ATA_A...

Page 10: ... D53 PEG_TX0 A54 GPI0 B54 GPO1 C54 NC D54 PEG_LANE_ RV A55 PCIE_TX4 B55 PCIE_RX4 C55 PEG_RX1 D55 PEG_TX1 A56 PCIE_TX4 B56 PCIE_RX4 C56 PEG_RX1 D56 PEG_TX1 A57 GND B57 GPO2 C57 NC D57 NC A58 PCIE_TX3 B58 PCIE_RX3 C58 PEG_RX2 D58 PEG_TX2 A59 PCIE_TX3 B59 PCIE_RX3 C59 PEG_RX2 D59 PEG_TX2 A60 GND FIXED B60 GND FIXED C60 GND FIXED D60 GND FIXED A61 PCIE_TX2 B61 PCIE_RX2 C61 PEG_RX3 D61 PEG_TX3 A62 PCIE...

Page 11: ...GND FIXED B90 GND FIXED C90 GND FIXED D90 GND FIXED A91 SPI_POWER B91 VGA_GRN C91 PEG_RX12 D91 PEG_TX12 A92 SPI_MISO B92 VGA_BLU C92 PEG_RX12 D92 PEG_TX12 A93 GPO0 B93 VGA_HSYNC C93 GND D93 GND A94 SPI_CLK B94 VGA_VSYNC C94 PEG_RX13 D94 PEG_TX13 A95 SPI_MOSI B95 VGA_DDC_C LK C95 PEG_RX13 D95 PEG_TX13 A96 NC B96 VGA_DDC_D AT C96 GND D96 GND A97 TYPE10 B97 SPI_CS C97 NC D97 NC A98 SER0_TX B98 NC C98...

Page 12: ... chapter provides you with instructions to set up your system The additional information is enclosed to help you set up onboard PCI device and handle Watch Dog Timer WDT and operation of GPIO in software programming 3 1 Install PCOM B630VGVG with a Carrier Board PCOM C600 Place PCOM C600 in a flat surface and screw on the four 4 cooper pillars ...

Page 13: ...BIOS Setup Information PCOM B630VG User s Manual Do the same with PCOM B630VG and Make Sure the Memory DDR3L SO DIMM Module is ECC ...

Page 14: ...tion PCOM B630VG User s Manual Insert the ECC DDR3L SO DIMM Memory Module in the right direction and make sure be well installed Then mount the PCOM B630VGVG onto PCOM C600 Make sure that row connector is well installed ...

Page 15: ...BIOS Setup Information PCOM B630VG User s Manual Then screw on the four 4 cooper pillars to fix the PCOM B630VGVG ...

Page 16: ... the performance without acquired technical information 3 3 Installing the Module upon the Carrier Board then into the Chassis To install your PCOM B630VGVG into standard chassis or proprietary environment please perform the following Step 1 Install well the PCOM B630VGVG upon the Carrier Board Cooler in its correct position Step 2 Check all jumpers setting on proper position Step 3 Place the Carr...

Page 17: ...ernet Controller PCOM B630VGVG itself is a Module Card the Ethernet port will support one auto negotiating 10 100 1000 Base T Ethernet interface to the Carrier Drivers Support Please find Intel 82579LM and 82574L LAN drivers in Ethernet directory of PCOM B630VGVG CD title The drivers support Windows XP Win7 3 3 4 Audio Controller Please find ALC886 High Definition Audio driver form PCOM B630VGVG C...

Page 18: ...BIOS Setup Information PCOM B630VG User s Manual 3 5 WDT Function B219 Module WDT from EC ...

Page 19: ...BIOS Setup Information PCOM B630VG User s Manual C600 Carrier WDT to Header When WDRST switch on and produce a high pulse will PM_SYSRST pull low let system reset 3 6 GPIO B219 Module GPIO from EC ...

Page 20: ...cture stored in Flash ROM These BIOS has a built in Setup program that allows users to modify the basic system configuration easily This type of information is stored in CMOS RAM so that it is retained during power off periods When system is turned on PCOM B630VG communicates with peripheral devices on the carrier board and checks its hardware ...

Page 21: ...nough to abort the start up 2 2 Entering Setup Launch System Setup Power on the computer and the system will start POST Power On Self Test process When the message below appears on the screen press DEL key will enter BIOS setup screen Press DEL to enter SETUP If the message disappears before responding and still wish to enter Setup please restart the system by turning it OFF and On or pressing the...

Page 22: ...cations of your system Read only Build Time The BIOS Release Date Processor Brand Name Processor Speed This value will change depend of different CPUs And please make sure the Processor that you ll install will be compatible with PCOM B630VG User s Manual System Date The date format is Day Month Date Year Use or to configure system Date System Time The time format is Hour Minute Second Use or to c...

Page 23: ...functional group and consists of all correlated BIOS settings Table 1 System Setup Utility menus Menu Usage Main Display a summary of the system and configure the system date and time Configuration Configure the system interfaces system management power management thermal management and other system characteristics Boot Configure boot device priority settings Security Configure user authentication...

Page 24: ...Troubleshooting PCOM B630VG User s Manual 4 4 Configuration Use this menu to set up the items of special enhanced features ...

Page 25: ...abled the Hyper threading BIOS Item Usage Item Specific Help Hyper threading Disabled Enabled Default Enabled for Windows XP Linux and Disabled for other OS Active Processor Cores All Default 1 Select the number of physical cores to enable in each processor package Intel Virtualization Technology Disabled Default Enabled N A EIST Disabled Enabled Default N A Turbo Mode Disabled Enabled Default N A...

Page 26: ...necessary to make any change just take the default value BIOS Item Usage Item Specific Help High Precision Timer Disabled Enabled Default Azalia Disabled Enabled Default VT d Disabled Default Enabled Enabled Disabled VT d function on MCH Port 80h Redirection LPC Bus PCIE Bus ...

Page 27: ...OM B630VG User s Manual AMT Configuration BIOS Item Usage Item Specific Help Intel AMT Disabled Enabled Default Disables Enabled iAMT function Un Configure ME Disabled Default Enabled Disable ME Disabled Default Enabled ...

Page 28: ...Troubleshooting PCOM B630VG User s Manual Memory Configuration BIOS Item Usage Item Specific Help ECC Support Disabled Enabled Default Enable Disable memory ECC support ...

Page 29: ...Troubleshooting PCOM B630VG User s Manual LAN Configuration BIOS Item Usage Item Specific Help Launch PXE OpROM Policy Disabled Default Enabled PCH LAN Controller Disabled Enabled Default ...

Page 30: ...o Default IGFX PEG PCIE Select which of IGFX PEG PCI Graphics should be Primary Display or select Secondary Display for switchable Graphics Primary PEG Auto PEG11 PEG12 Primary PCIE Auto PCIE1 PCIE2 PCIE3 PCIE4 PCIE5 PCIE6 PCIE7 Internal Graphics Auto Default Disabled Enabled Keep IGD Enabled based on the setup options ...

Page 31: ...0 Pre Allocated Fixed Graphics Memory size used by the internal Graphics Device DVMT Total Gfx Mem 128MB 256MB Default MAX Select DVMT5 0 Total Graphics Memory size used by the Internal Graphics Device Primary IGFX Boot Display VBIOS Default CRT EFP LFP EFP2 LFP2 EFP3 LCD Panel Type VBIOS Default 640x480 800x600 1024x768 1280x1024 1400x1050 1600x1200 1366x768 1680x1050 1920x1200 1440x900 1600x900 ...

Page 32: ...Troubleshooting PCOM B630VG User s Manual Panel Color Depth 18Bit Default 24Bir ...

Page 33: ... Item Usage Item Specific Help PCI Latency Timer 32 PCI Bus Clocks 64 PCI Bus Clocks 96 PCI Bus Clocks 128 PCI Bus Clocks 160 PCI Bus Clocks 192 PCI Bus Clocks 224 PCI Bus Clocks 248 PCI Bus Clocks Maximum Payload Auto 128 Bytes 256 Bytes 512 Bytes 1024 Bytes 2048 Bytes 4096 Bytes Maximum Read Request Auto 128 Bytes 256 Bytes 512 Bytes ...

Page 34: ...4096 Bytes CPU PCI Express Configuration It is not necessary to make any change just take the default value BIOS Item Usage Item Specific Help PEG0 PEG2 Gen X Auto Gen1 Gen2 Gen3 PEG0 PEG2 ASPM Disabled Auto ASPM L0s ASPM L1 ASPM L0sL1 Enable PEG Disable Enable Auto ...

Page 35: ... s Manual PCH PCI Express Configuration It is not necessary to make any change just take the default value PCI Express Root Port 1 5 7 8 Only take Port 1 as an example It is not necessary to make any change just take the default value ...

Page 36: ... Specific Help PCI Express Root Port 1 5 7 8 Disabled Enabled Default Control PCI Express root port ASPM Disabled Default L0S L1 L0S And L1 Auto Control PCIe Active State Power Management setting PCIe Speed Auto Default Gen1 Gen2 Select PCIe Speed to Gen1 or Gen2 ...

Page 37: ...ge Item Specific Help SATA Controller s Enabled Default Disabled Determines how SATA controller s operate SATA Mode Selection Disabled IDE AHCI RAID Determines how SATA controller s operate SATA Controller Speed Default Gen1 Gen2 Gen3 Port 0 5 Disabled Enabled Hot Plug Disabled Enabled External SATA Disabled Enabled ...

Page 38: ...tion disables legacy support if no USB devices are connected DISABLE option will keep USB devices available only for EFI applications USB3 0 Support Enabled Default Disabled XHCI Hand off Enabled Default Disabled EHCI Hand off Enabled Disabled Default USB Mass Storage Driver Support Enabled Default Disabled PCH USB Configuration USB Ports per Port 0 13 Disable Disabled Default Enabled Control each...

Page 39: ...Funtion ACPI Sleep State S3 Only Default S1 Only Select the highest ACPI sleep state when the SUSPEND button is pressed Restore AC power loss Power Off Power On Last State Select AC Power state when power is re applied after a power failure Wake system with Fixed Time Disabled Default Enabled Enable or disable System wake on alarm event When enabled System will wake on the hr min sec specified Wak...

Page 40: ...Troubleshooting PCOM B630VG User s Manual TPM Configuration BIOS Item Usage Item Specific Help Security Device Support Disabled Default Enabled Enabled Disabled TPM Function ...

Page 41: ...Troubleshooting PCOM B630VG User s Manual Super IO Configuration ...

Page 42: ...Troubleshooting PCOM B630VG User s Manual Serial Port 0 1 Configuration BIOS Item Usage Item Specific Help Serial Port Disable Enable Default Setting Serial Port 1 IRQ ...

Page 43: ...hooting PCOM B630VG User s Manual Watch Dog Timer BIOS Item Usage Item Specific Help WDT Controller Disable Enabled Change Settings WDT Disabled 10 Seconds 20 Seconds 30 Seconds 40 Seconds 50 Seconds 60 Seconds ...

Page 44: ...ware Monitor Provide on board sensor reading information BIOS Item Usage Item Specific Help Smart Fan1 3 Control Disable Enable Default Disable Enable Smart Fan function Smart Fan1 3 start 25 30 35 40 45 50 55 60 65 70 Fan1 3 Full Speed 60 65 70 75 ...

Page 45: ...User s Manual Serial Port Console Configuration Configure console redirection on serial port BIOS Item Usage Item Specific Help Serial Port 1 Console Redirection Disabled Default Enabled Control Console Redirection enable disable ...

Page 46: ...ntrol Console Reirection enable disable Bits per second 9600 19200 57600 115200 Default Select serial port transmission speed The speed must be matched on the other side Long or noisy lines may require lower speeds Data Bits 7 8 Parity None Even Odd Mark Space Stop Bits 1 2 Flow Control None Default Hardware RTS CTS None No flow control RTS CTS Hardware ...

Page 47: ... control XON XOFF Software flow control VT UTF8 Combo Key Support Disabled Enabled Default Recorder Mode Disabled Default Enabled Resolution 100x31 Disabled Default Enabled Legacy OS Redirection Resolution 80x24 80x25 Putty KeyPad VT100 LINUX XTERMR6 SCO ESCN VT400 ...

Page 48: ...ervices ALWAYS do not allow disabling GA20 this option is useful when any RT code is executed above 1MB Choices Upon Request Always Option ROM Messages Set Display mode for Option ROM This item is used to determine the display mode when an optional ROM is initialized during POST When set to Force BIOS the display mode used by AMI BIOS is used Select Keep Current if you want to use the display mode...

Page 49: ...if one is available When Disabled the ROM BIOS of these host adaptors will not be able to capture Interrupt 19 Therefore you will not be able to boot operating systems from any bootable disks attached to these host adaptors Nor will you be able to gain access to their ROM setup utilities Choices Disabled Enabled Launch Storage OpROM Choices Disabled Enabled Full Screen Logo Choices Disabled Enable...

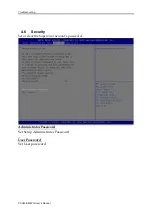
Page 50: ...Troubleshooting PCOM B630VG User s Manual 4 6 Security Set or clear the Supervisor account s password Administrator Password Set Setup Administrator Password User Password Set User password ...

Page 51: ...ll menu then exit setup configure driver Finally resets the system automatically Save Changes and Exit Exit system setup after saving the changes Discard Changes and Reset Reset the system without saving the changes Restore Defaults Restore Load Default Values for all the setup options ...

Page 52: ...ctor Serial ATA Hard Disk Setting for IDE AHCI Reference from PCOM C600 Unlike IDE bus each Serial ATA channel can only connect to one SATA hard disk at a time there are total two connectors J28 J30 two ports on board those 2 Masters in Non AHCI mode these two support 6Gb J10 will be an e SATA which support 3Gb another Mini PCIe support a mSATA feature support 3Gb because SATA hard disk doesn t re...

Page 53: ...select Yes to load in default optimal BIOS setup This will force your BIOS setting back to the initial factory configuration It is recommended to do this so you can be sure the system is running with the BIOS setting that Portwell has highly endorsed As a matter of fact users can load the default BIOS setting any time when system appears to be unstable in boot up sequence Improper Disable Operatio...

Page 54: ...r Please check Monitor connector whether it inserts properly Beep rapidly Power error warning Please check Power mode setting Information Support Question I forget my password of system BIOS what am I supposed to do Answer You can simply short 2 3 pins on JP20 to clean your password Question How to update the BIOS file of the PCOM B630VG Answer 1 Please visit web site of the Portwell download cent...

Page 55: ...CMOS 10 Switch ON the Power Supply then press the del key to BIOS to load Restore Defaults and then select Save Changes and Exit option Note Please visit our technical web site at http www portwell com tw For additional technical information which is not covered in this manual you can mail to tsd mail portwell com tw or you can also send mail to our sales they will be very delighted to forward the...

Page 56: ...ence Memory Area Size Description 0000 003F 1K Interrupt Area 0040 004F 0 3K BIOS Data Area 0050 006F 0 5K System Data 0070 0E2E 54K DOS 0E2F 0F6B 5K Program Area 0F6C 9BFF 562K Available First Meg Conventional memory end at 624K 9C00 9D3F 5K Extended BIOS Area 9D40 9FFF 11K Unused A000 AFFF 64K VGA Graphics B000 B7FF 32K Unused B800 BFFF 32K VGA Text C000 CD7F 54K Video ROM CD80 EFFF 138K Unused ...

Page 57: ...e IRQ 0 System ROM System Timer IRQ 1 System ROM Keyboard Event IRQ 2 Unassigned Usable IRQ IRQ 3 System ROM COM2 IRQ 4 System ROM COM1 IRQ 5 Unassigned Usable IRQ IRQ 6 System ROM Diskette Event IRQ 7 Unassigned Usable IRQ IRQ 8 System ROM Real Time Clock IRQ 9 Unassigned Usable IRQ IRQ 10 Unassigned Usable IRQ IRQ 11 Video ROM Usable IRQ IRQ 12 System ROM IBM Mouse Event IRQ 13 System ROM Coproc...

Reviews: