background image

ROBO-8122VG2R 

Copyright © Portwell 2017                         ROBO-8122VG2R User's Guide     

18 


3  Hardware Configuration  

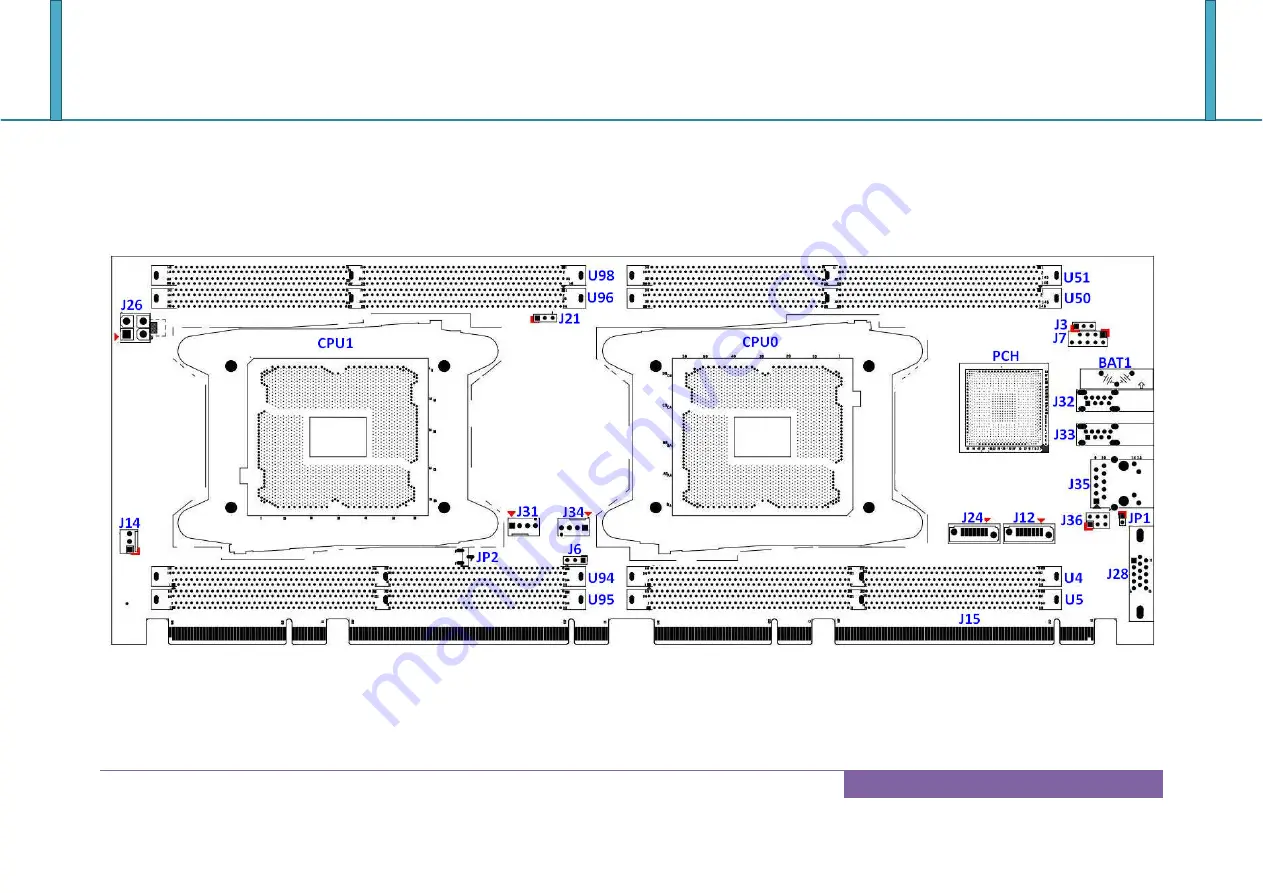
3.1 Jumpers and Connectors 

 
This chapter indicates jumpers’, headers’ and connectors’ locations. Users may find useful information related to hardware settings in this chapter. 


Summary of Contents for ROBO-8122VG2R

Page 1: ...ROBO 8122VG2R Copyright Portwell 2017 ROBO 8122VG2R User s Guide 1 Non Standard PICMG 1 3 Single Host Board Version 1 0 ROBO 8122VG2R...

Page 2: ...ROBO 8122VG2R Copyright Portwell 2017 ROBO 8122VG2R User s Guide 2 Revision History R1 0 Preliminary...

Page 3: ...ifications 16 3 Hardware Configuration 18 3 1 Jumpers and Connectors 18 3 2 Jumpers Settings 19 3 3 Connector Settings 22 4 Signal Descriptions 26 4 1 Watch Dog Signal 26 5 System Resources 32 5 1 Int...

Page 4: ...Introduction 35 6 2 BIOS Setup 36 6 2 1 Main 37 6 2 2 Configuration 39 6 2 3 Security 72 6 2 4 Boot 74 6 2 5 Save Exit 76 7 Troubleshooting 78 7 1 Hardware Quick Installation 78 7 2 BIOS Setting 81 7...

Page 5: ...tion contained herein and hereby expressly disclaims any implied warranties of merchantability or fitness for any particular purpose with regard to any of the foregoing Portwell assumes no liability f...

Page 6: ...a defect in materials or workmanship or due to non conformance to the agreed upon specifications will be repaired or exchanged at Portwell s option and expense Certification Portwell is certified to D...

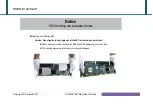
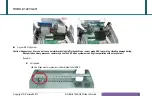
Page 7: ...and Installing SBC Caution Do not just hold any single side of the SBC hold evenly on both sides z Heavy processor cooler may bend the SBC when SBC being held just on one side z The bending may cause...

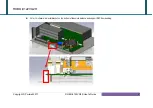
Page 8: ...S I or vendor to use a metal bracket to hold fix the desktop or server grade SBC to avoid the vibration damage during transportation Heavy processor cooler may bend the SBC when systems are during tra...

Page 9: ...ROBO 8122VG2R Copyright Portwell 2017 ROBO 8122VG2R User s Guide 9 z 2U or 1U chassis a mental bracket on the bottom of chassis to balance and support SBC from bending...

Page 10: ...d ASPEED AST1400 GPU to generate for 2D performance It supports only VGA output on bracket It supports four SATA III ports which two are on board and the others are on backplane Besides it also suppor...

Page 11: ...press x8 2x PCI Express x4 by bios setting from each CPU Gen3 up to 8 0 GT s From PCH 1x PCI Express x4 or 4x PCI Express x1 by different bios support Gen 3 up to 8 0 GT s SATA Interface Four SATA III...

Page 12: ...s Operating temperature 0 50 C for 75W CPU limitation Storage temperature 20 80 C Humidity 5 90 non condensing Power supply voltage ATX Board size 338 5mm x 126 39mm 13 33 L x 4 98 W 2 1 Supported Ope...

Page 13: ...ROBO 8122VG2R Copyright Portwell 2017 ROBO 8122VG2R User s Guide 13 2 2 Mechanical Dimensions...

Page 14: ...ROBO 8122VG2R Copyright Portwell 2017 ROBO 8122VG2R User s Guide 14...

Page 15: ...d Onboard Intel Ethernet Connection I217 LM LAN Driver Intel Ethernet Connection I217 LM Version 12 6 47 1 LAN Card 2 Onboard Intel I210 Gigabit Network Connection LAN Driver 2 Intel I210 Gigabit Netw...

Page 16: ...7 1A 6 5A 6 5A System 3 3V 3 8A 2 8A 2 8A System 5V 0 3A 0 2A 0 1A System Device 12V 8 0A 7 3A 6 9A System Device 5V 1 0A 0 9A 0 4A USB 3 0 Loading Test 4 83V 960 mA USB 2 0 Loading Test 4 96V 500 mA...

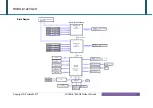
Page 17: ...ROBO 8122VG2R Copyright Portwell 2017 ROBO 8122VG2R User s Guide 17 Block Diagram...

Page 18: ...l 2017 ROBO 8122VG2R User s Guide 18 3 Hardware Configuration 3 1 Jumpers and Connectors This chapter indicates jumpers headers and connectors locations Users may find useful information related to ha...

Page 19: ...jumper pins Open or N C Not Connected means removing a jumper cap from jumper pins Users can refer to Figure 1 for the Jumper allocations Jumper Table The jumper settings are schematically depicted in...

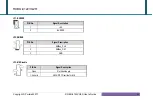
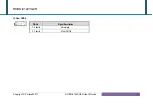
Page 20: ...BO 8122VG2R User s Guide 20 JP1 BUZZER JP2 SMBUS JP3 ME Disable PIN No Signal Description 1 5V 2 BUZZER PIN No Signal Description 1 SMBus_CLK 2 SMBus_DAT 3 GND PIN No Signal Description Open Not Overr...

Page 21: ...ROBO 8122VG2R Copyright Portwell 2017 ROBO 8122VG2R User s Guide 21 J3 Clear CMOS PIN No Signal Description 1 2 shorts Normal 2 3 shorts Clear CMOS...

Page 22: ...interface connectors Connector Function List Connector Function Remark J12 J24 SATA Connector 6Gb s J14 System Fan Power Control J26 ATX 4Pin 12V Power Connector J28 VGA Connector J31 J34 CPU Fan Powe...

Page 23: ...Portwell 2017 ROBO 8122VG2R User s Guide 23 J14 System Fan Power Control J26 ATX 4Pin 12V Power Connector PIN No Signal Description 1 Ground 2 FAN PWM_CONTROL 3 Sense output PIN No Signal Description...

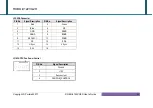
Page 24: ...onnector PIN No Signal Description PIN No Signal Description 1 Red 2 Green 3 Blue 4 NC 5 GND 6 RGND 7 GGND 8 BGND 9 KEY 5V 10 SGND 11 NC 12 SDA 13 H Sync 14 V Sync 15 SCL 16 J31 J34 CPU Fan Power Cont...

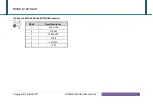
Page 25: ...ROBO 8122VG2R Copyright Portwell 2017 ROBO 8122VG2R User s Guide 25 J36 Power SATA LAN Link I210AT LED connector PIN No Signal Description 1 Power LED 2 5VDUAL 3 LAN Act LED 4 3VSB 5 SATA LED 6 VCC3...

Page 26: ...rtwell PET tool PET_WDT_Available Declaration It can verify the watch dog timer is available Prototype int PET_WDT_Available Parameter None Return Value If the return value 0 is success otherwise retu...

Page 27: ...unsigned char minimum unsigned char maximum Parameter type In The type specifies the watch dog timer count unit minimum Out Minimum value maximum Out Maximum value Return Value If the return value 0 i...

Page 28: ...res i e reload the watch dog timer within the specified timer out or the system will reboot when it counts down to 0 Prototype int PET_WDT_SetConfig int type unsigned char timeout Parameter type In Th...

Page 29: ...imeout value Prototype int PET_WDT_GetConfig int type unsigned char timeout Parameter type Out Two type SECOND_MODE and MINUTE_MODE timeout Out Timeout value Return Value If the return value 0 is succ...

Page 30: ...timeout value to prevent the system from rebooting Prototype int PET_WDT_Trigger Parameter None Return Value If the return value 0 is success otherwise return an error code Sample Code 01 unsigned cha...

Page 31: ...op its timer count down Prototype int PET_WDT_Disable Parameter None Return Value If the return value 0 is success otherwise return an error code Sample Code 01 unsigned char timeout 10 02 PET_WDT_Set...

Page 32: ...s which supports DDR4 Register memory The maximum memory can be up to 256GB Memory clock and related settings can be detected by BIOS via SPD interface Watch out the contact and lock integrity of memo...

Page 33: ...g peripheral devices and secure it WARNING Please ensure that mother board is properly inserted and fixed by mechanism Note Please refer to section 6 3 1 to 6 3 4 to install INF Graphic LAN 5 3 1Chips...

Page 34: ...Graphic driver in the ROBO 8122VG2R CD title The driver supports Windows Server 2012 5 3 3 Intel LAN I210AT I217LM Gigabit Ethernet Controller Intel I210AT Gigabit Ethernet controller and route to BP...

Page 35: ...er s Guide 35 6 BIOS Setup Items 6 1 Introduction The following section describes the BIOS setup program The BIOS setup program can be used to view and change the BIOS settings for the module Only exp...

Page 36: ...disappears before responding and still wish to enter Setup please restart the system by turning it OFF and On or pressing the RESET button It can be also restarted by pressing Ctrl Alt and Delete keys...

Page 37: ...ROBO 8122VG2R Copyright Portwell 2017 ROBO 8122VG2R User s Guide 37 6 2 1 Main Use this menu for basic system configurations such as time date etc...

Page 38: ...ll 2017 ROBO 8122VG2R User s Guide 38 Feature Description Options System Date The date format is Day Month Date Year Use or to configure system Date System Time The time format is Hour Minute Second U...

Page 39: ...ROBO 8122VG2R Copyright Portwell 2017 ROBO 8122VG2R User s Guide 39 6 2 2 Configuration Use this menu to set up the items of special enhanced features...

Page 40: ...ROBO 8122VG2R Copyright Portwell 2017 ROBO 8122VG2R User s Guide 40 CPU Configuration CPU Configuration Parameters...

Page 41: ...Options Enable Intel TXT Support Enables Intel Trusted Execution Technology Configuration Please disable EV DFX Features when TXT is enabled Disable Enable VMX Enables the Vanderpool Technology takes...

Page 42: ...ROBO 8122VG2R Copyright Portwell 2017 ROBO 8122VG2R User s Guide 42 Chipset Configuration Configuration Chipset feature...

Page 43: ...8122VG2R Copyright Portwell 2017 ROBO 8122VG2R User s Guide 43 Feature Description Options Memory Frequency Maximum Memory Frequency Selections in Mhz Do not select Reserved Auto 1333 1600 1867 2133...

Page 44: ...8122VG2R User s Guide 44 Memory Topology Show only Displays memory topology with Dimm population information Each sockets has 2 Nodes iMC s numbered from 0 7 each node supports upto 2 channels 0 1 and...

Page 45: ...ROBO 8122VG2R Copyright Portwell 2017 ROBO 8122VG2R User s Guide 45 LAN Configuration Configuration on Board LAN device...

Page 46: ...abled PCH Internal LAN Enable Disable PCH Internal LAN Enabled Disabled i217 Legacy PXE Rom Launch Legacy PXE Rom Disable Not launch Rom Enable Force launch Rom Disable Enable PCI Express Root Port 3...

Page 47: ...ROBO 8122VG2R Copyright Portwell 2017 ROBO 8122VG2R User s Guide 47 Graphics Configuration Configuration Graphics Settings...

Page 48: ...2017 ROBO 8122VG2R User s Guide 48 Feature Description Options Active Video Select active Video type Offboard Device Onboard Device Launch Video OPROM Controls the execution of UEFI and Legacy Video...

Page 49: ...ROBO 8122VG2R Copyright Portwell 2017 ROBO 8122VG2R User s Guide 49 PCI PCIE Configuration PCI PCI X and PCI Express Settings...

Page 50: ...e 4G Decoding Enables or Disables 64bit capable Devices to be Decoded in Above 4G Address Space Only if System Supports 64 bit PCI Decoding Disabled Enabled SR IOV Support If system has SR IOV capable...

Page 51: ...ROBO 8122VG2R Copyright Portwell 2017 ROBO 8122VG2R User s Guide 51 CPU0 1 PCIE Configuration...

Page 52: ...ROBO 8122VG2R Copyright Portwell 2017 ROBO 8122VG2R User s Guide 52 Feature Description Options IOU0 1 IIO PCIe Port 2 Port3 Select PCIe port Bifuration for select slot s Auto x8x8 x16...

Page 53: ...ROBO 8122VG2R Copyright Portwell 2017 ROBO 8122VG2R User s Guide 53 Socket 0 1 PcieD02F0 3F0 Port 2A 3A Settings related to PCI Express Ports 0 1A 1B 2A 2B 2C 2D 3A 3B 3C 3D...

Page 54: ...ed to disable the port and hide its CFG space Auto Enable Disable Hot Plug Capable This option specifies if the link is considered Hot Plug capable Disable Enable PCI E Port Link This option disables...

Page 55: ...ROBO 8122VG2R Copyright Portwell 2017 ROBO 8122VG2R User s Guide 55 PCI Express Root Port 5 PCI Express Root Port 5 Settings...

Page 56: ...Enable Disable Disabled Enabled PCIe Speed Configure PCIe Speed Auto Gen1 Gen2 PME Interrupt PCI Express PME Interrupt Enable Disable Disabled Enabled MSI PCIE MSI Enable Disable Disabled Enabled Ext...

Page 57: ...ROBO 8122VG2R Copyright Portwell 2017 ROBO 8122VG2R User s Guide 57 SATA Configuration SATA Device Options Settings...

Page 58: ...icy should be set to legacy to make this selection effective Enabled Disabled Alternate Device ID on RAID Enable alternate device ID on RAID devices Disabled Enabled Load EFI Driver for RAID In RAID m...

Page 59: ...ROBO 8122VG2R Copyright Portwell 2017 ROBO 8122VG2R User s Guide 59 USB Configuration USB Configuration Parameters...

Page 60: ...driver Enabled Disabled EHCI Hand off This is a workaround for OSes without EHCI hand off support The EHCI ownership change should be claimed by EHCI driver Disabled Enabled USB Mass Storage Driver Su...

Page 61: ...ROBO 8122VG2R Copyright Portwell 2017 ROBO 8122VG2R User s Guide 61 Power Control Configuration System Power Control Configuration Parameters...

Page 62: ...pressed Suspend Disabled S1 CPU Stop Clock S3 Suspend to RAM Restore AC Power Loss Select S0 S5 for ACPI state after a G3 Power Off Power On Last State RTC Wake up Enabled Enable or disable System wa...

Page 63: ...ROBO 8122VG2R Copyright Portwell 2017 ROBO 8122VG2R User s Guide 63 Super IO Configuration System Super IO Chip Parameters...

Page 64: ...iption Options Serial Port Port 1 Port 2 Enable or Disable Serial Port COM Enabled Disabled Watch Dog Timer Enabled Enable Disable Watch Dog Timer Disabled Enabled Timer Unit Select Timer count unit o...

Page 65: ...ROBO 8122VG2R Copyright Portwell 2017 ROBO 8122VG2R User s Guide 65 H W Monitor Configuration Monitor hardware status...

Page 66: ...t CPU Fan Mode CPU Smart Fan Mode Select Automatic Mode Full on Mode Fan off temperature limit Fan will off when temperature lower than this limit 30 0 127 Smart System Fan Start Fan will work when te...

Page 67: ...ROBO 8122VG2R Copyright Portwell 2017 ROBO 8122VG2R User s Guide 67 Serial Port Console Redirection Serial Port Console Redirection...

Page 68: ...ROBO 8122VG2R Copyright Portwell 2017 ROBO 8122VG2R User s Guide 68 Feature Description Options Console Redirection Enabled Console Redirection Enable or Disable Disabled Enabled...

Page 69: ...ROBO 8122VG2R Copyright Portwell 2017 ROBO 8122VG2R User s Guide 69 COM 0 1 Serial Port Console Redirection Settings COM0 COM1 Serial Port Console Redirection settings...

Page 70: ...ors Even parity bit is 0 if the num of 1 s in the data bits is even Odd parity bit is 0 if num of 1 s in the data bits is odd Mark parity bit is always 1 Space parity bit is always 0 Mark and Space Pa...

Page 71: ...sables extended terminal resolution Disabled Enabled Legacy OS Redirection Resolution On Legacy OS the Number of Rows and Columns supports redirection 80x24 80x25 Putty KeyPad Select FunctionKey and K...

Page 72: ...2VG2R Copyright Portwell 2017 ROBO 8122VG2R User s Guide 72 6 2 3 Security This section lets you set security passwords to control access to the system at boot time and or when entering the BIOS setup...

Page 73: ...2R User s Guide 73 Feature Description Options Password Check Mode Setup check password when enter setup screen Power on check password on every time system power on Setup Power on Administrator Passw...

Page 74: ...ROBO 8122VG2R Copyright Portwell 2017 ROBO 8122VG2R User s Guide 74 6 2 4 Boot Use this menu to specify the priority of boot devices...

Page 75: ...On Off Post Report Post Report Support Enabled Disabled Disabled Enabled Summary Screen Summary Screen Support Enabled Disabled Disabled Enabled CSM Support Enable Disable CSM Support Enabled Disable...

Page 76: ...ROBO 8122VG2R Copyright Portwell 2017 ROBO 8122VG2R User s Guide 76 6 2 5 Save Exit...

Page 77: ...e Changes and Reset Reset the system after saving the changes Discard Changes and Reset Reset system setup without saving any changes Restore Defaults Restore Load Default values for all the setup opt...

Page 78: ...chapter will focus on system integration issues in terms of BIOS setting and OS diagnostics 7 1 Hardware Quick Installation ATX Power Setting Unlike other Single board computer ROBO 8122VG2AR supports...

Page 79: ...re total four connectors SATA0 3port Two ports onboard connector two ports route to gold finger on backplane The installation of Serial ATA is simpler and easier than IDE because SATA hard disk doesn...

Page 80: ...User s Guide 80 ROBO 8122VG2AR can support four SATA interface SATAIII 6 0Gb s on board It has two J12 J24 SATA ports on board two SATA ports on PICMG backplane The SATA interface shall support both 1...

Page 81: ...that you have a successful start with ROBO 8122VG2AR it is recommended when going with the boot up sequence to hit delete or Esc key and enter the BIOS setup menu to tune up a stable BIOS configurati...

Page 82: ...PICMG 1 3 backplane with ROBO 8122VG2AR board It is very important Answer No Use the standard PICMG 1 3 backplane will let the ROBO 8122VG2AR to damage The gold finger circuit design of the ROBO 8122...

Page 83: ...ROBO 8122VG2R Copyright Portwell 2017 ROBO 8122VG2R User s Guide 83...

Page 84: ...ot my password of system BIOS what am I supposed to do Answer You can switch off your power supply then find the J3 on the ROBO 8122VG2AR SBC to set it from 1 2 short to 2 3 short and wait 5 seconds t...

Page 85: ...Please visit web site of Portwell download center as below hyperlink http www portwell com tw support download_center php Registering an account in advance is a must The E Mail box should be an exist...

Page 86: ...er off and wait for 10 seconds before powering on http www portwell com tw support download_center php If you have other additional technical information or request which is not covered in this manual...

Page 87: ...PBT is a brand new on line utility which innovated by Portwell PBT now is available for Portwell s premiere customers who are able to add customized BIOS logo and change BIOS default settings on Ameri...

Page 88: ...Pin Count Interface Specification Revision 1 0 LPC http www intel com design chipsets industry lpc htm Universal Serial Bus USB Specification Revision 2 0 http www usb org home PCI Specification Revi...

Reviews: