background image

BIOS Setup Information 

RUBY-7720VG2A User’s Manual 

4-7 


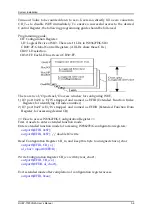
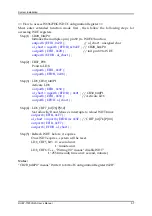
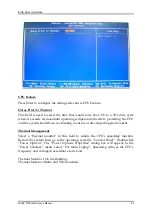
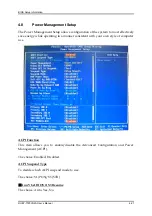
CPU Feature 

Press Enter to configure the settings relevant to CPU Feature. 

 
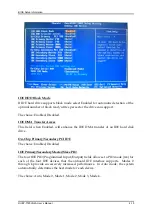
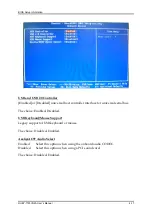
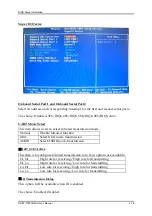
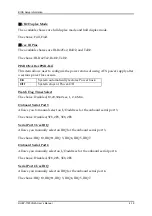
Delay Prior To Thermal 

This field is used to select the time that would force the CPU to a 50% duty cycle 
when it exceeds its maximum operating temperature therefore protecting the CPU 
and the system board from overheating to ensure a safe computing environment. 
 

Thermal Management 

Select a “thermal monitor” in this field to enable the CPU’s speedstep function. 
Restart the system then go to the operating system’s “Control Panel”. Double-click 
“Power Options”. The “Power Options Properties” dialog box will appear. In the 
“Power Schemes” menu, select “Por table/Laptop”. Speedstep reduces the CPU’s 
frequency and voltage in accordance to its load. 
 
Thermal Monitor 1 On die throtting. 
Thermal Monitor 2 Ratio and VID transition. 


Summary of Contents for RUBY-7720VG2A

Page 1: ...RUBY 7720VG2A Micro ATX Mainboard User s Manual Version 1 0 Copyright Portwell Inc 2009 All rights reserved All other brand names are registered trademarks of their respective owners ...

Page 2: ...ernet Controller 3 4 3 3 4 Audio Controller 3 5 3 4 Clear CMOS Operation 3 5 3 5 WDT Function 3 5 3 6 GPIO 3 8 3 6 1 Pin assignment 3 8 3 6 2 Programming Guide 3 9 Chapter 4 BIOS Setup Information 4 1 4 1 Entering Setup 4 1 4 2 Main Menu 4 2 4 3 Standard CMOS Setup Menu 4 3 4 4 IDE Adaptors Setup Menu 4 5 4 5 Advanced BIOS Features 4 6 4 6 Advanced Chipset Features 4 11 4 7 Integrated Peripherals ...

Page 3: ...ry and Compact Flash to get a safe installation and provides a programming guide of Watch Dog Timer function Chapter 4 BIOS Setup Information Specifies the meaning of each setup parameters how to get advanced BIOS performance and update new BIOS In addition POST checkpoint list will give users some guidelines of trouble shooting Chapter 5 Troubleshooting Provide variously of useful tips to quickly...

Page 4: ... 33 66 100 synchronous mode feature To expand storage using it also include 1 Type I II compact flash socket The onboard Super I O chip supports four serial ports one is RS232 422 485 selectable and three are in RS232 data format Besides it can also support dual display function by VGA LVDS interfaces RUBY 7720VG2A can support one PCI Express X 16 slot one PCI Express X 1 slot and two PCI slots It...

Page 5: ...r with Ultra DMA 33 66 100 SSD One Compact Flash Type I II socket support UDMA SATA Interface Two SATA connectors data transfer rates up to 150MB s Serial Ports Support four serial ports RS 232selectable x 3 RS 232 422 485 selectable x 1 IR Interface IrDA 1 0 compatible Parallel Port Support one parallel port USB Interface Support eight USB Universal Serial Bus ports four at rear I O four ports in...

Page 6: ...ntel GMA 900 On board Ethernet LAN Two Gigabit Ethernet 10 100 1000 M bits sec LAN port High Driving GPIO Programmable 8 bit Digital I O interface System Monitoring Feature Monitor CPU temperature system temperature and major power sources etc Outline Dimension L X W 243 8mm 9 6 X 243 8mm 9 6 Power Requirements Typical 5V 4 0A 12V 6 5A 3 3V 3A Operating Temperature 0 C 55 C Storage Temperature 20 ...

Page 7: ...System Overview RUBY 7720VG2A User s Manual 1 4 1 3 1 Mechanical Drawing RUBY 7720VG2A Mechanical Drawing ...

Page 8: ...System Overview RUBY 7720VG2A User s Manual 1 5 1 4 System Architecture All of details operating relations are shown in RUBY 7720VG2A System Block Diagram RUBY 7720VG2A System Block Diagram ...

Page 9: ...iguration jumpers on RUBY 7720 7721 are in the proper position The default settings are indicated with a star sign Ì 2 1 Jumper Setting In the following sections Short means covering a jumper cap over jumper pins Open or N C Not Connected means removing a jumper cap from jumper pins Users can refer to Figure 2 1 for the Jumper allocations Figure 2 1 RUBY 7720 Jumper and Connector Locations TOP ...

Page 10: ...utput JP3 LCD Panel Voltage Setup JP3 Signal Description 1 2 Short 3 3V TFT LCD Ì 2 3 Short 5V TFT LCD JP4 LCD Backlight enable Voltage Setup JP4 Signal Description 1 2 Short 3 3V TFT LCD Ì 2 3 Short 5V TFT LCD JP6 CMOS Setup JP6 Signal Description 1 2 Short Clear CMOS Setup 2 3 Short Normal Keep CMOS Setup Ì JP7 COM3 RS232 RS422 RS485 Function Select COM Function Jumper setting RS 232 5 6 9 11 10...

Page 11: ...Signal Description 1 2 Short Master 1 2 Open Slave Ì JP10 CPU FSB Setup this setting is just for RUBY 7720 JP10 Signal Description 1 2 Short FSB 400MHz Ì 2 3 Short FSB 533MHz JP11 CPU Type Setup this setting is just for RUBY 7720 JP11 Signal Description 1 2 Short BANIAS Ì 2 3 Short DOTHAN JP12 COM4 RI Function Setup JP12 Signal Description 1 2 Short 5V Output 3 4 Short RI Function Ì 5 6 Short 12V ...

Page 12: ... Mouse Connector J13 System Fan1 Connector 1 3 Pin Wafer J14 System Panel Connectors 2 5 Pin Header J15 PCI Express 16 Slot J17 USB 4 5 Connector 2 5 1 Pin Header J18 USB 6 7 Connector 2 5 1 Pin Header J19 PCI Express 1 Slot J20 GPIO Connector 2 5 Pin Header J21 GPIO Connector 2 1 Pin Header J22 GPIO Connector 2 1 Pin Header J23 CPU Fan Connector 1 3 Pin Wafer J24 System Fan2 Connector 1 3 Pin Waf...

Page 13: ...B 15 Pin female J2 COM1 RS 232 COM2 RS 232 D SUB9 2 J3 PS 2 Keyboard Mouse Connector J4 Line OUT Line IN Microphone connector J5 LAN2 RJ 45 USB 2 3 Connector J6 LAN1 RJ 45 USB 0 1 Connector J7 Audio CD IN Connector J9 IR Interface 1 6 Pin Header Pin No Signal Description 1 VCC 2 NC 3 IRRX 4 GND 5 IRTX 6 NC ...

Page 14: ...19 LVDSB_DATA 1 20 LVDSB_DATA 1 21 LVDSB_DATA 2 22 LVDSB_DATA 2 23 NC 24 NC 25 LVDSB_CLKP 26 LVDSB_CLKM 27 NC 28 NC 29 GND 30 GND J11 Inverter Power Connector 1 5 Pin wafer Pin No Signal Description 1 VCC 2 GND 3 12V 4 GND 5 BACKLIGH_EN J13 System Fan1 Connector 1 3 Pin Wafer Pin No Signal Description 1 Fan Smart Speed 2 12V 3 Fan Speed Detect J14 System Panel Connectors 2 5 Pin Header Pin No Sign...

Page 15: ... 1 Pin Header Pin No Signal Description Pin No Signal Description 1 5V 2 5V 3 USB_D4 4 USB_D5 5 USB_D4 6 USB_D5 7 GND 8 GND 9 10 NC J19 PCI Express 1 Slot J20 GPIO Connector 2 5 Pin Header Pin No Signal Description Pin No Signal Description 1 GPI4 2 GPO0 3 GPI 5 4 GPO1 5 GPI 6 6 GPO2 7 GPI 7 8 GPO3 9 GND 10 5V J21 GPIO Connector 2 1 Pin Header Pin No Signal Description 1 GPIO_35 2 GND J22 GPIO Con...

Page 16: ...n Pin No Signal Description 1 DCD 4 2 RXD 4 3 TXD 4 4 DTR 4 5 GND_COM4 6 DSR 4 7 RTS 4 8 CTS 4 9 V_RI4 10 J26 Compact Flash Connector Vertical type Pin No Signal Description Pin No Signal Description 1 GND 26 N C 2 DATA 3 27 DATA 11 3 DATA 4 28 DATA 12 4 DATA 5 29 DATA 13 5 DATA 6 30 DATA 14 6 DATA 7 31 DATA 15 7 HDC_CS0 32 HDC_CS1 8 GROUND 33 GROUND 9 GROUND 34 IOR 10 GROUND 35 IOW 11 GROUND 36 V...

Page 17: ...eader Pin No Signal Description Pin No Signal Description 1 DCD 4 2 RXD 4 3 TXD 4 4 DTR 4 5 GND_COM4 6 DSR 4 7 RTS 4 8 CTS 4 9 V_RI4 10 J28 Floppy Disk Driver Connector J29 SATA2 Connector J30 SATA1 Connector J31 ATX Power In Connector 2 10 Pin Pin No Signal Description Pin No Signal Description 1 3V3 11 3V3 2 3V3 12 12V 3 GND 13 GND 4 5V 14 Power ON 5 GND 15 GND 6 5V 16 GND 7 GND 17 GND 8 PWROK 1...

Page 18: ...D 25 SLCT 26 GND J33 Primary IDE Interface Connector 2 20 1 Pin Box Header Pin No Signal Description Pin No Signal Description 1 RESET 2 GROUND 3 DATA 7 4 DATA 8 5 DATA 6 6 DATA 9 7 DATA 5 8 DATA 10 9 DATA 4 10 DATA 11 11 DATA 3 12 DATA 12 13 DATA 2 14 DATA 13 15 DATA 1 16 DATA 14 17 DATA 0 18 DATA 15 19 GROUND 20 N C 21 IDE DRQ 22 GROUND 23 IOW 24 GROUND 25 IOR 26 GROUND 27 IDE CHRDY 28 CABLE SEL...

Page 19: ...DATA 5 29 DATA 13 5 DATA 6 30 DATA 14 6 DATA 7 31 DATA 15 7 HDC_CS0 32 HDC_CS1 8 GROUND 33 GROUND 9 GROUND 34 IOR 10 GROUND 35 IOW 11 GROUND 36 VCC_COM 12 GROUND 37 IRQ15 13 VCC 38 VCC 14 GROUND 39 CSEL 15 GROUND 40 N C 16 GROUND 41 HDD_RESET 17 GROUND 42 IORDY 18 SA2 43 SDREQ 19 SA1 44 SDACK 20 SA0 45 HDD_ACTIVE 21 DATA 0 46 PDIAG 22 DATA 1 47 DATA 8 23 DATA 2 48 DATA 9 24 N C 49 DATA 10 25 N C 5...

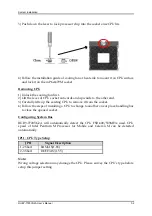
Page 20: ...programming 3 1 Intel Pentium M Celeron M Processor Installing Intel mPGA479M CPU Socket 1 Lift the handling lever of CPU socket outwards and upwards to the other end 2 Align the processor pins with pinholes on the socket Make sure that the notched corner or dot mark pin 1 of the CPU corresponds to the socket s bevel end Then press the CPU gently until it fits into place If this operation is not e...

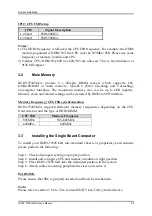
Page 21: ... 3 Carefully lifts up the existing CPU to remove it from the socket 4 Follow the steps of installing a CPU to change to another one or place handling bar to close the opened socket Configuring System Bus RUBY 7720VG2A will automatically detect the CPU FSB 400 533MHz used CPU speed of Intel Pentium M Processor for Mobile and Celeron M can be detected automatically JP11 CPU Type Setup JP11 Signal De...

Page 22: ...y clock and related settings can be detected by BIOS via SPD interface Memory frequency CPU FSB synchronization RUBY 7720VG2A supports different memory frequencies depending on the CPU front side bus and the type of DDR2 DIMM CPU FSB Memory Frequency 533MHz 533 400MHz 400MHz 400MHz 3 3 Installing the Single Board Computer To install your RUBY 7720VG2A into standard chassis or proprietary environme...

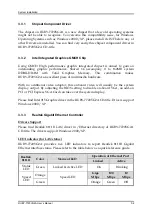
Page 23: ...iece of multimedia hardware With no additional video adaptor this onboard video will usually be the system display output By adjusting the BIOS setting to disable on board VGA an add on PCI or PCI Express VGA Card can take over the system display Please find Intel 915 Graphic driver in the RUBY 7720VG2A CD title Drivers support Windows 2000 XP 3 3 3 Realtek Gigabit Ethernet Controller Drivers Supp...

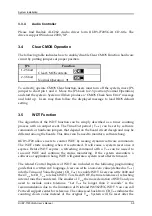
Page 24: ... different among the boards This timer can be used to monitor a software hang RUBY 7720 allows users to control WDT by issuing dynamic software commands The WDT starts counting when it is activated It will cause a system reset once it expires Before WDT expires a refreshing command with a Twd can be issued to re count WDT and continue the status monitoring If the system encounters a software or ap...

Page 25: ...ing WDT 1 IO port 0x2E is H W strapped and named as EFIR Extended Function Index Register for identifying CR index number 2 IO port 0x2F is H W strapped and named as EFDR Extended Function Data Register for accessing desired CR How to access W83627HG Configuration Register First it needs to enter extended function mode Enter extended function mode for accessing W83627HG configuration registers out...

Page 26: ...tportb EFIR 0x07 outportb EFDR 0x08 Step 3 LD8_CR30_bit0P1 Activate LD8 outportb EFIR 0x30 al_char1 inportb EFDR 0x01 CR30_bit0P1 outportb EFIR 0x30 Activate LD8 outportb EFDR al_char1 Step 4 LD8_CRF7_bit 7 6 P 0 0 Not allow K B and Mouse s interrupts to reload WDT timer outportb EFIR 0xF7 al_char1 inportb EFDR 0x3F CRF7_bit 7 6 P 0 0 outportb EFIR 0xF7 outportb EFDR al_char1 Step 5 Refresh WDT be...

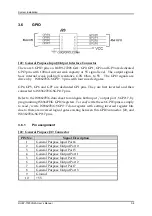
Page 27: ...P4 7 pins Refer to the W83627HG data sheet to configure both input output port SGP0 7 by programming W83627HG GPIO registers To read write these 8 GPIO pins is simply to read write W83627HG SGP0 7 data register with setting inversed register bits due to there are inversed logical gates existing between this GPIO connector J20 and W83627HG SGP0 7 pins 3 6 1 Pin assignment J22 General Purpose I O Co...

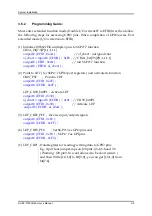
Page 28: ...al_char1 2 Point to LD7 for SGP0 7 GPIO port registers and activate its function CR07_P07 Point to LD7 outportb EFIR 0x07 outportb EFDR 0x07 LD7_CR30_bit0P1 Activate LD7 outportb EFIR 0x30 al_char1 inportb EFDR 0x01 CR30_bit0P1 outportb EFIR 0x30 Activate LD7 outportb EFDR al_char1 3 LD7_CRF2_PFF Inverse input output signals outportb EFIR 0xF2 outportb EFDR 0xFF 4 LD7_CRF0_PF0 Set SGP0 3 as GPO pi...

Page 29: ...r reboot the computer Wait the message Hit DEL if you want to run SETUP appears press Del key immediately to enter BIOS setup program If the message disappears before you respond but you still wish to enter Setup please restart the system to try COLD START again by turning it OFF and then ON or touch the RESET button You may also restart from WARM START by pressing Ctrl Alt and Delete keys simulta...

Page 30: ...MOS Setup Utility a Main Menu is presented The Main Menu allows user to select from eleven setup functions and two exit choices Use arrow keys to switch among items and press Enter key to accept or bring up the sub menu Note It is strongly recommended to reload Optimum Setting if CMOS is lost or BIOS is updated ...

Page 31: ... the arrow keys to highlight the item and then use the PgUp PgDn or keys to select the value or number you want in each item and press Enter key to certify it Follow command keys in CMOS Setup table to change Date Time Drive type and Boot Sector Virus Protection Status Note Oblique parameters are base on memory capacity which user adopts on single board ...

Page 32: ...b menu of detailed options Video EGA VGA CGA 40 CGA 80 MONO Select the default video device Halt On All Errors No Errors All But Keyboard All Errors The boot process will halt on all errors No Errors The POST will not stop of any type of error All But Keyboard The boot process will stop for any error except a keyboard error Base Memory 640K Displays the amount of conventional memory detected durin...

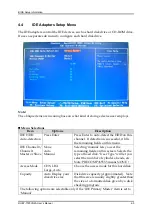
Page 33: ...successful it fills the remaining fields on this menu IDE Channel 0 Channel 1 Master or Slave None Auto Manual Selecting manual lets you set the remaining fields on this screen Selects the type of fixed disk User Type will let you select the number of cylinders heads etc Note PRECOMP 65535 means NONE Access Mode CHS LBA Large Auto Choose the access mode for this hard disk Capacity Auto Display you...

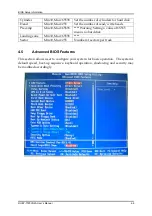
Page 34: ... heads Precomp Min 0 Max 65535 Warning Setting a value of 65535 means no hard disk Landing zone Min 0 Max 65535 Sector Min 0 Max 255 Number of sectors per track 4 5 Advanced BIOS Features This section allows user to configure your system for basic operation The system s default speed boot up sequence keyboard operation shadowing and security may be modified accordingly ...

Page 35: ...the system board from overheating to ensure a safe computing environment Thermal Management Select a thermal monitor in this field to enable the CPU s speedstep function Restart the system then go to the operating system s Control Panel Double click Power Options The Power Options Properties dialog box will appear In the Power Schemes menu select Por table Laptop Speedstep reduces the CPU s freque...

Page 36: ...function is enabled and someone attempt to write data into this area BIOS will show a warning message on screen and alarm beep Enabled Activates automatically when the system boots up causing a warning message to appear when anything attempts to access the boot sector or hard disk partition table Disabled No warning message will appear when anything attempts to access the boot sector or hard disk ...

Page 37: ...M and Disabled Boot Other Device Select your Boot Device Priority The choice Enabled Disabled LAN PXE Boot This function decide whether to invoke the PXE Boot ROM of the onboard LAN chip The choice Enabled Disabled Swap Floppy Drive If the system has two floppy drives choose enable to assign physical driver B to logical drive A and Vice Versa The choice Enabled Disabled Boot Up Floppy Seek Enabled...

Page 38: ...rokes begins to repeat The choice 250 500 750 and 1000 Default 250 Security Option Select whether the password is required every time the system boots or only when you enter setup System The system will not boot and access to Setup will be denied if the correct password is not entered at the prompt Setup The system will boot but access to Setup will be denied if the correct password is not entered...

Page 39: ...be stated that these items should never need to be altered The default settings have been chosen because they provide the best operating conditions for the system The only time user might consider making any changes would be if you discovered that data was being lost while during system operation DRAM Timing Selectable This field is used to select the timing of the DRAM The choice By SPD Manual CA...

Page 40: ...arge This option sets the number of cycles required for the RAS to accumulate its charge before the SDRAM refreshes Precharge Delay tRAS The options are Auto 4 5 6 7 8 9 10 11 12 13 14 and 15 SLP_S4 Assertion Width The options are 1 to 2 Sec 2 to 3 Sec 3 to 4 Sec and 4 to 5 Sec System BIOS Cacheable The choice Enabled Disabled Video BIOS Cacheable The choice Enabled Disabled Memory Hole At 15M 16M...

Page 41: ...his field shows the current DVMT mode When set to Fixed Mode the graphics driver will reserve a fixed portion of the system memory as graphics memory When set to DVMT Mode the graphics chip will dynamically allocate system memory as graphics memory according to system and graphics requirements When set to Both Mode the graphics driver will allocate a fixed amount of memory as dedicated graphics me...

Page 42: ...oice 64MB 128MB Boot Display The choice CRT LVDS CRT LVDS Panel Scaling The choice Auto On OFF Panel Type The choice 640x480 18bit 1ch 800x600 18bit 1ch 1024x768 18bit 1ch 1400x1050 18bit 2ch FWH Write Protection The choice Enabled Disabled 4 7 Integrated Peripherals OnChip IDE Device Move the cursor to this field and press Enter The following screen will appear ...

Page 43: ...led will enhance the IDE DMA transfer of an IDE hard disk drive On Chip Primary Secondary PCI IDE The choice Enabled Disabled IDE Primary Secondary Master Slave PIO The four IDE PIO Programmed Input Output fields allow set a PIO mode 0 4 for each of the four IDE devices that the onboard IDE interface supports Modes 0 through 4 provide successively increased performance In Auto mode the system auto...

Page 44: ...ster 1 IDE Slave and 2 SATA supporting maximum of 2 drives on each channel Enhanced Mode This option allows you to use both IDE and SATA drives allowing a maximum of 4 drives 1 IDE Master 1 IDE Slave and 2 SATA SATA Only This option automatically sets the SATA drives to Primary Master mode Since the SATA drives are in Master mode you cannot set the IDE drive to Master mode PATA IDE Mode This field...

Page 45: ... interface for universal serial bus The choice Enabled Disabled USB Keyboard Mouse Support Legacy support of USB keyboard or mouse The choice Disabled Enabled Azalia AC97 Audio Select Enabled Select this option when using the onboard audio CODEC Disabled Select this option when using a PCI sound card The choice Disabled Enabled ...

Page 46: ...ssion mode Normal Disable Infrared function IrDA Select IrDA mode transmission ASKIR Select ASKIR mode transmission RxD TxD Active This item is to configure Infrared transmission rate Four options are available Hi Hi High rate for receiving High rate for transmitting Hi Lo High rate for receiving Low rate for transmitting Lo Hi Low rate for receiving High rate for transmitting Lo Lo Low rate for r...

Page 47: ...k Off System stays at Power Off Watch Dog Timer Select The choice Disabled 10 20 30 40 sec 1 2 4 Min Onboard Serial Port 3 Allows you to manual select an I O address for the onboard serial port 3 The choice Disabled 3F8 2F8 3E8 2E8 Serial Port 3 Use IRQ Allows you manually select an IRQ for the onboard serial port 3 The choice IRQ 10 IRQ11 IRQ 3 IRQ 4 IRQ 5 IRQ7 Onboard Serial Port 4 Allows you ma...

Page 48: ...lel port The choice 378 278 3BC Parallel Port Use IRQ Allows you manually select an IRQ for the onboard Parallel port The choice IRQ 5 IRQ7 IRQ 10 IRQ11 Parallel Port Mode There are three different modes for the onboard parallel port The choice SPP EPP1 9 EPP1 7 LPT ECP Mode Use DMA Select the DMA value of the LPT ECP mode The choice 0 1 3 ...

Page 49: ...tively save energy while operating in a manner consistent with your own style of computer use ACPI Function This item allows you to enable disable the Advanced Configuration and Power Management ACPI The choice Enabled Disabled ACPI Suspend Type To decide which ACPI suspend mode to use The choice S1 POS S3 STR Run VGA BIOS if S3 Resume The choice Auto Yes No ...

Page 50: ...r Down ranges from 1 Min to 15 Min Video off Method This determines the manner in which the monitor is blanked Blank Screen This option only writes blanks to the video buffer V H SYNC Blank This selection will cause the system to turn off the vertical and horizontal synchronization ports and write blanks to the video buffer DPMS Initial display power management signaling Video Off In Suspend This ...

Page 51: ...the CPU Thermal Throttling The choice 75 0 50 0 25 0 Wake up by Onboard Lan The choice Enable Disabled Power On by Ring Select Enabled a system that is at soft off mode will be alert to Wake On Modem The choice Enabled Disabled USB KB Wake Up From S3 The choice Enabled Disabled Default Disabled Resume by Alarm This item allows users to enable disable the resume by alarm function When Enabled is se...

Page 52: ...e IDE devices being monitored by system so as to keep system out of suspend mode if the associated device is busy The choice Enabled Disabled FDD COM LPT Port This item is to configure floppy device COM ports and parallel port being monitored by system so as to keep system out of suspend mode if the associated device is busy The choice Enabled Disabled PCI PIRQ A D This option can be used to detec...

Page 53: ...ical items and it is strongly recommended that only experienced users should make any changes to the default settings Init Display First This field is used to select whether to initialize the onboard VGA PCI Express or PCI first when the system boots The choice PCI Slot Onboard Reset Configuration Data Default is disabled Select Enabled to reset Extended System Configuration Data ESCD when you exi...

Page 54: ...Q 3 IRQ 4 IRQ 5 IRQ 7 IRQ 9 IRQ 10 IRQ 11 IRQ 12 IRQ 14 IRQ 15 assigned to The choice PCI ISA PnP Legacy ISA DMA Resources When resources are controlled manually assign each system interrupt a type depending on the type of device using the DMA Resource The choice Press Enter DMA 0 DMA 1 DMA 2 DMA 3 DMA 4 DMA 5 DMA 6 DMA 7 assigned to The choice PCI ISA PnP Legacy ISA PCI VGA Palette Snoop This fie...

Page 55: ...ning Temperature This item allows you to set a temperature above which the system will start the beeping warning Default setting is disabled This function will only with ACPI power management and S3 STR suspends type The choices Disabled 50 122 53 127 56 133 60 140 63 145 66 151 70 158 ...

Page 56: ...h are described below Load Fail Safe Defaults When Enter is pressed a confirmation dialog box with a message similar to Load Fail Safe Defaults Y N N Pressing Y loads the BIOS default values for the most stable minimal performance system operations Load Optimized Defaults When Enter is pressed a confirmation dialog box with a message similar to Load Optimized Defaults Y N N Pressing Y loads the de...

Page 57: ...o press Esc to abort the selection and not enter a password To disable a password just press Enter when prompted to enter the password A message will confirm the password will be disabled Once the password is disabled the system will reboot and Setup can be entered freely PASSWORD DISABLED When a password has been enabled user will be prompted to enter it every time user tries to enter Setup This ...

Page 58: ...that stays on after system off During subsequent booting of computer the BIOS configures the system according to the Setup selections stored in CMOS After saving the values the system is restarted again Exit Without Saving Pressing Enter on this item asks for confirmation Quit Without Saving Y N N This allows user to exit Setup without storing in CMOS any change The previous selections remain in e...

Page 59: ...dressed in Chapter 2 this chapter will primarily focus on system integration issues in terms of BIOS setting and OS diagnostics 5 1 Hardware Quick Installation ATX Power Setting Unlike other Single board computer RUBY 7720VG2A supports ATX only Therefore there is no other setting that really needs to be set up However there are only two connectors that must be connected J31 20 pins Power Connector...

Page 60: ... 3 Short FSB 533MHz Serial ATA Hard Disk Setting for IDE Each Serial ATA channel can only connect to one SATA hard disk at a time there are total two connectors J29 J30 The installation of Serial ATA is simpler and easier than IDE because SATA hard disk doesn t require setting up Master and Slave which can reduce mistake of hardware installation All you need to do is to plug in two cables and enab...

Page 61: ...o do this so you can be sure the system is running with the BIOS setting that Portwell has highly endorsed As a matter of fact users can load the default BIOS setting any time when system appears to be unstable in boot up sequence Auto Detect Hard Disks In the BIOS Standard CMOS setup menu pick up any one from Primary Secondary Master Slave IDE ports and press Enter Setup the selected IDE port and...

Page 62: ...ppy Disk Controller IRQ 7 IRQ 8 CMOS Clock IRQ 9 Display Controller ACPI Controller USB 1 0 1 1 UHCI Controller IRQ 10 Network Controller USB 1 0 1 1 UHCI Controller USB 2 0 EHCI Controller COM3 4 IRQ 11 SMBus USB 1 0 1 1 UHCI Controller IRQ 12 PS 2 mouse IRQ 13 Data Processor IRQ 14 Primary IDE Controller IRQ 15 It is then very easy to find out which IRQ resource is ready for additional periphera...

Page 63: ...s you also visit RMA site http www portwell com tw rma login asp to check RMA report if necessary Information Support Question1 I power on the system but the CPU speed is not correct Why Answer If you have ever loaded the BIOS optimal default thank you for doing so Please check CPU FSB Voltage Reference CPU Jumper Setting JP10 11 Question2 What kind of CPU supports Answer Intel Pentium M Celeron M...

Page 64: ...e Enhanced Mode in the BIOS Step2 Connect SATA HDD only Step3 Install OS Step4 Connect IDE HDD Please be noted that you cannot connect SATA and IDE HDD to install OS at the same time since the OS installation may fail Note Please visit our technical web site at http www portwell com tw For additional technical information which is not covered in this manual you can mail to tsd mail portwell com tw...

Page 65: ...d for your reference Memory Area Size Device Description 0000 003F 1K Interrupt Area 0040 004F 0 3K BIOS Data Area 0050 006F 0 5K System Data 0070 0E2E 54K DOS 0E2F 0F66 4 9K Program Area 0F67 9F7F 576K Available Conventional memory ends at 638K 9F80 9FFF 2K Extended Bios Area A000 AFFF 64K VGA Graphics B000 B7FF 32K Unused B800 BFFF 32K VGA Text C000 CE7F 58K Video ROM CE80 EEFF 130K Unused EF00 ...

Page 66: ...m ROM System Timer IRQ 1 System ROM Keyboard Event IRQ 2 Unassigned Usable IRQ IRQ 3 System ROM COM2 IRQ 4 System ROM COM1 IRQ 5 Unassigned Usable IRQ IRQ 6 System ROM Diskette Event IRQ 7 Unassigne Usable IRQ IRQ 8 System ROM Real Time Clock IRQ 9 Unassigned Usable IRQ IRQ 10 Unassigned Usable IRQ IRQ 11 Unassigned Usable IRQ IRQ 12 System ROM IBM Mouse Event IRQ 13 System ROM Coprocessor Error I...

Reviews: