HT-4600/PB-4600 series Technical Manual 54
REBUILD LCD PANEL ASSEMBLY
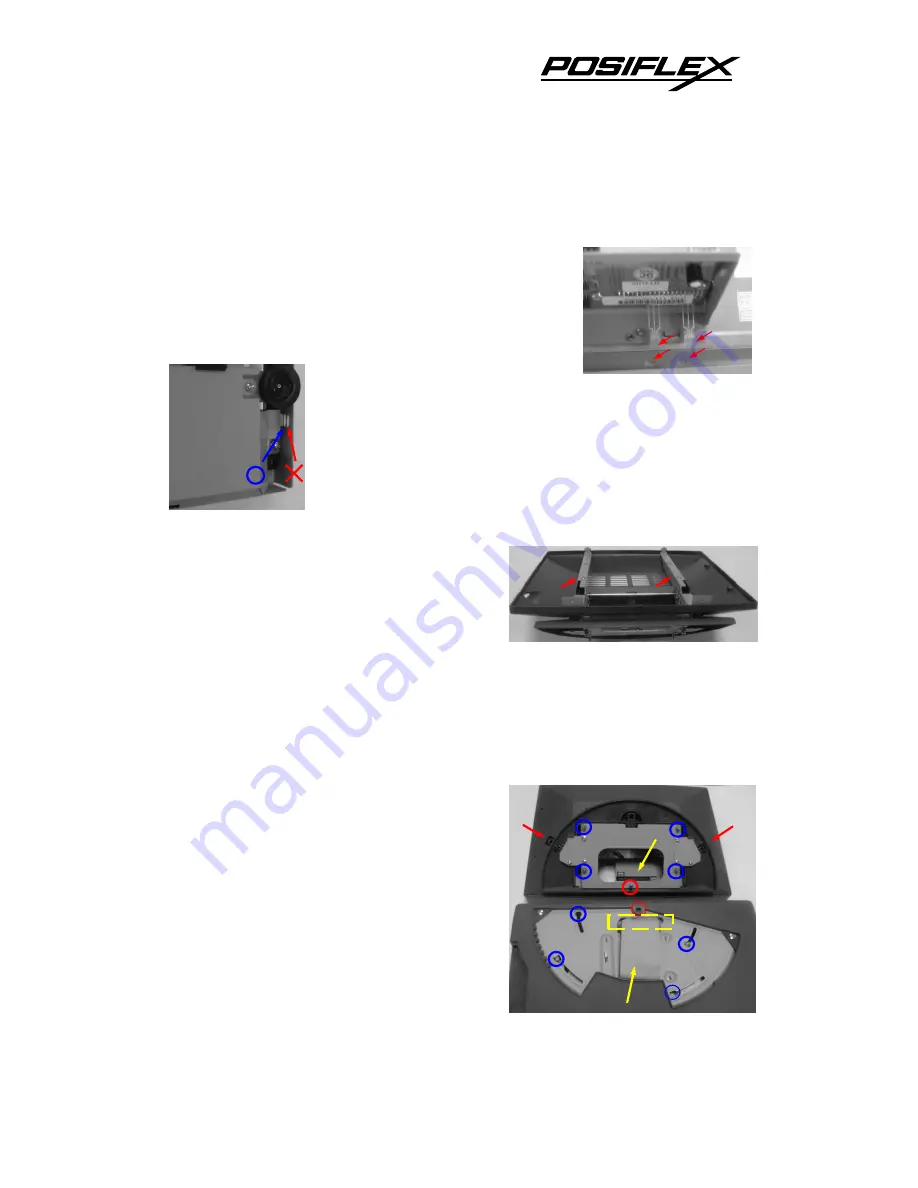
There are some special watch points when rebuilding the
LCD panel assembly back to one piece besides reversed
order of operations aforementioned. Please make sure that
the 2 LED’s comes out of the 2 holes in metal frame as
indicated by red arrows in the right picture when
reinstalling the control board with its
metal casing. Please also notice the leading edge of the metal
casing for control board must be inserted to the lower slit in the
metal frame as indicated by blue circle in the left picture. If it is
inserted to the slit represented by the red arrow in the picture,
the brightness adjust knob will be obstructed.
If you have both models of HT series with and
without touch panel, please pay particular
attention not to confuse the parts that their
difference may be overlooked. Please note that
the metal casing for control board and the 2 metal supports in the back cover assembly
indicated by red arrows in the right picture must be reapplied with the correct one.
REINSTALL LCD PANEL ASSEMBLY
Please refer to the picture at right for reinstalling
the LCD panel assembly back onto the top of
HT series if there is no more operation in main
unit to do. The upper part in the picture shows
the bottom of the LCD panel assembly and the
lower part shows the top of HT series main unit.
First insert the LCD + touch cable to the
connector in opening of LCD assembly bottom
with the red wire at left as indicated by yellow

