SECTION 4
POTTERTON COMMERCIAL PRODUCTS DIVISION
INSTALLATION, OPERATION & MAINTENANCE MANUAL
PAGE 14
ISIS HE
7. Fit a metal guide onto the top and bottom sockets
in the rear section. These may require tapping
into position using a mallet. Care should be taken
to avoid damaging the guide rings. Fit an “O” ring
over each guide ring.
8. Prepare one face of the first intermediate section
as described in operations 2 – 5 and place in
position for assembly to the rear section. The two
faces that have been prepared utilising the
sealants are now pulled together, this ensures
adequate sealant is throughout the boiler sealing
grooves.
Position the intermediate section directly in front
of the rear section and using a crowbar under the
bottom of the intermediate section, gently lift the
intermediate section slightly upwards and
towards the rear section engaging the two guide
rings.
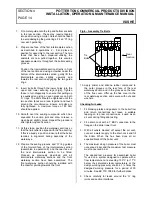
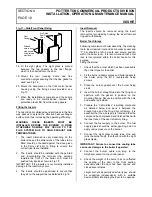
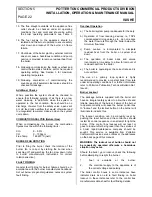
9. Insert tie bolts through the lower holes into the
upper and lower securing lugs (Fig.6). Tighten
these in turn diagonally to ensure that pulling-up
is equalised so giving an even pressure on both
‘O’ rings. The bolts should be tightened until the
two section faces are drawn together and touch
around the circumference. Ensure all bolts are
fully tightened. A maximum torque of 80 N/m
should be applied.
10. Smooth over the sealing compound, which has
squeezed the section joint and drew to leave a
clean bead, slightly proud. Repeat the procedure
after tightening each section.
11. At this stage, position the waterway sections so
that the flue outlet is aligned with the flue ducting,
if this is already in position. Ensure that the boiler
remains in alignment during assembly of the
waterways.
12. Prepare the sealing grooves and ‘O’ ring guides
of the forward face of the intermediate section
(assembled in operation 8) and the rear face of
the next intermediate section to be fitted.
Proceed as previously described until all
intermediate waterway sections and the front
waterway section have been assembled. The
front waterway section should be installed with
the chamfer pointing towards the front.
Fig.6 – Assembly Tie Bolts
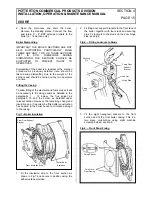
13. Apply primer and silicone rubber compound to
the outer grooves in the rear face of the rear
waterway section and in the grooves on the face
of the flue cover. Offer up the flue cover to the
rear waterway section and secure with nuts and
washers.
Checking for Leaks
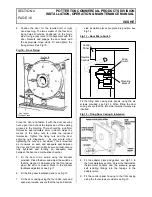
1. Fit blanking plates and gaskets to the boiler flow
and return connections but leave a suitable
tapping on top rear connection as it used as an
air vent during filling and testing.
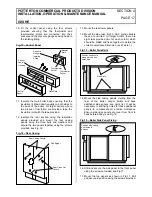
2. Fit a drain cock with a 1” BSP connection to the
flange on the boiler lower front.
3. With all outlets blanked off except the air vent,
connect a water supply to the drain cock and fill
the boiler. When this has been done all air
expelled blank off the boiler vent.
4. The maximum design pressure of the boiler must
not exceed 6 bar and the maximum test pressure
must not exceed 9 bar.
The applied test pressure for assembled boiler
for use on a system designed to operate with a
flow temperature not exceeding 100°C (or 17°C
below the saturated steam temperature at the
design working pressure) shall be 1 ½ times the
designed working pressure for a period of 30
minutes. See BS 779: 1989 for further details.
5. Check carefully for leaks around the ‘O’ ring
joints and section interfaces.
Rear
Section
Tie
Bolts
Summary of Contents for Isis HE
Page 1: ...MAY 2004 ...


