background image


Thank you for your purchase   


Page 

5

 of 

5


Date:  9-Aug-2012   


stores | catalog | www.potterybarnkids.com 


USA 1.800.290.8181 


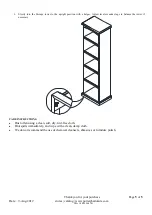
6.


Slowly  turn  the  Storage  tower  to  the  upright  position  with  a  helper.  Adjust  levelers  under  legs  to  balance  the  tower  if 
necessary. 


CARE INSTRUCTIONS: 


Dust often using a clean, soft, dry, lint-free cloth. 


Blot spills immediately, and wipe with a clean, damp cloth. 


We do not recommend the use of chemical cleansers, abrasives or furniture polish. 

Summary of Contents for CATALINA STORAGE TOWER

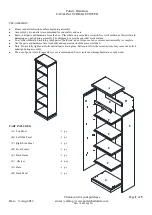
Page 1: ...des an ideal work surface To avoid accidentally discarding small parts or hardware do not dispose of any contents until assembly is complete Use the parts and hardware lists to identify and separate each of the pieces included Note Do not fully tighten all bolts until all parts are in place Failure to follow these instructions may cause the bolts to misalign during assembly The use of power tools ...

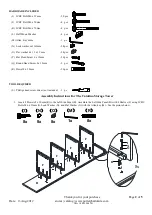
Page 2: ... O Flat washer 6 x 13 x 1 5mm 24 pcs P Flat Head Screw 6 x 19mm 26 pcs Q Round Head Screw 8 x 38mm 2 pcs R Dowel 8 x 30mm 36 pcs TOOL REQUIRED S Phillips head screw driver not included 1 pc Assembly Instructions For The Catalina Storage Tower 1 Insert 8 Dowels 8 x 30mm R to the Left Side Panel B Assemble the Left Side Panel B with 4 Shelves F using JCBC Bolts M6 x 32mm I Lock Washer N and Flat Was...

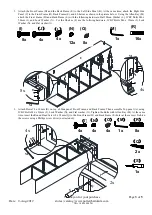
Page 3: ...olts M6 x 50mm J and Lock Washer N For the Shelves F use the follwing hardware JCBC Bolts M6 x 32mm I Lock Washer N and Flat washer O 3 Attach Dowel 8 x 30mm R on top of Side panel Front Frame and Back Frame Then assemble Top panel A using JCBC Bolts M6 x 32mm I Lock Washer N and Flat washer O Tighten the Bolts with Allen Key M At the same time insert the Round Head Screw 8 x 38mm Q to the Front F...

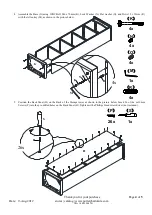
Page 4: ...r N Flat washer O and Dowel 8 x 30mm R with the Allen key M as shown in the picture below 5 Position the Back Panel H on the Back of the Storage tower as shown in the picture below Insert 26 of the 6x19mm Screws P into the pre drilled holes on the Back Panel H Tighten with a Phillips Head screw driver not included K 4x N 4x O 4x M 1x R O N K M R 4x G 4x S 1x P 26x 26x P S H ...

Page 5: ...urn the Storage tower to the upright position with a helper Adjust levelers under legs to balance the tower if necessary CARE INSTRUCTIONS Dust often using a clean soft dry lint free cloth Blot spills immediately and wipe with a clean damp cloth We do not recommend the use of chemical cleansers abrasives or furniture polish ...

Reviews: