background image

FURNITURE TIPPING RESTRAINT 

WARNING

: This product is only a deterrent. It is not a substitute for proper adult supervision.  Manufacturer assumes no liability for improper installation or 

excessive loads placed on screws, brackets or straps. 

Young children may be injured by tipping furniture and the use of a tipping restraint is highly recommended. 

When properly installed, this restraint will provide protection against tipping of furniture. This tipping restraint 

MUST

 be secured to a wall-stud or wall structure 

of similar strength. 

------------------------------------------------------------------------------------------------------------------------------------------------------------------------------------------------------ 

Hardware included:  
(2) Brackets  
(2) Long Stud Mounting Screws 

(1) Nylon Strap  
(2) Short Furniture-Side Mounting Screws 

Note: For safe mounting it is essential to use the proper hardware for your wall type. The included hardware is for drywall or stud mounting only. For other 
wall types (e.g., plaster, concrete and brick) please consult your local hardware store for fastener advice. 

To install: 

1) LOCATING THE STUDS:

  Use a stud finder to locate the vertical wooden studs within your wall located behind the final

position of the furniture item.  Mark the stud locations with a light pencil-mark. 

2) MOUNTING THE FURNITURE-SIDE BRACKET:

  Move the furniture item close to the wall to its final position.  Use

pieces of tape or a pencil to transcribe the stud locations of the wall onto the furniture item.  Move the furniture item again so 
you can access its back and use the marks to locate a suitable mounting point for the furniture-side bracket. Make sure that 
the bracket is secured to a firm portion of the furniture frame and as high as possible. Remember: The furniture-side bracket 
must be positioned near a wall stud.  Using a pencil, and the bracket as a guide, mark “screw marks” on the furniture item 
through the bracket holes. 

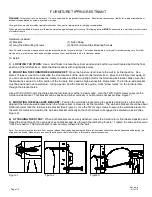
Use a 3/32” drill bit to drill pilot holes into the furniture item at the “screw marks”.  Use the TWO Short screws to secure the 
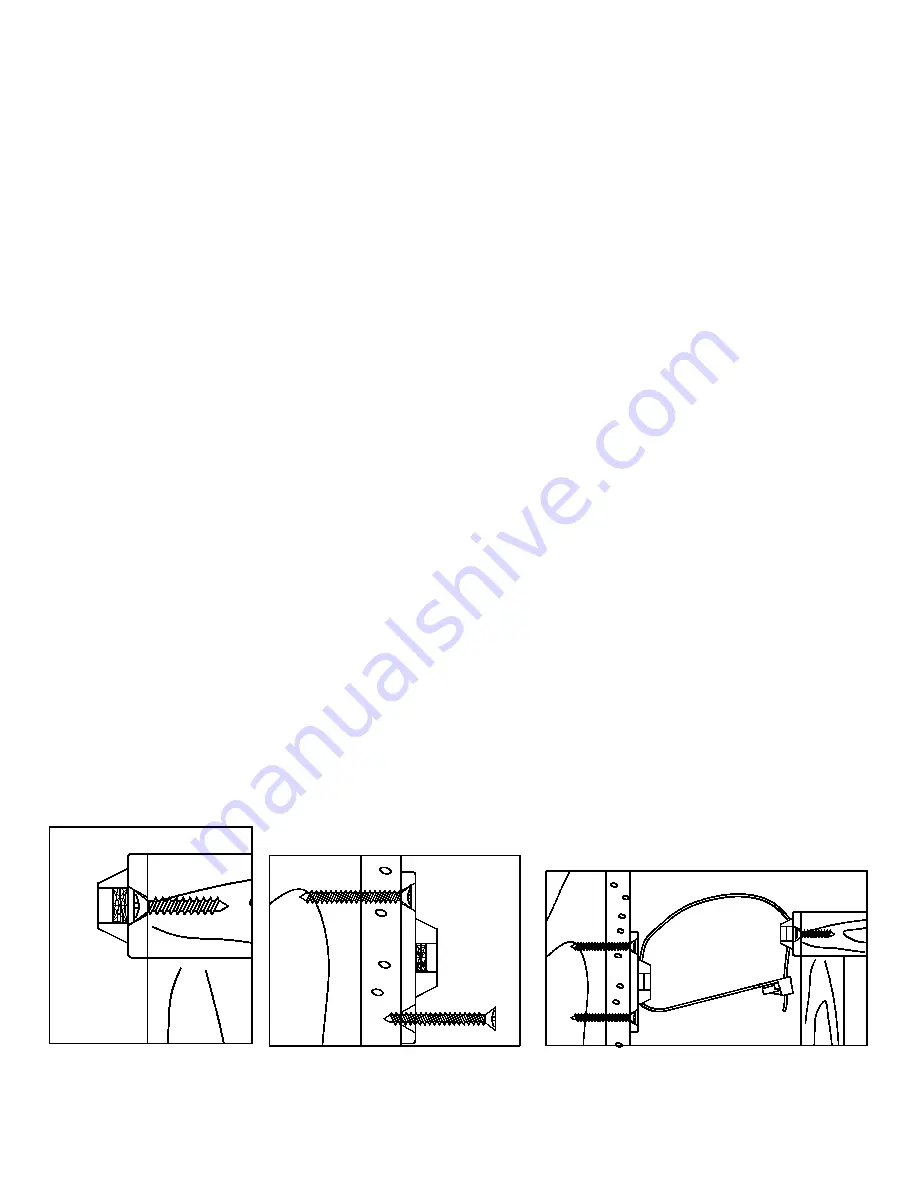
furniture-side bracket.  This bracket can be positioned either vertically or horizontal as necessary (See Figure 1).


3) MOUNTING THE WALL-SIDE BRACKET:  

Position the wall-side bracket along the selected stud mark so that it will be

adjacent the furniture-side bracket when the furniture item is moved to its final position.  The wall-side bracket should be about 
ONE inch lower than the furniture-side bracket (See Figure 3).  Use the TWO Long screws to secure the wall-side bracket to 
the wall.  Remember to position the wall-side bracket vertically so that both screws will engage the selected wall stud (See 
Figure 2). 

4) ATTACHING THE STRAP:  

When both brackets are securely attached, move the furniture to its final desired position and

thread the strap through the openings of each bracket and also through the ratcheting “buckle”.  Tighten the strap until several 
“clicks” are heard.  The furniture item is now securely tethered to the wall. 

Note:  If you must move the furniture item, you can release the strap by depressing the lever arm located at its buckle and simultaneously withdrawing the 
strap from the buckle. Make sure to reconnect the strap once the furniture item is returned to its previous position. 

Figure 1 

       Figure 2 

        Figure 3 

Page 

1

/

2

Rev. date 

9

-

Jul

-1

3


Summary of Contents for FARMHOUSE KITCHEN FRIDGE

Page 1: ...Date 8 Aug 13 www potterybarnkids com Page 1 of 9 Rev pottery barn kids FARMHOUSE KITCHEN FRIDGE ...

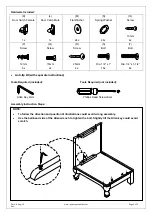
Page 2: ... Remove all parts and hardware from the box and lay out on a clear carpeted or scratch free work surface as this will avoid damaging parts during assembly The shipping box provides an ideal work surface Do not dispose of any packaging or contents of the shipping carton until assembly is completed to avoid accidentally discarding small parts or hardware Use the parts and hardware lists below to ide...

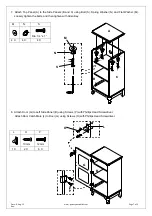
Page 3: ... Bolt Dia 1 4 x 1 T Bolt Dia 1 4 x 1 1 2 8x 6x 2x 4x 16x Anti tip kit with separate instructions Tools Required included Tools Required not included Allen Key 4mm Phillips Head Screwdriver Assembly Instruction Steps NOTE To follow the direction and position of illustrations could avoid wrong assembly Use the ball head side of the Allen wrench to tighten the bolt Slightly tilt the Allen key could a...

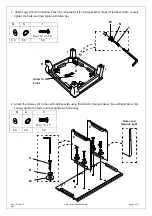
Page 4: ... Loosely tighten the bolts and then tighten with Allen Key M N T Dia 1 4 x 1 1 2 8 X 8 X 8 X 2 Attach the Shelves E to the Left Side Panel B using the Bolt S Spring Washer N and Flat Washer M Loosely tighten the bolts and then tighten with Allen Key M N S Dia 1 4 x 1 4 X 4 X 4 X S N M B E E Holes end towards right Arrow to Front M N T D I I H H ...

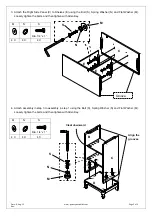
Page 5: ...her M Loosely tighten the bolts and then tighten with Allen Key M N S Dia 1 4 x 1 4 X 4 X 4 X 4 Attach assembly in step 3 to assembly in step 1 using the Bolt S Spring Washer N and Flat Washer M Loosely tighten the bolts and then tighten with Allen Key M N S Dia 1 4 x 1 4 X 4 X 4 X S M N E E C Groove Align the grooves S N M C B D Cleat downward ...

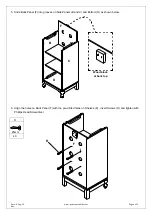
Page 6: ...ide Back Panel F into grooves on Side Panels B and C and Bottom D as shown below 6 Align the holes on Back Panel F with the pre drilled holes on Shelves E insert Screws R and tighten with Phillips Head Screwdriver R 25mm 4 X F R B C D Wood block at back top F ...

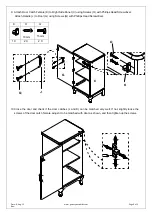
Page 7: ...sher N and Flat Washer M Loosely tighten the bolts and then tighten with Allen Key M N S Dia 1 4 x 1 4 X 4 X 4 X 8 Attach Door G to Left Side Panel B using Screws P with Phillips Head Screwdriver Attach Door Catch Male L to Door G using Screws O with Phillips Head Screwdriver L O P 10mm 12mm 1 X 2 X 6 X M N S A C B G B O L P ...

Page 8: ...d Screwdriver Attach Handle J to Door G using Screws Q with Phillips Head Screwdriver K O Q 10mm 15mm 1 X 2 X 2 X 10 Close the door and check if the door catches L and K can be matched very well If not slightly loose the screws of the door catch female adjust it to be matched with door as shown and then tighten up the screws O K Q J C G ...

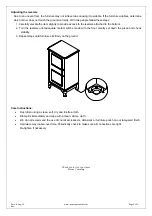
Page 9: ...ottom 2 Turn the levelers until adequate contact will be made with the floor Gently set down the piece and check stability 3 Repeat steps until furniture sits firmly on the ground Care Instructions Dust often using a clean soft dry and lint free cloth Blot spills immediately and wipe with a clean damp cloth We do not recommend the use of chemical cleansers abrasives or furniture polish on our lacq...

Page 10: ...t Make sure that the bracket is secured to a firm portion of the furniture frame and as high as possible Remember The furniture side bracket must be positioned near a wall stud Using a pencil and the bracket as a guide mark screw marks on the furniture item through the bracket holes Use a 3 32 drill bit to drill pilot holes into the furniture item at the screw marks Use the TWO Short screws to sec...

Reviews: