Date: 2014-Sept-16
Page 3 of 10
Rev: 2015-Jan-21
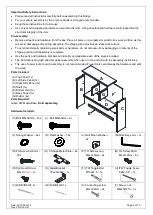
Tools Required (not included):
Philips Head Screwdriver
Power Drill
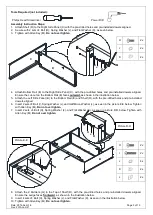
Assembly Instruction Steps:
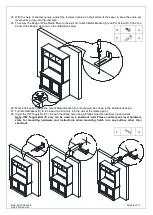
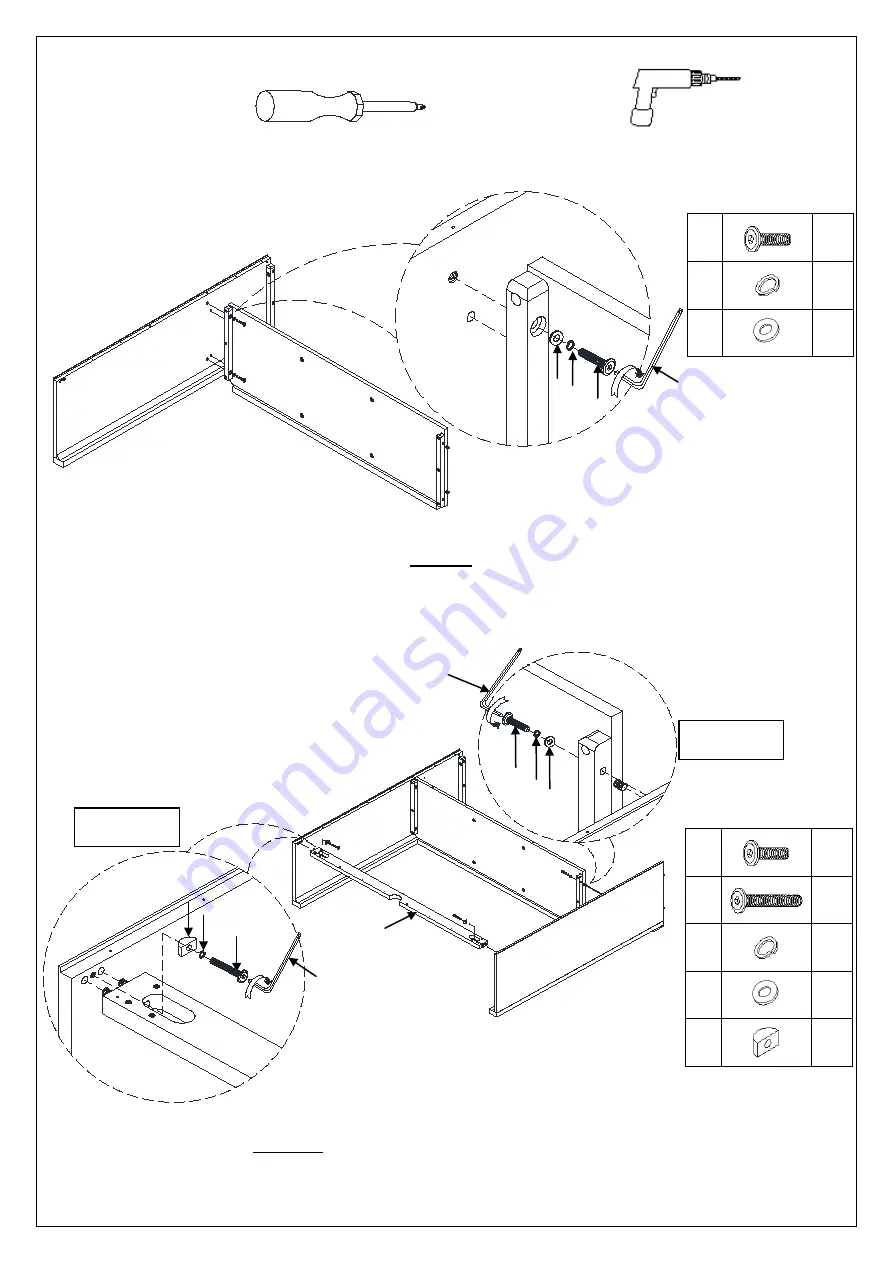
1. Attach Shelf (D) to the Right Side Panel (C) with the pre-drilled holes and pre-installed dowels aligned.
2. Secure with 2 sets of: Bolt (H), Spring Washer (J), and Flat Washer (K), as seen below.
3. Tighten with Allen Key (M).
Do not over tighten
.
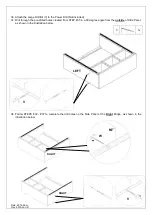
4. Attach Bottom Rail (E) to the Right Side Panel (C), with the pre-drilled holes and pre-installed dowels aligned.
Ensure the cut-out on the Bottom Rail (E) faces
outward,
as shown in the illustration below.
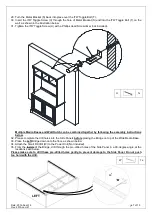
5. Attach the Left Side Panel (B) to the Bottom Rail (E) and Shelf (D), with the pre-drilled holes and pre-installed
dowels aligned.
6. Insert 2 sets of: Bolt (I), Spring Washer (J), and Half Moon Washer (L), as seen in the picture E-E below. Tighten
with Allen Key (M).
Do not over tighten
7. Insert 2 sets of: Bolt (H), Spring Washer (J), and Flat Washer (K), as seen in picture D-D below. Tighten with
Allen Key (M).
Do not over tighten
.
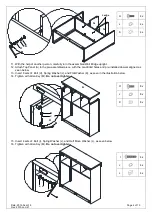
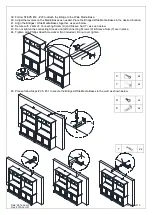
8. Attach the 2 Dividers (G) to the Top of Shelf (D), with the pre-drilled holes and pre-installed dowels aligned.
Ensure the Ledge faces
frontward
, as shown in the illustration below.
9. Insert 4 sets of: Bolt (H), Spring Washer (J), and Flat Washer (K), as seen in the illustration below.
10. Tighten with Allen Key (M).
Do not over tighten
.
H
2x
J
2x
K
2x
H
2x
I
2x
J
4x
K
2x
L
2x
J
C
D
H
K
M
B
E
E
I
J
L
K
J
H
M
M
Picture E-E
Picture D-D


