background image


Date: 1‐Dec‐15 


          www. potterybarnkids.com 


Page 9 of 10


Rev:   


Note: The mattress base (C) may be at the highest level (Level 3) when the child is 
born. It must be at the lowest level (Level 1) before the child can stand up. Before 
installing the mattress base (C), please ask the customer at which height they want it 
installed (Illustration showing Mattress base install in the highest position). 

*  
3.  After determining the desired height of the mattress base (C).    With the help of an adult, 

place the Mattress Base (C) into the crib by carefully not to scratch the finish. 

 
Attach (C) to (A) as shown below. Do not fully tighten (E) at this time. 


Note: 

To change the position of the Mattress Base (C), remove bolts (E), line up the Mattress 

Base (C) with the holes at the desired height (Level 1 or 2) and re-attach the Mattress Base 
(C) with bolts (E). 


(E) Bolt M6x25mm - 4x


Installed in the highest position. 

A

A

C

Level 1


4x

4x 

E

H

Level 2


Level 3


Summary of Contents for MARLOW CRIB

Page 1: ...Date 1 Dec 15 www potterybarnkids com Page 1 of 10 Rev pottery barn kids MARLOW CRIB...

Page 2: ...or other plastic film as mattress covers because they can cause suffocation Infants can suffocate in gaps between the crib sides and a mattress that is too small Never place additional padding under a...

Page 3: ...ep instructions for future use Use only vendor supplied hardware to assemble Using unauthorized hardware could jeopardize the structural integrity of the item Do not remove warning labels from the cri...

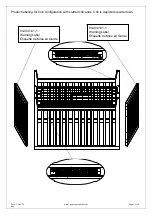
Page 4: ...0 Rev Product labeling for Crib configuration with slatted crib ends Crib is depicted upside down 04 000141 Warning Label 04 000141 Warning Label 04 000141 1 Warning Label tiquette de Mise en Garde 04...

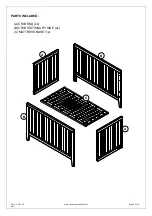
Page 5: ...Date 1 Dec 15 www potterybarnkids com Page 5 of 10 Rev PARTS INCLUDED A CRIB END 2x B CRIB STATIONARY SIDE 2x C MATTRESS BASE 1x A A B B C...

Page 6: ...ec 15 www potterybarnkids com Page 6 of 10 Rev HARDWARE INCLUDED D Bolt M6x45mm 8x E Bolt M6x25mm 4x F Wood Dowel 30mm 8x G Bolt M6 x 10mm 8x H Allen Key with Ball Tip 1x I Left Bracket 2x J Right Bra...

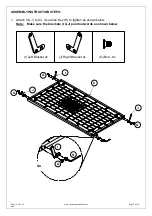
Page 7: ...Page 7 of 10 Rev ASSEMBLY INSTRUCTION STEPS 1 Attach I J to C Use Allen Key H to tighten as shown below Note Make sure the brackets I J point outwards as shown below I Left Bracket 2x J Right Bracket...

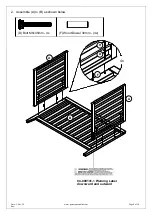
Page 8: ...Date 1 Dec 15 www potterybarnkids com Page 8 of 10 Rev 2 Assemble A to B as shown below D Bolt M6x45mm 4x F Wood Dowel 30mm 4x 04 000141 1 Warning Label downward and outward 4x D H F A A B...

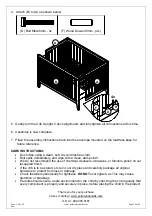
Page 9: ...nstall in the highest position 3 After determining the desired height of the mattress base C With the help of an adult place the Mattress Base C into the crib by carefully not to scratch the finish At...

Page 10: ...dry and lint free cloth Blot spills immediately and wipe with a clean damp cloth We do not recommend the use of chemical cleansers abrasives or furniture polish on our lacquered finish If the crib is...

Reviews: