background image

Date: 2014-Sept-14   


Page 2 of 8 

Rev: 2015-Jan-13 


Important Safety Instructions:


Please read all instructions carefully before assembling this Wall Bridge. 


For your safety, assembly by two or more adults is strongly recommended. 


Keep these instructions for future use. 


Use only vendor-supplied hardware to assemble this item. Using unauthorized hardware could jeopardize the 
structural integrity of the item. 


Pre-assembly: 


Remove all parts and hardware from the box. Place all items on a carpeted or scratch-free work surface, as this 
will avoid damaging parts during assembly. The shipping box provides an ideal work surface. 


To avoid accidentally discarding small parts or hardware, do not dispose of any packaging or contents of the 
shipping carton until assembly is complete.   


Use the parts and hardware lists below to identify and separate each of the pieces included. 


The illustrations provided allow for easier assembly when used in conjunction with the assembly instructions. 


The use of power tools to aid in assembly is not recommended. Power tools can damage the hardware and split 
the wood. 


Parts Included: 


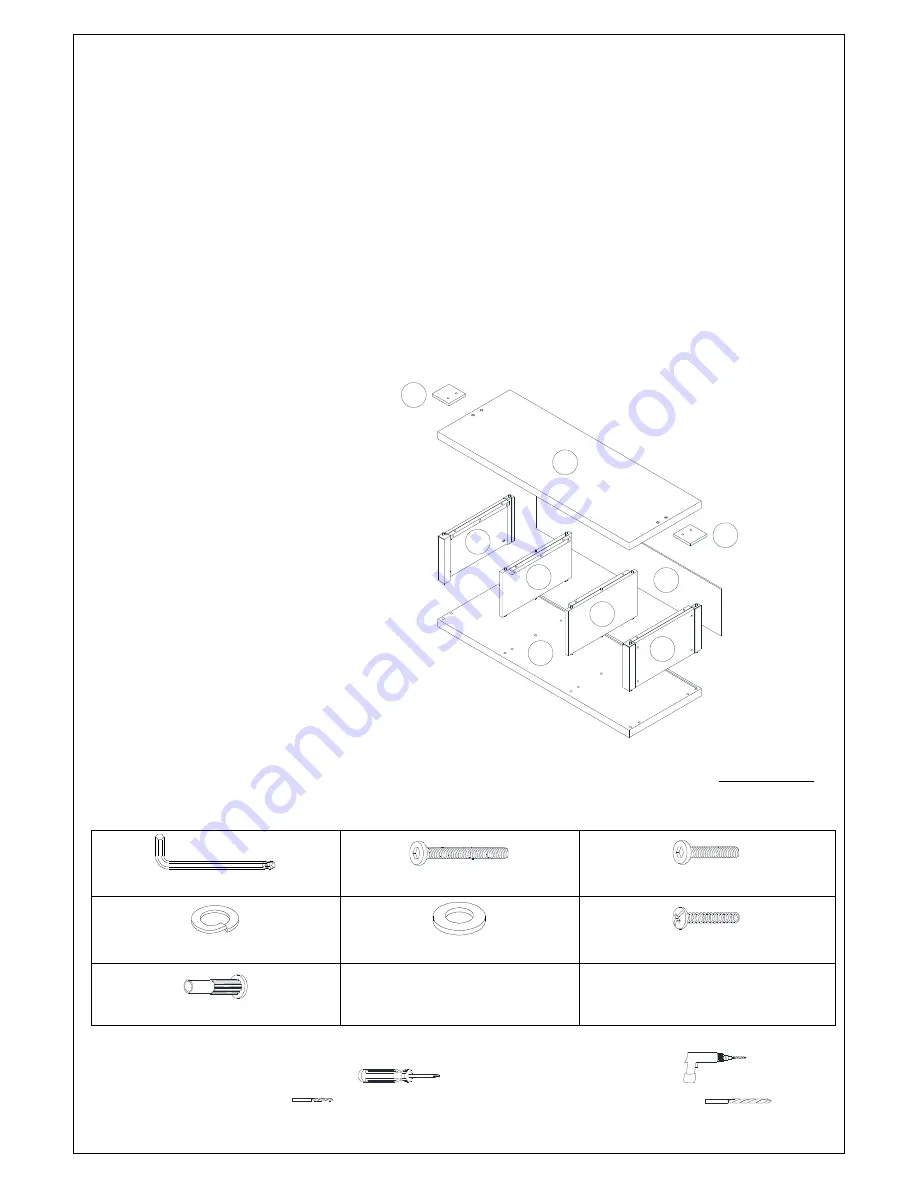
(A) Top Panel (1x) 

(B) Left Side Panel (1x) 

(C) Right Side Panel (1x) 

(D) Left Divider (1x) 

(E) Right Divider (1x) 

(F) Bottom Panel (1x) 

(G) Back Panel (1x) 

(H) Connecting Pad (2x) 


Parts Required:


Other Preston Tall Units (Tall Bookcases/Cabinet Hutches/Bookcase Hutches) and/or Media Bases (sold separately)


Hardware Included: 


(I) Allen Key – 1x 


(J) Long Bolt (1/4”x45mm) – 8x 


(K) Short Bolt (1/4”x28mm) – 12x 


(L) Spring Washer (1/4”) – 20x 


(M) Flat Washer (1/4”) – 20x 


(N) Connecting Screw(M4x20mm)– 4x 


(O) Sleeve Nut (M4x28mm) – 4x 


Tools Required: 

Philips Head Screwdriver (not included) 


Power Drill (not included) 


Drill Bit 

Φ

2mm (not included)


        Drill Bit 

Φ

6mm (not included)


A

B

C

D

E

F

G

H

H

Summary of Contents for PRESTON

Page 1: ...Date 2014 Sept 14 Page 1 of 8 Rev 2015 Jan 13 pottery barn kids PRESTON MEDIA BRIDGE www potterybarnkids com...

Page 2: ...is complete Use the parts and hardware lists below to identify and separate each of the pieces included The illustrations provided allow for easier assembly when used in conjunction with the assembly...

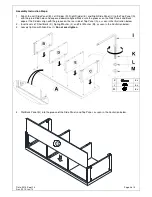
Page 3: ...ke sure the grooves on the Side Panels and Back edge of the Dividers align with the groove on the rear side of Top Panel A as seen in the illustration below 2 Insert 8 sets of Short Bolts K Spring Was...

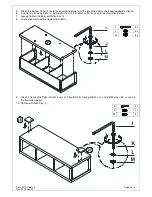
Page 4: ...8 sets of Long Bolts J Spring Washer L Flat Washer M as seen in the illustration below 7 Loosely tighten the Bolts with Allen Key I 8 Check alignments before tightening all bolts F 9 Attach 2 Connect...

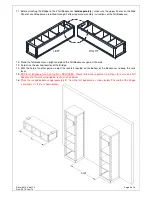
Page 5: ...okcases against the wall 13 Determine the desired location of the Bridge 14 With the help of another person adjust the levelers located on the bottom of the Bookcases to keep the units level 15 NOTE I...

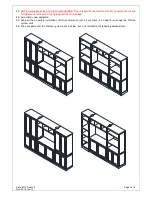
Page 6: ...are touching 19 Attach the Bridge to the Bookcases using 8 sets of Connecting Bolts N and Sleeve Nuts O as seen in the illustration below 4 sets are included with Bridge and the other 4 sets belong t...

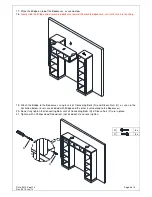
Page 7: ...secure the second Tall Bookcase to the wall using tipping restraint kit included 23 Assembly is now complete 24 Keep all the assembly instructions for future reference just in case there is a need to...

Page 8: ...ely and wipe with a clean damp cloth We do not recommend the use of chemical cleansers abrasives or furniture polish on our lacquered finish Hardware may loosen over time Periodically check to make su...

Reviews: