background image

Date: 2015-AUG-24   


        Page 

2

 of 

9


Rev: 


Important Safety Instructions:


Please read all instructions carefully before assembling. 


For your safety, assembly by two or more adults is strongly recommended. 


Keep instructions for future use. 


Use only vendor supplied hardware to assemble. Using unauthorized hardware could jeopardize the structural 
integrity of the item. 


Pre-assembly: 


Remove all parts and hardware from the box and lay out on a clear carpeted or scratch-free work surface, as 
this will avoid damaging parts during assembly. The shipping box provides an ideal work surface. 


Do not dispose of any packaging or contents of the shipping carton until assembly is completed to avoid 
accidentally discarding small parts or hardware. 


Use the parts and hardware lists below to identify and separate each of the pieces included. 


The illustrations provided allow for easier assembly when used in conjunction with the assembly instructions. 


The use of power tools to aid in assembly is not recommended. Power tools can damage hardware and split 
wood. 


Note: Do not fully tighten all bolts until all parts are in place. Failure to follow these instructions may cause the 
bolts to misalign during assembly. 


Parts Included: 

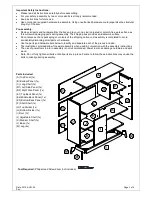
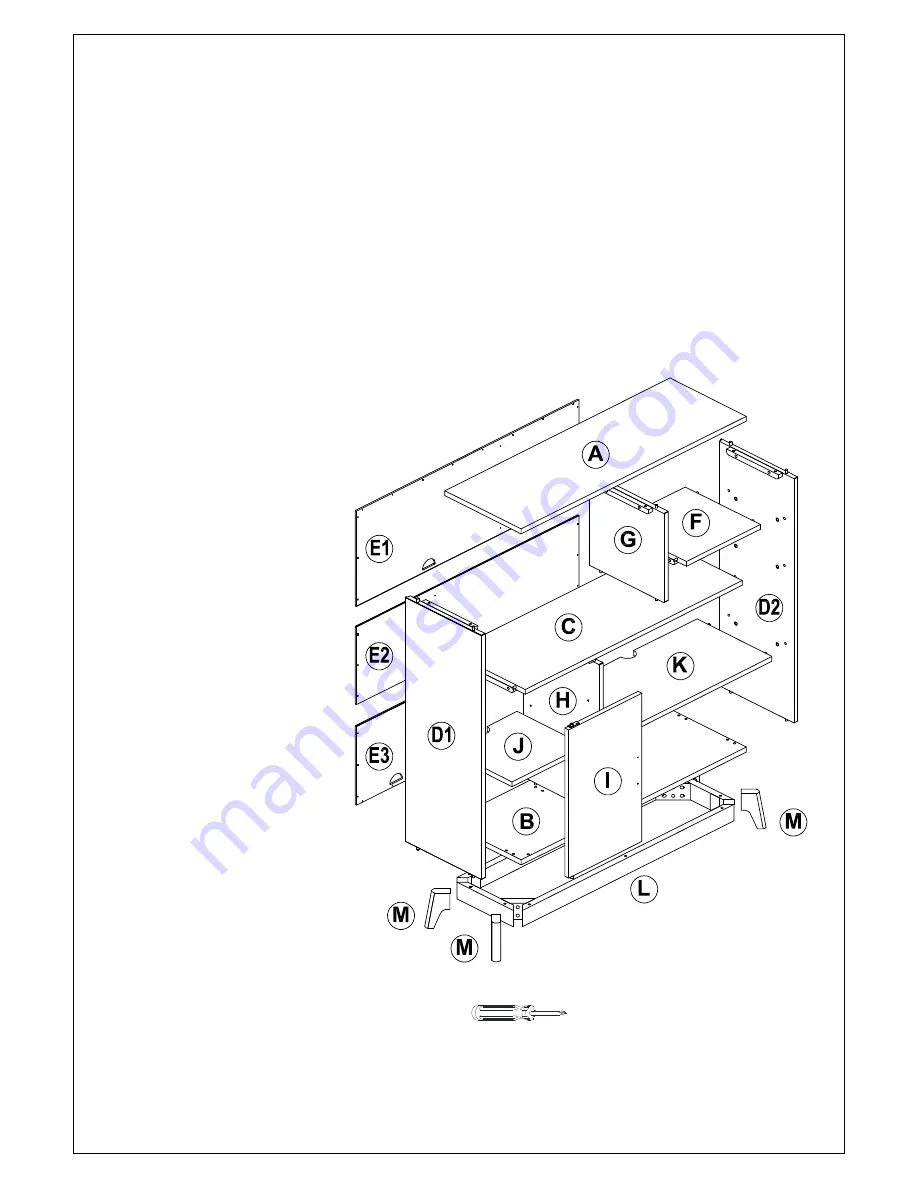
(A) Top Panel (1x) 

(B) Bottom Panel (1x) 
(C) Long Shelf (1x) 

(D1) Left Side Panel (1x) 

(D2) Right Side Panel (1x) 
(E1) Top Back Panel (1x) 

(E2) Middle Back Panel (1x) 

(E3) Bottom Back Panel (1x) 
(F) Short Shelf (1x) 

(G) Top Divider (1x) 

(H) Bottom Divider (1x) 
(I) Door (1x) 

(J) Adjustable Shelf (1x) 

(K) Medium Shelf (1x) 
(L) Base (1x) 

(M) Leg (4x) 


Tool Required:

 Philips Head Screwdriver (not included) 


Summary of Contents for REESE STOARGE

Page 1: ...Date 2015 AUG 24 Page 1 of 9 Rev pottery barn kids REESE STOARGE www potterybarnkids com...

Page 2: ...avoid accidentally discarding small parts or hardware Use the parts and hardware lists below to identify and separate each of the pieces included The illustrations provided allow for easier assembly w...

Page 3: ...her 5 16 8x Q Flat Washer 5 16 8x R Bolt 1 4 x25mm 28x S Bolt 1 4 x51mm 10x T Spring Washer 1 4 38x U Flat Washer 1 4 38x V Machine Screw 5 32 x19mm 2x W Plastic Cap 2x X Shelf Support 4x Y Handle 1x...

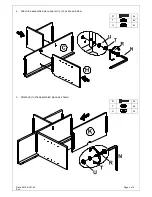
Page 4: ...Date 2015 AUG 24 Page 4 of 9 Rev 2 Attach the assembled piece and H to C as shown below 3 Attach K to the assembled piece as shown R 4x T 4x U 4x R 2x T 2x U 2x...

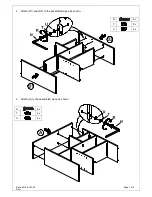
Page 5: ...Date 2015 AUG 24 Page 5 of 9 Rev 4 Attach D1 and D2 to the assembled piece as shown 5 Attach A to the assembled piece as shown R 8x T 8x U 8x R 6x T 6x U 6x...

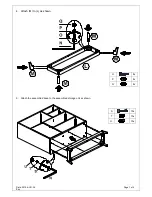
Page 6: ...Date 2015 AUG 24 Page 6 of 9 Rev 6 Attach I to the assembled piece and then attach B to the assembled piece as shown 7 Attach Y to the assembled piece as shown R 6x T 6x U 6x W 2x Y 1x V 2x...

Page 7: ...Date 2015 AUG 24 Page 7 of 9 Rev 8 Attach M to L as shown 9 Attach the assembled base to the assembled storage unit as shown O 8x P 8x Q 8x S 10x T 10x U 10x...

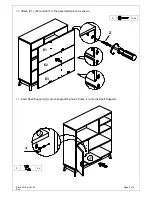
Page 8: ...Date 2015 AUG 24 Page 8 of 9 Rev 10 Attach E1 E2 and E3 to the assembled piece as shown 11 Insert Shelf Support X onto corresponding holes Place J onto the Shelf Supports E1 E2 E3 Z 43x X 4x...

Page 9: ...and lint free cloth Blot spills immediately and wipe with a clean damp cloth We do not recommend the use of chemical cleansers abrasives or furniture polish on our lacquered finish Hardware may loosen...

Reviews: