Date: 2016-Jan-14 Page 2 of 3
Rev:
Important Safety Instructions:
•
Please read all instructions carefully before assembling.
•
For your safety, assembly by two or more adults is strongly recommended.
•
Keep these instructions for future use.
•
Use only vendor-supplied hardware to assemble this item. Using unauthorized hardware could jeopardize the
structural integrity of the item.
Pre-assembly:
•
Remove all parts and hardware from the box. Place all items on a carpeted or scratch-free work surface, as this
will avoid damaging parts during assembly. The shipping box provides an ideal work surface.
•
To avoid accidentally discarding small parts or hardware, do not dispose of any packaging or contents of the
shipping carton until assembly is complete.
•
Use the parts and hardware lists below to identify and separate each of the pieces included.
•
The illustrations provided allow for easier assembly when used in conjunction with the assembly instructions.
•
The use of power tools to aid in assembly is not recommended. Power tools can damage the hardware and split
the wood.
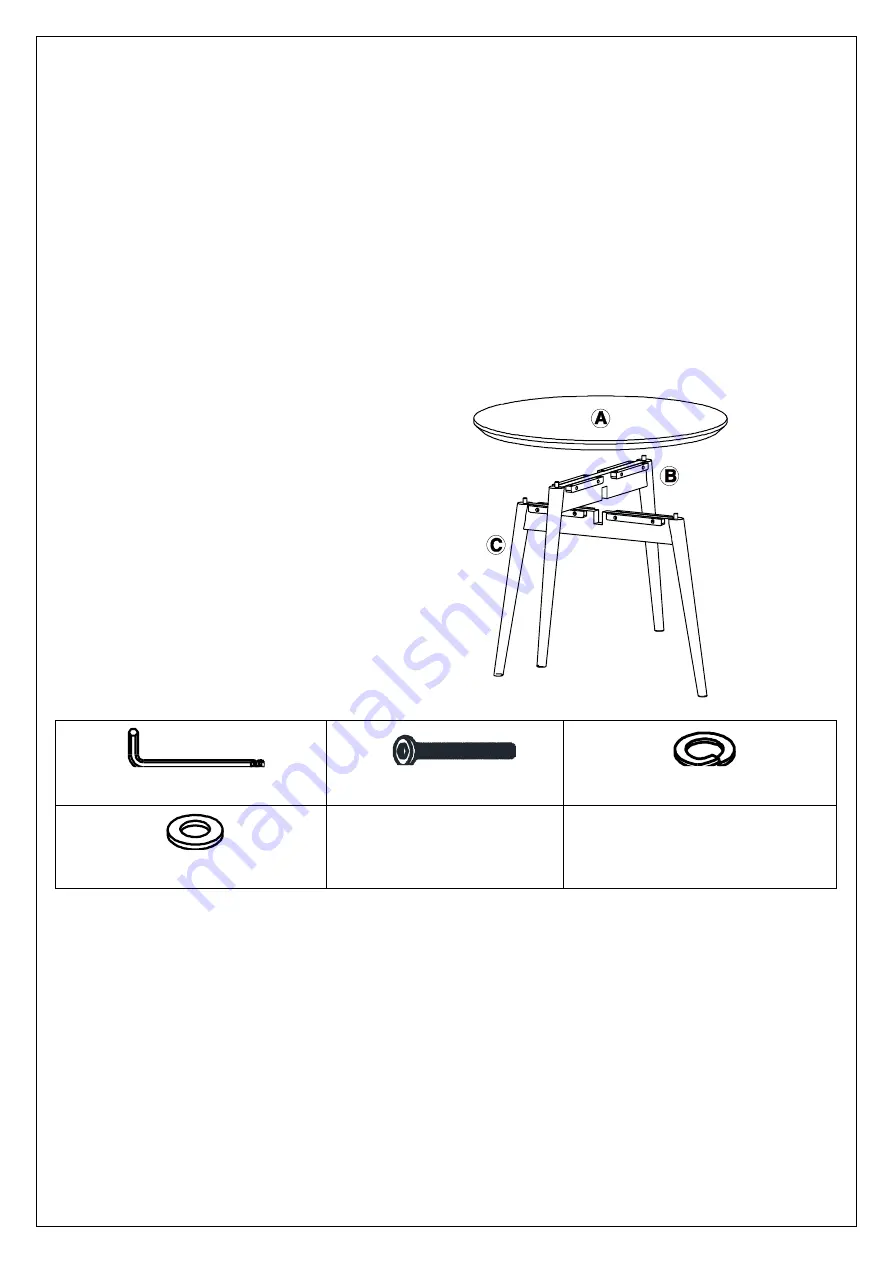
Parts Included:
(A) Top Panel (1x)
(B) Leg with Bottom Cut-out (1x)
(C) Leg with Top Cut-Out (1x)
Hardware Included:
(D) Allen Key
– 1x
Assembly Instructions
Preston Cabinet Hutch
Please read all instructions before beginning assembly.
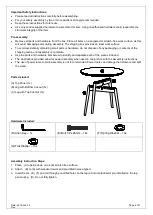
PART LIST
HARDWARE LIST
Allen key
( 4 pcs )
M.
PART LIST
HARDWARE LIST
( 1 pc )
Bolt (1/4" x 28mm)
Spring washer (1/4")
(10 pcs )
O.
N.
(10 pcs )
Flat washer (1/4")
P.
Q.
Half - moon metal block
( 2 pcs )
R.
( 4 pcs )
Plastic cap
Plastic Restraint
( 1 pc )
T.
S.
Plastic Wall Bracket
( 2 pcs )
U.
Long Wood Screw 3 x 32mm
( 2 pcs )
V.
Short Wood Screw 3 x 19mm
( 2 pcs )
L.
( 6 pcs )
Bolt (1/4" x 45mm)
Philips Screwdriver (Not included)
W.
( 2 pcs )
"T" Metal Bracket
(12 pcs )
Wood Screw 3 x 12mm
Door knob
( 2 pcs )
( 4 pcs )
Machine screw (5/32" x 22mm)
Shelf pin
( 8 pcs )
(30 pcs )
Wood Screw 3,5 x 19mm
K.
(E) Bolt 1/4
”x28mm – 16x
(F) Spring Washer
– 16x
(G) Flat Washer
– 16x
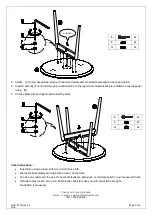
Assembly Instruction Steps:
1. Place (A) upside down on a soft, scratch free surface.
2. Attach (B) to (A) with wooden dowels and pre-drilled holes aligned.
3. Insert 8 sets (E), (F) and (G) through pre-drilled holes on the leg rail into metal inserts pre-installed on the top
panel using (D). Do not fully tighten.
Assembly Instructions
Beadboard Basic Trundle
Please read all instructions before beginning assembly.
PART LIST
Left Right Board (with extra holes)
A.
( 2 pcs )
HARDWARE LIST
B.
Center Bottom Board
Cross Bar
C.
Allen key
Allen Bolt 1/4"x60mm
G.
Spring washer
Flat washer
PART LIST
HARDWARE LIST
Long Side Rail (Front)
D.
H.
I.
J.
( 2 pcs )
E.
Long Side Rail (Back)
( 1 pc )
Barrel Nut
Long Wood Screw 4x30mm
K.
Short Wood Screw 4x13mm
Caster
L.
M.
( 1 pc )
( 8 pcs )
( 22 pcs )
( 24 pcs )
( 6 pcs )
( 8 pcs )
( 8 pcs )
( 8 pcs )
( 1 pc )
( 1 pc )
F.
Short Side Rail
( 2 pcs )
N.


