CLASSIC LADDER SHELF
Assembly Instructions
Important Safety Instructions:
•
Please read all instructions carefully before assembling.
•
For your safety, assembly by two people is recommended.
Parts Included:
(Box 1 of 1)
Hardware Enclosed:
Tools Required:
•
(1) Ladder Shelf (A)
•
(2) (Long) Back Support (B)
•
(2) (Short) Back Support (C)
•
(4) Fastener (D)
•
(4) Connecting Bolt (E)
•
(2) Anchor (F)
•
(2) Screw (G)
•
(1) Mounting Template
•
Screwdriver (not included)
Pre-Assembly:
•
Remove all parts and hardware from the box and lay out on a clear workspace, along with any plastic protective
packaging. Do not dispose of any contents until assembly is complete to avoid accidentally discarding small parts or
hardware.
•
Use the parts and hardware lists above to identify and separate each of the pieces included.
•
The illustrations provided allow for easier assembly when used in conjunction with the assembly instructions.
•
Note: Fully tighten all connecting bolts. Failure to follow these instructions may cause the bolts to misalign during
assembly.
Assembly Instructions:
1. Turn the Ladder (A) over on a carpeted or scratch free surface so the back is facing upwards.
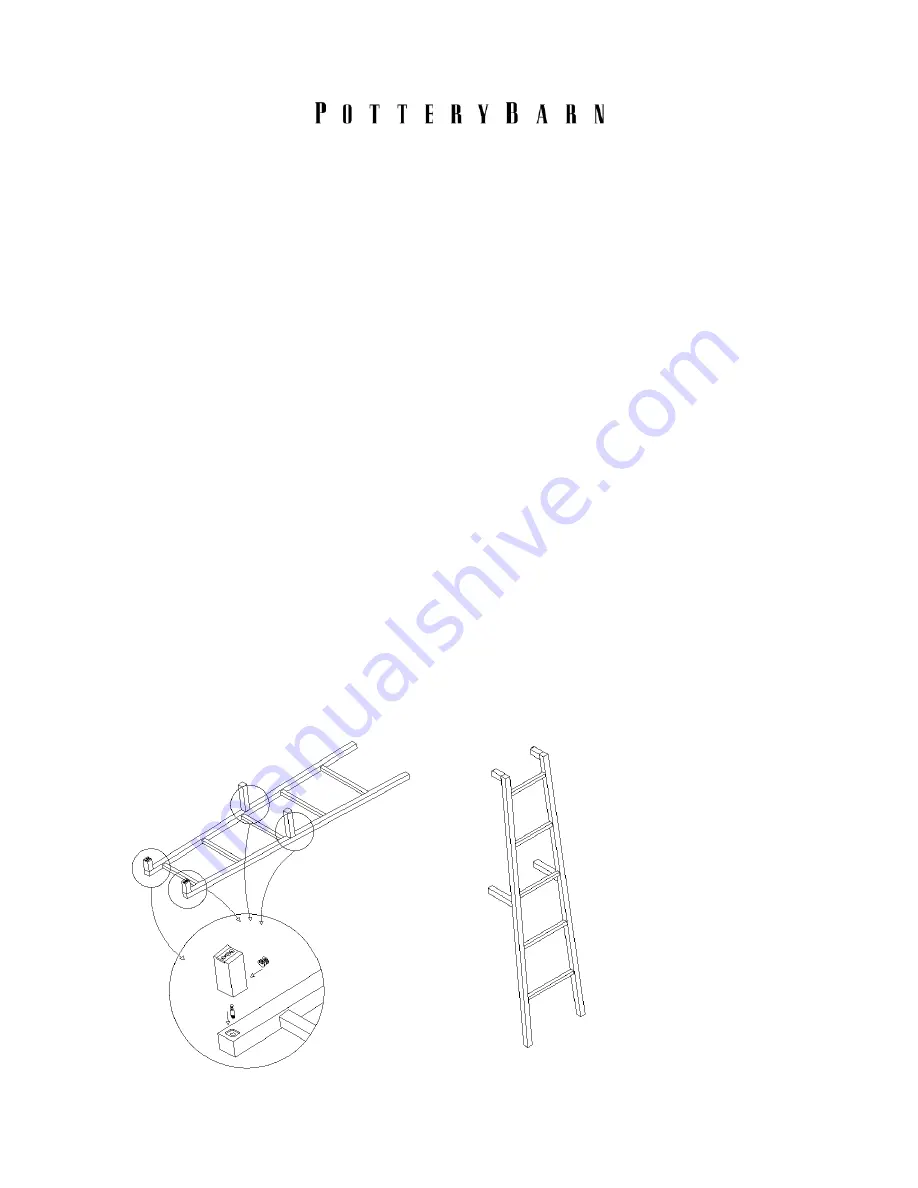
2. Attach (4) connecting bolts (E) to the ladder into the corresponding pre-drilled holes and tighten with a
screwdriver.
3. Insert (4) fasteners (D) into the corresponding pre-drilled holes on the back supports (B and C). Attach to
connecting bolts and tighten fasteners with the screwdriver. Fig. 1
4. Grasp ladder at each end and carefully turn upright. Fig. 2
A
B
C
D
E
Fig. 1
Fig. 2


