background image


Date: 3‐Apr‐15 


              www. potterybarn.com 


Page 1 of 6


Rev:   


LOGAN BASE WITH DRAWERS 24”


Summary of Contents for LOGAN HUTCH WITH DOORS 24 inch

Page 1: ...Date 3 Apr 15 www potterybarn com Page 1 of 6 Rev LOGAN BASE WITH DRAWERS 24 ...

Page 2: ...not dispose of any packaging or contents of the shipping carton until assembly is completed to avoid accidentally discarding small parts or hardware Use the parts and hardware lists below to identify and separate each of the pieces included The illustrations provided allow for easier assembly when used in conjunction with the assembly instructions The use of power tools to aid in assembly is not r...

Page 3: ...les Do not drill the shelf pin holes Only bore holes if this base is to be connected with other pieces in the Logan Collection 3 Adjusting the levelers Due to an uneven floor the furniture may not sit level due causing it to wobble If the furniture wobbles determine which corner does not touch the ground correctly With two people follow these steps 1 Pull out the bottom drawer and adjust the level...

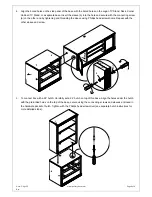
Page 4: ...ther end by tightening and threading the sleeve using Phillips head screwdrivers Repeat with the other sleeve and screw 5 To connect bas with a 24 hutch Carefully set a 24 hutch on top of this base Align the holes under the hutch with the pre drilled holes on the top of the base secure using the connecting screws and sleeves enclosed in the hardware packet of hutch Tighten with the Phillips head s...

Page 5: ...omplete NOTE USE THE ANTI TIP KIT PROVIDED TO SAFELY SECURE YOUR PRODUCT S FOLLOW THE INSTRUCTIONS PROVIDED TO PREVENT SERIOUS INJURY FROM TIPPING FURNITURE Care Instructions Dust often using a clean soft dry and lint free cloth Blot spills immediately and wipe with a clean damp cloth We do not recommend the use of chemical cleansers abrasives or furniture polish on our lacquered finish Hardware m...

Page 6: ...the furniture item Move the furniture item again so you can access its back and use the marks to locate a suitable mounting point for the furniture side bracket Make sure that the bracket is secured to a firm portion of the furniture frame and as high as possible Remember The furniture side bracket must be positioned near a wall stud Using a pencil and the bracket as a guide mark screw marks on th...

Reviews: