background image

19

SERVICE AND ADJUSTMENTS

00598

TO LEVEL MOWER HOUSING

Adjust the mower while tractor is parked on level ground 
or driveway.  Make sure tires are properly infl ated (See 
“PROD UCT SPECIFICATIONS” section of this manual).   If 
tires are over or underinfl ated, you will not properly adjust 
your mower.

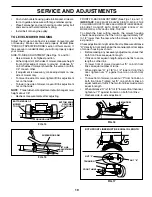
SIDE-TO-SIDE ADJUSTMENT (See Figs. 14 and 15)
•      Raise mower to its highest position.
•         At the midpoint of both sides of mower, measure height 

from bot tom edge of mower to ground.   Distance “A” 
on both sides of mower should be the same or within 
1/4" of each other.

•     If adjustment is necessary, make adjustment on one 

side of mower only.

•      To raise one side of mower, tighten lift link ad just ment 

nut on that side.

•      To lower one side of mower, loosen lift link ad just ment 

nut on that side.

NOTE

:  Three full turns of adjustment nut will change mower 

height about 1/8".
•      Recheck measurements after adjusting.

01156

NUT "E"

01268

"D"

"D"

MANDREL

FIG. 16

NUT "F"

FRONT LINKS

FIG. 17

FRONT-TO-BACK ADJUSTMENT (See Figs. 16  and 17) 

IMPORTANT:

  DECK MUST BE LEVEL SIDE-TO-SIDE. IF THE 

FOLLOWING FRONT-TO-BACK ADJUSTMENT IS NECESSARY, 
BE SURE TO AD JUST BOTH FRONT LINKS  EQUAL LY  SO 


MOWER  WILL STAY LEVEL SIDE-TO-SIDE.     


To obtain the best cutting results, the mower housing 
should be adjusted so that the front is approximately 1/8" 
to 1/2" lower than the rear when the mower is in its high-
est position.

Check adjustment on right side of tractor.  Measure dis tance 
“D” directly in front and behind the mandrel at bottom edge 
of mower housing as shown.
•      Before making any necessary adjustments, check that 

both front links are equal in length.  

•      If links are not equal in length, adjust one link to same 

length as other link.

•     To lower front of mower loosen nut “E” on both front 

links an equal number of turns.

•     When distance “D” is 1/8" to 1/2" lower at front than 

rear, tighten nuts “F” against trunnion on both front 
links.

•      To raise front of mower, loosen nut “F” from trunnion on 

both front links. Tighten nut “E” on both front links an 
equal number of turns. The two front links must remain 
equal in length.

•         When distance “D” is 1/8" to 1/2" lower at front than rear, 

tighten nut “F” against trunnion on both front links.

•      Recheck side-to-side adjustment.

BOTH FRONT LINKS MUST BE EQUAL IN LENGTH

01267

FIG. 14

01553

SUSPENSION ARM

LIFT LINK 
ADJUSTMENT 
NUT

FIG. 15

“A”

“A”

BOTTOM EDGE OF 
MOWER
TO GROUND

BOTTOM EDGE 

OF MOWER

TO GROUND

GROUND LINE

TRUNNION

•         Push clutch cable housing guide into bracket, slide col-

lar onto guide and secure with large retainer spring.

•      Place fl at washer and clutch spring on idler pulley bolt 

and secure with small retainer spring.

•      Install belt onto engine pulley.

Summary of Contents for 191713

Page 1: ...ODEL NO PO15538C 15 5 HP 38 Inch Lawn Tractor For Parts and Service contact our authorized distributor call 1 800 849 1297 For Technical Assistance call 1 800 829 5886 191713 03 09 04 RD PRINTED IN U S A ...

Page 2: ...he machine Clear the area of objects such as rocks toys wire etc which could be picked up and thrown by the blade Be sure the area is clear of other people before mow ing Stop machine if anyone enters the area Never carry passengers Do not mow in reverse unless absolutely necessary Always look down and behind before and while back ing Be aware of the mower discharge direction and do not point it a...

Page 3: ...r the watchful care of another responsible adult Be alert and turn machine off if children enter the area Before and when backing look behind and down for small children Mow up and down slopes 15 Max not across Remove obstacles such as rocks tree limbs etc Watchforholes ruts orbumps Uneventerraincouldoverturn the machine Tall grass can hide obstacles Use slow speed Choose a low gear so that you wi...

Page 4: ...ble you to assemble and maintain your tractor properly Always observe the SAFETY RULES CUSTOMER RESPONSIBILITIES Read and observe the safety rules Follow a regular schedule in maintaining caring for and using your tractor Follow the instructions under Maintenance and Storage sections of this owner s manual WARNING This tractor is equipped with an internal com bustion engine and should not be used ...

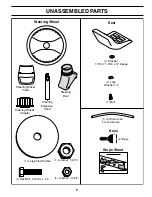
Page 5: ...eering Boot Steering Wheel Adapter 1 Bolt 1 Washer 17 32 x 1 3 16 x 12 Gauge Seat 2 Keys Slope Sheet Keys 1 Lock Washer 1 2 Steering Extension Shaft 1 Large Flat Washer 1 Oil Drain Tube For Future Use 1 Hex Bolt 1 4 28 x 1 1 4 1 Locknut 1 4 28 1 Locknut 1 2 20 ...

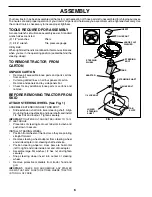
Page 6: ...ID ATTACH STEERING WHEEL See Fig 1 ASSEMBLE EXTENSION SHAFT AND BOOT Slide extension shaft onto lower steering shaft Align mountingholesinextensionandlowershaftsandinstall 1 4 hex bolt and locknut Tighten securely IMPORTANT TIGHTEN BOLT AND NUT SECURELY TO 10 12 FT LBS TORQUE Place tabs of steering boot over tab slots in dash and push down to secure INSTALL STEERING WHEEL Position front wheels of ...

Page 7: ... seat without moving its adjusted position Raise seat and tighten adjustment bolt securely 2466 02465 SEAT PAN SHOULDER BOLT FLAT WASHER SEAT TO DRIVE TRACTOR OFF SKID See Op eration section for location and function of controls WARNING Before starting read understand and follow all instructions in the Operation section of this manual Be sure tractor is in a well ventilated area Be sure the area i...

Page 8: ...HE FOLLOWING IMPORTANT ITEMS Engine oil is at proper level Fuel tank is filled with fresh clean regular unleaded gasoline Become familiar with all controls their location and function Operate them before you start the engine Be sure brake system is in safe operating condition CHECK TIRE PRESSURE The tires on your tractor were overinflated at the factory for shipping purposes Correct tire pressure ...

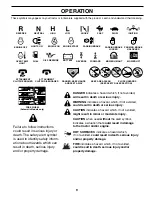
Page 9: ...uld result in serious injury or death The safety alert symbol is used to identify safety inform ation about hazards which can result in death serious injury and or property damage DANGER indicates a hazard which if not avoided will result in death or serious injury WARNING indicates a hazard which if not avoided could result in death or serious injury CAUTION indicates a hazard which if not avoide...

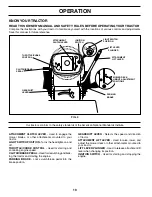
Page 10: ...f THROTTLE CHOKE CONTROL Used for starting and controlling engine speed CLUTCH BRAKE PEDAL Used for declutching and brak ing the tractor and starting the engine PARKING BRAKE Locks clutch brake pedal into the brake position GEARSHIFT LEVER Selects the speed and direction of tractor ATTACHMENT LIFT LEVER Used to raise lower and adjust the mower deck or other attachments mounted to your tractor LIFT...

Page 11: ...approximately 1 1 2 to 4 The heights are measured from the ground to the blade tip withtheenginenotrunning Theseheightsareapproximate and may vary depending upon soil conditions height of grass and types of grass being mowed The average lawn should be cut to approximately 2 1 2 inches during the cool season and to over 3 inches during hot months For healthier and better looking lawns mow often and...

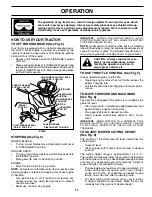
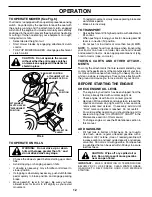
Page 12: ...nt slowly release parking brake and clutch brake pedal Make all turns slowly TO TRANSPORT Raiseattachmentlifttohighestpositionwithattachment lift control When pushing or towing your tractor be sure gearshift lever is in neutral N position Do not push or tow tractor at more than five 5 MPH NOTE To protect hood from damage when transporting your tractor on a truck or a trailer be sure hood is closed...

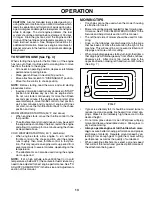
Page 13: ...ad restart the engine and allow it to warm up for one minute using the choke as described above COLD WEATHER STARTING 50 F and below When engine starts allow engine to run with the throttle control in the choke position until the engine runs roughly then move throttle control to fast posi tion This may require an engine warm up period from several seconds to several minutes depending on the temper...

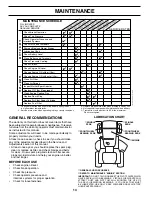
Page 14: ...t_sch tractore new1 LUBRICATION CHART 01964 FRONT WHEEL BEARING ZERK FRONT WHEEL BEARING ZERK ENGINE SPINDLE ZERK SPINDLE ZERK GENERAL PURPOSE GREASE REFER TO MAINTENANCE ENGINE SECTION IMPORTANT DO NOT OIL OR GREASE THE PIVOT POINTS WHICH HAVE SPECIAL NYLON BEARINGS VISCOUS LUBRICANTS WILL ATTRACT DUST AND DIRT THAT WILL SHORTEN THE LIFE OF THE SELF LUBRICATING BEARINGS IF YOU FEEL THEY MUST BE L...

Page 15: ...und If blade is balanced it should remain in a horizontal position If either end of the blade moves downward sharpen the heavy end until the blade is balanced TRACTOR Always observe safety rules when performing any main tenance BRAKE OPERATION If tractor requires more than six 6 feet stopping distance at high speed in highest gear then brake must be adjusted See TOADJUSTBRAKE intheServiceandAdjust...

Page 16: ...t attempt to open or remove caps or covers Adding or checking level of electrolyte is not necessary TO CLEAN BATTERY AND TERMINALS Corrosion and dirt on the battery and terminals can cause the battery to leak power Disconnect BLACK battery cable first then RED bat tery cable and remove battery from tractor Rinse the battery with plain water and dry Clean terminals and battery cable ends with wire ...

Page 17: ...12 CLEANING Clean engine battery seat finish etc of all foreign matter Keep finished surfaces and wheels free of all gasoline oil etc Protect painted surfaces with automotive type wax We do not recommend using a garden hose or pressure washer to clean your tractor unless the engine and trans mission are covered to keep water out Water in engine or transmission will shorten the useful life of your ...

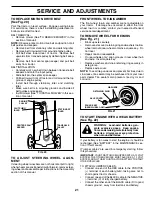
Page 18: ... belt off engine pulley Removesmallretainerspring andremoveclutchspring off pulley bolt Remove large retainer spring slide collar off and push housing guide out of bracket Disconnect anti swaybar from chassis bracket by re moving retainer spring Disconnect suspension arms from rear deck brackets by removing retainer springs Disconnect front links from deck by removing retainer springs Raise lift l...

Page 19: ...he mower housing should be adjusted so that the front is approximately 1 8 to 1 2 lower than the rear when the mower is in its high est position Checkadjustmentonrightsideoftractor Measuredistance D directly in front and behind the mandrel at bottom edge of mower housing as shown Before making any necessary adjustments check that both front links are equal in length If links are not equal in lengt...

Page 20: ...Measure distance between brake operating arm and nut A on brake rod If distance is other than 1 1 2 loosen jam nut and turn nut A until distance becomes 1 1 2 Retighten jam nut against nut A Road test tractor for proper stopping distance as stated above Readjust if necessary If stopping distance is still greater than five 5 feet in highest gear further maintenance is necessary Replace brake pads o...

Page 21: ...sive gases Keep sparks flameandsmokingmaterialsawayfrom batteries Always wear eye protection when around batteries If your battery is too weak to start the engine it should be recharged See BATTERY in the MAINTENANCE sec tion of this manual If jumper cables are used for emergency starting follow this procedure IMPORTANT YOURTRACTOR IS EQUIPPEDWITH A 12VOLT SYSTEM THE OTHER VEHICLE MUST ALSO BE A 1...

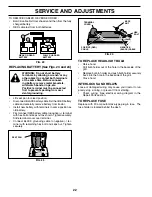
Page 22: ...AN 02602 KEPS NUT HEX BOLT POSITIVE RED CABLE NEGATIVE BLACK CABLE TERMINAL COVER REPLACING BATTERY See Figs 23 and 24 WARNING Do not short battery terminals by allowing a wrench or any other object to contact both terminals at the same time Before connect ing battery remove metal bracelets wristwatch bands rings etc Positive terminal must be connected first to prevent sparking from acci dental gr...

Page 23: ...OL CABLE The throttle control has been preset at the factory and adjustment should not be necessary If adjustment is nec essary see engine manual TO ADJUST CHOKE CONTROL The choke control has been preset at the factory and ad justment should not be necessary If adjustment is neces sary see engne manual TO ADJUST CARBURETOR Your carburetor is not adjustable If your engine does not operate properly ...

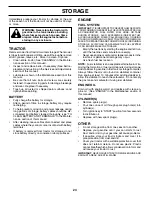
Page 24: ...FUEL SYSTEM PARTS SUCH AS CARBURETOR FUEL FILTER FUEL HOSE OR TANK DURING STORAGE ALSO EXPERIENCE INDICATES THAT ALCOHOL BLENDED FUELS CALLED GASOHOL OR USING ETHANOLORMETHANOL CANATTRACTMOISTUREWHICH LEADSTOSEPARATIONANDFORMATIONOFACIDSDURING STORAGE ACIDIC GAS CAN DAMAGE THE FUEL SYSTEM OF AN ENGINE WHILE IN STORAGE Empty the fuel tank by starting the engine and let it run until the fuel lines a...

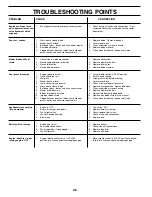
Page 25: ...Faulty ignition switch 7 Check replace ignition switch 8 Faulty solenoid or starter 8 Check replace solenoid or starter 9 Faulty operator presence switch es 9 Contact an authorized service center department Engine clicks but will not 1 Weak or dead battery 1 Recharge or replace battery start 2 Corroded battery terminals 2 Clean battery terminals 3 Loose or damaged wiring 3 Check all wiring 4 Fault...

Page 26: ... Mower deck not level 4 Level mower deck 5 Low uneven tire air pressure 5 Check tires for proper air pressure 6 Worn bent or loose blade 6 Replace sharpen blade Tighten blade bolt 7 Buildup of grass leaves and trash under mower 7 Clean underside of mower housing 8 Mower drive belt worn 8 Replace mower drive belt 9 Blades improperly installed 9 Reinstall blades sharp edge down 10 Improper blades us...

Page 27: ...d for rental or commercial purposes is limited to 90 days from the date of original purchase 5 This Warranty applies only to products which have been properly assembled adjusted operated and main tained in accordance with the instructions furnished This Warranty does not apply to any product which has been subjected to alteration misuse abuse improper assembly or installation delivery damage or to...

Page 28: ...the face Do not mow slopes greater than 15 degrees Make turns gradually to prevent tipping or loss of control Exercise extreme caution when changing direction on slopes 1 Fold this page along dotted line indicated above 2 Hold page before you so that its left edge is vertically parallel to a tree trunk or other upright structure 3 Sight across the fold in the direction of hill slope you want to me...

Page 29: ......
Reviews: