background image

42

LIMITED WARRANTY

The Manufacturer warrants to the original consumer purchaser that this product as manufactured is free from defects in materi-
als and work man ship. For a period of two (2) years from date of purchase by the original consumer purchaser, we will repair or 
replace, at our option, without charge for parts or labor incurred in replacing parts, any part which we fi nd to be defective due 
to materials or workmanship. This Warranty is subject to the following limitations and exclusions.

1.    This warranty does not apply to the engine, other than EHP manufactured transaxle/transmission components, 

battery (except as noted below) or components parts thereof.  Please refer to the applicable manufacturer's 
warranty on these items.

2.   Transportation charges for the movement of any power equipment unit or attachment are the responsibility of 

the pur chaser.  Transportation charges for any parts submitted for replacement under this warranty must be 
paid by the purchaser unless such return is requested by Electrolux Home Products.

3.   Battery Warranty:  On products equipped with a Battery, we will replace, without charge to you, any battery 

which we fi nd to be defective in manufacture, during the fi rst ninety (90) days of ownership. After ninety (90) 
days, we will exchange the Battery, charging you 1/12 of the price of a new Battery for each full month from 
the date of the original sale. Battery must be maintained in accordance with the instructions furnished.

4.   The Warranty period for any products used for rental or commercial purposes is limited to 90 days from the 

date of original purchase.

5.   This Warranty applies only to products which have been properly assembled, adjusted, operated, and main-

 tained in ac cor dance with the instructions furnished. This Warranty does not apply to any product which has 
been subjected to alteration, misuse, abuse, improper assembly or installation, delivery damage, or to normal 
wear of the product.

6.   Exclusions: Excluded from this Warranty are belts, blades, blade adapters, normal wear, normal adjustments, 

stan dard hardware and normal maintenance.

7.    In the event you have a claim under this Warranty, you must return the product to an authorized  service deal-

er.

Should you have any unanswered questions concerning this Warranty, please contact:

giving the model number, serial number and date of purchase of your product and the name and address of the authorized 
dealer from whom it was purchased.

THIS WARRANTY DOES NOT APPLY TO INCIDENTAL OR CONSEQUENTIAL DAMAGES AND ANY IMPLIED WAR RAN -
TIES ARE LIMITED TO THE SAME TIME PERIODS STATED HEREIN FOR OUR EXPRESSED WARRANTIES. Some areas 
do not allow the limitation of consequential damages or limitations of how long an implied Warranty may last, so the above limi-
tations or exclusions may not apply to you. This Warranty gives you specifi c legal rights, and you may have other rights which 
vary from locale to locale.

This is a limited Warranty within the meaning of that term as defi ned in the Magnuson-Moss Act of 1975.

In Canada contact:

Electrolux Canada Corp.
7075 Ordan Drive
Mississauga, Ontario 
L5T 1K6

Electrolux Home Products, Inc.
Outdoor Products Customer Service Dept.
250 Bobby Jones Expressway
Augusta, GA  30909  USA

Summary of Contents for 191984

Page 1: ...PO175H42STB 17 5 HP 42 Inch Lawn Tractor For Parts and Service contact our authorized distributor call 1 800 849 1297 For Technical Assistance call 1 800 829 5886 191984 03 04 04 RD PRINTED IN U S A 00420 poulan ...

Page 2: ...he machine Clear the area of objects such as rocks toys wire etc which could be picked up and thrown by the blade Be sure the area is clear of other people before mow ing Stop machine if anyone enters the area Never carry passengers Do not mow in reverse unless absolutely necessary Al ways look down and behind before and while backing Be aware of the mower discharge direction and do not point it a...

Page 3: ...e blades shift into reverse and back down slowly Do not turn on slopes unless necessary and then turn slowly and gradually downhill if possible WARNING In order to prevent acci dental starting when setting up trans porting adjusting or making repairs always disconnect spark plug wire and place wire where it cannot contact spark plug WARNING Do not coast down a hill in neutral you may lose control ...

Page 4: ...d maintain your tractor properly Always observe the SAFETY RULES CUSTOMER RESPONSIBILITIES Read and observe the safety rules Follow a regular schedule in maintaining caring for and using your tractor Follow the instructions under Maintenace and Stor age sections of this owner s manual WARNING This tractor is equipped with an internal com bustion engine and should not be used on or near any unimpro...

Page 5: ...nsert 1 Large Flat Washer Steering Boot Steering Extension Shaft Steering Wheel Adapter 1 Bolt 1 Washer 17 32 x 1 3 16 x 12 Gauge Seat 2 Keys Slope Sheet Key 1 Lock Washer 1 2 1 Hex Bolt 1 4 28 x 1 1 4 1 Locknut 1 4 28 1 Locknut 1 2 20 1 Oil Drain Tube ...

Page 6: ...RING SHAFT STEERING BOOT EXTENSION SHAFT 1 4 HEX BOLT STEERING WHEEL INSERT ADAPTER 1 2 LOCK WASHER LARGE FLAT WASHER TABS TAB SLOTS BEFORE REMOVING TRACTOR FROM SKID ATTACH STEERING WHEEL SEE FIG 1 ASSEMBLE EXTENSION SHAFT AND BOOT Slide extension shaft onto lower steering shaft Align mountingholesinextensionandlowershaftsandinstall 1 4 hex bolt and locknut Tighten securely IMPORTANT TIGHTEN BOLT...

Page 7: ...rottle control to idle position Release parking brake Slowlymovethemotioncontrolleverforwardandslowly drive tractor off skid Apply brake to stop tractor set parking brake and place motion control lever in neutral position Turn ignition key to STOP position Continue with the instructions that follow FIG 2 ADJUSTMENT BOLT LOCK WASHER HOW TO SET UP YOUR TRACTOR INSTALL SEAT See Fig 2 Adjust seat befo...

Page 8: ...ean regular unleaded gasoline Become familiar with all controls their location and function Operate them before you start the engine Be sure brake system is in safe operating condition It is important to purge the transmission before oper ating your tractor for the first time Follow proper start ing and transmission purging instructions See TO START ENGINE and PURGE TRANSMISSION in the Operation s...

Page 9: ...ould result in serious injury or death The safety alert symbol is used to identify safety inform ation about hazards which can result in death serious injury and or property damage DANGER indicates a hazard which if not avoided will result in death or serious injury WARNING indicates a hazard which if not avoided could result in death or serious injury CAUTION indicates a hazard which if not avoid...

Page 10: ...r declutching and brak ing the tractor and starting the engine PARKING BRAKE Locks clutch brake pedal into the brake position FREEWHEEL CONTROL Disengages transmission for pushing or slowly towing the tractor with the engine off LIFT LEVER PLUNGER ATTACHMENT LIFT LEVER PARKING BRAKE IGNITION SWITCH THROTTLE CHOKE CONTROL LIGHT SWITCH POSITION MOTION CONTROL LEVER CLUTCH BRAKE PEDAL FIG 4 FREE WHEE...

Page 11: ... DEPRESSED ENGINE Move throttle control to slow position NOTE Failure to move throttle control to slow position and allowing engine to idle before stopping may cause engine to backfire Turn ignition key to OFF position and remove key Always remove key when leaving tractor to prevent unauthorized use Never use choke to stop engine PARKING BRAKE ENGAGED POSITION MOTION CONTROL LEVER THROTTLE CHOKE C...

Page 12: ...y the attachments that are recommended by and comply with specifications of the manufacturer of your trac tor Use common sense when towing Too heavy of a load while on a slope is dangerous Tires can lose traction with the ground and cause you to lose control of your tractor TO TRANSPORT See Figs 4 and 7 When pushing or towing your tractor be sure to disengage transmission by placing freewheel cont...

Page 13: ...ition Move throttle control to choke position NOTE Before starting read the warm and cold starting procedures below Insertkeyintoignitionandturnkeyclockwiseto START position and release key as soon as engine starts Do not run starter continuously for more than fifteen seconds per minute If the engine does not start after several attempts move throttle control to fast position wait a few minutes an...

Page 14: ...speed With motion control lever in neutral N position slowly disengage clutch brake pedal Slowly move motion control lever forward after the tractor moves approximately five 5 feet slowly move motion control lever to reverse position After the trac tor moves approximately five 5 feet return the mo tion control lever to the neutral N position Repeat this procedure with the motion control lever thre...

Page 15: ...t_sch tractore new1 LUBRICATION CHART 01964 FRONT WHEEL BEARING ZERK FRONT WHEEL BEARING ZERK ENGINE SPINDLE ZERK SPINDLE ZERK GENERAL PURPOSE GREASE REFER TO MAINTENANCE ENGINE SECTION IMPORTANT DO NOT OIL OR GREASE THE PIVOT POINTS WHICH HAVE SPECIAL NYLON BEARINGS VISCOUS LUBRICANTS WILL ATTRACT DUST AND DIRT THAT WILL SHORTEN THE LIFE OF THE SELF LUBRICATING BEARINGS IF YOU FEEL THEY MUST BE L...

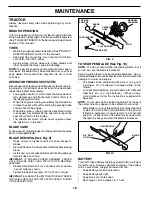
Page 16: ...ade is balanced TRACTOR Always observe safety rules when performing any main tenance BRAKE OPERATION If tractor requires more than six 6 feet stopping distance at high speed in highest gear then brake must be adjusted See TOADJUSTBRAKE intheServiceandAdjustments section of this manual TIRES Maintainproperairpressureinalltires See PRODUCT SPECIFICATIONS section of this manual Keep tires free of gas...

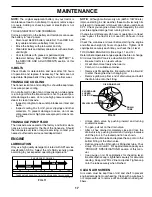
Page 17: ...ES 20 0 30 40 80 100 30 20 0 20 30 40 F C 32 10 10 60 5W 30 SAE 30 oil_visc_chart1_e NOTE Although multi viscosity oils 5W30 10W30 etc improve starting in cold weather these multi viscosity oils will result in increased oil consumption when used above 32 F Check your engine oil level more frequently to avoid possible engine damage from running low on oil Change the oil after every 25 hours of oper...

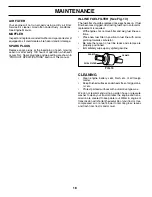
Page 18: ... to clean your tractor unless the engine and trans mission are covered to keep water out Water in engine or transmission will shorten the useful life of your tractor Use compressed air or a leaf blower to remove grass leaves and trash from tractor and mower AIR FILTER Your engine will not run properly using a dirty air filter Service air cleaner more often under dusty conditions See Engine Manual ...

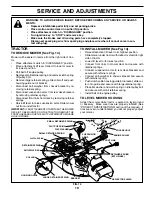
Page 19: ... Disconnect anti swaybar from chassis bracket by re moving retainer spring Disconnect suspension arms from rear deck brackets by removing retainer springs Disconnect front links from deck by removing retainer springs Raise lift lever to raise suspension arms Slide mower out from under tractor IMPORTANT IFANATTACHMENTOTHERTHANTHEMOWER DECK IS TO BE MOUNTED ON THE TRACTOR REMOVE THE FRONTLINKSANDHOO...

Page 20: ...on that side To lower one side of mower loosen lift link adjustment nut on that side NOTE Threefullturnsofadjustmentnutwillchangemower height about 1 8 Recheck measurements after adjusting FRONT TO BACK ADJUSTMENT See Figs 17 and 18 IMPORTANT DECK MUST BE LEVEL SIDE TO SIDE IF THE FOLLOWINGFRONT TO BACKADJUSTMENTISNECESSARY BE SURE TO ADJUST BOTH FRONT LINKS EQUALLY SO MOWER WILL STAY LEVEL SIDE T...

Page 21: ...gaged position Pull freewheel control out and into the slot and release so it is held in the disengaged position Therearwheelsmustlockandskidwhenyoutrytomanually push the tractor forward If the rear wheels rotate the brake needs to be adjusted or the pads need to be replaced TO ADJUST BRAKE Depress clutch brake pedal all the way down and en gage parking brake Measure distance between brake operati...

Page 22: ...OUR TRACTOR BATTERY TO START OTHER VEHICLES TO ATTACH JUMPER CABLES Connect one end of the RED cable to the POSITIVE terminal of each battery A B taking care not to short against tractor chassis ConnectoneendoftheBLACKcabletotheNEGATIVE terminal C of fully charged battery Connect the other end of the BLACK cable D to good chassis ground away from fuel tank and battery TO REMOVE CABLES REVERSE ORDE...

Page 23: ... SEAT PAN 01536 HEADLIGHT WIRE CONNECTOR HOOD FIG 27 Lift seat pan to raised position DisconnectBLACKbatterycablefirstthenREDbattery cable and carefully remove battery from tractor Install new battery with terminals in same position as old battery First connect RED battery cable to positive terminal with hex bolt and keps nut as shown Tighten securely Slide terminal cover over terminal Connect BLA...

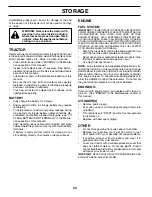
Page 24: ...FUEL SYSTEM PARTS SUCH AS CARBURETOR FUEL FILTER FUEL HOSE OR TANK DURING STORAGE ALSO EXPERIENCE INDICATES THAT ALCOHOL BLENDED FUELS CALLED GASOHOL OR USING ETHANOLORMETHANOL CANATTRACTMOISTUREWHICH LEADSTOSEPARATIONANDFORMATIONOFACIDSDURING STORAGE ACIDIC GAS CAN DAMAGE THE FUEL SYSTEM OF AN ENGINE WHILE IN STORAGE Empty the fuel tank by starting the engine and let it run until the fuel lines a...

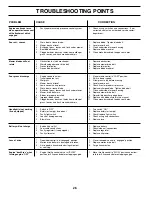
Page 25: ...ignition switch 7 Check replace ignition switch 8 Faulty solenoid or starter 8 Check replace solenoid or starter 9 Faulty operator presence switch es 9 Contact an authorized service center department Engine clicks but will not 1 Weak or dead battery 1 Recharge or replace battery start 2 Corroded battery terminals 2 Clean battery terminals 3 Loose or damaged wiring 3 Check all wiring 4 Faulty solen...

Page 26: ...en blade Tighten blade bolt 7 Buildup of grass leaves and trash under mower 7 Clean underside of mower housing 8 Mower drive belt worn 8 Replace mower drive belt 9 Blades improperly installed 9 Reinstall blades sharp edge down 10 Improper blades used 10 Replace with blades listed in this manual 11 Clogged mower deck vent holes from buildup of 11 Clean around mandrels to open vent holes grass leave...

Page 27: ...d for rental or commercial purposes is limited to 90 days from the date of original purchase 5 This Warranty applies only to products which have been properly assembled adjusted operated and main tained in accordance with the instructions furnished This Warranty does not apply to any product which has been subjected to alteration misuse abuse improper assembly or installation delivery damage or to...

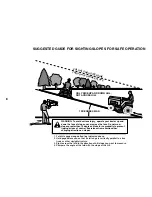
Page 28: ...the face Do not mow slopes greater than 15 degrees Make turns gradually to prevent tipping or loss of control Exercise extreme caution when changing direction on slopes 1 Fold this page along dotted line indicated above 2 Hold page before you so that its left edge is vertically parallel to a tree trunk or other upright structure 3 Sight across the fold in the direction of hill slope you want to me...

Page 29: ......

Reviews: