0450071
Si vous avez des questions de nature technique, veuillez appeler le 1-800-665-8685
7
V 1.45
MAINTENANCE
Before making any adjustments or changing any accessory, turn off the tool, unplug it from
it's air source and discharge any residual air pressure.
If painting is paused for only a few minutes, the machine can be left without cleaning. If the spray gun will be left to
sit for a few hours or more before its next use, it must be cleaned to prevent the paint from drying inside the ducts.
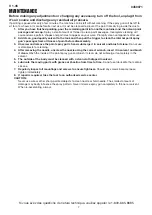
1. After you have finished painting, pour the remaining paint into another container and then clean paint
passage and air cap.
Spray a small amount of thinner to clean paint passages. Incomplete cleaning will
cause adverse pattern shapes and particles to appear on your work. Promptly clean components after use.
2. Add clean, good quality solvent to the tank and then pull the trigger to clean the internal paint spray
gun's passages from all traces of paint before disassembly.
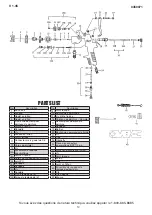
3. Unscrew and remove the paint spray gun's head, submerge it in solvent and brush it clean.
Do not use
metal objects for cleaning.
4. After removing the needle, unscrew the nozzle using the correct wrench, insert it in solvent and brush
it clean.
Wash the inside of the paint spray gun and brush it clean; do not submerge it completely in the
solvent.
5. The outside of the body must be cleaned with a clean cloth dipped in solvent.
6. Lubricate the moving parts with grease or Vaseline from time to time.
Do not use lubricants that contain
silicone.
7. Regularly inspect all mountings and screws to ensure tightness.
Should any screws become loose,
tighten immediately.
8. If repair is required, take the tool to an authorized service center.
CAUTION:
Never use wire or other sharp, pointed objects to clean nozzle or fluid needle. The smallest amount of
damage may badly influence the spray pattern. Never immerse spray gun completely in thinner or solvent.
When re-assembling, always


