background image

for any technical questions, please call 1-800-665-8685

4

vIbratIOn PrecautIOns

this tool vibrates during use.

 Repeated or long-term exposure to vibration may cause temporary or permanent 

physical injury, particularly to the hands, arms and shoulders.

1.  anyone using vibrating tools regularly or for an extended period should first be examined by a doctor 

and then have regular medical check ups to ensure medical problems are not being caused by or 
worsened from tool use. 

Pregnant women or people who have impaired blood circulation to the hands, past 

hand injuries, nervous system disorders, diabetes or Raynaud's Disease should not use this tool. If you feel 
any medical symptoms related to vibrations (such as tingling, numbness, and white or blue fingers), seek 
medical attention as soon as possible.

2.  Do not smoke during use. 

Nicotine reduces the blood flow to the hands and fingers, increasing the risk of 

vibration-related injury.

3.  wear suitable gloves to reduce the vibration effects on the user.
4.  use tools with the lowest amount of vibration when there is a choice between different processes.
5.  Do not use for extended periods. 

Take frequent breaks when using this tool.

6.  let the tool do the work. 

Grip tool as lightly as possible (while still keeping safe control of it).

7.  to reduce vibrations, maintain tool as explained in this manual.

 If abnormal vibrations occur, stop using 

this tool immediately.

sPecIfIc safety InstructIOns

1.  use an appropriate dust respirator when sanding for an extended period of time.

 This will help prevent 

breathing in the fine dust created while sanding.

 cautIOn: 

some wood contains preservative such as copper chromium arsenate (cca), which can be toxic.

 When 

sanding these materials extra care should be taken to avoid inhalation and minimize skin contact.

2.  always disconnect the sander cord plug from the receptacle before changing abrasive sheets.

OPErATING INSTrUCTIONS

 this sander is designed for use in sanding and polishing areas that are hard to reach such as corners and 
edges.

 The pointed front allows for easy access where other sanders cannot reach.

selectInG tHe rIGHt abrasIve GrIt

 selecting the correct size and type of abrasive grit is extremely important in achieving a high quality sanded 
finish.

 Aluminum oxide, silicone carbide and other synthetic abrasive are best for power sanding. To produce the 

best finish possible, start with a coarse grit sanding paper and gradually change to finer and finer grit sandpapers. 
A final sanding with a well-worn fine sandpaper will produce a professional looking finish that in many cases will not 
need hand sanding.

attacHInG sanDPaPer

1.   Disconnect sander from the power source.
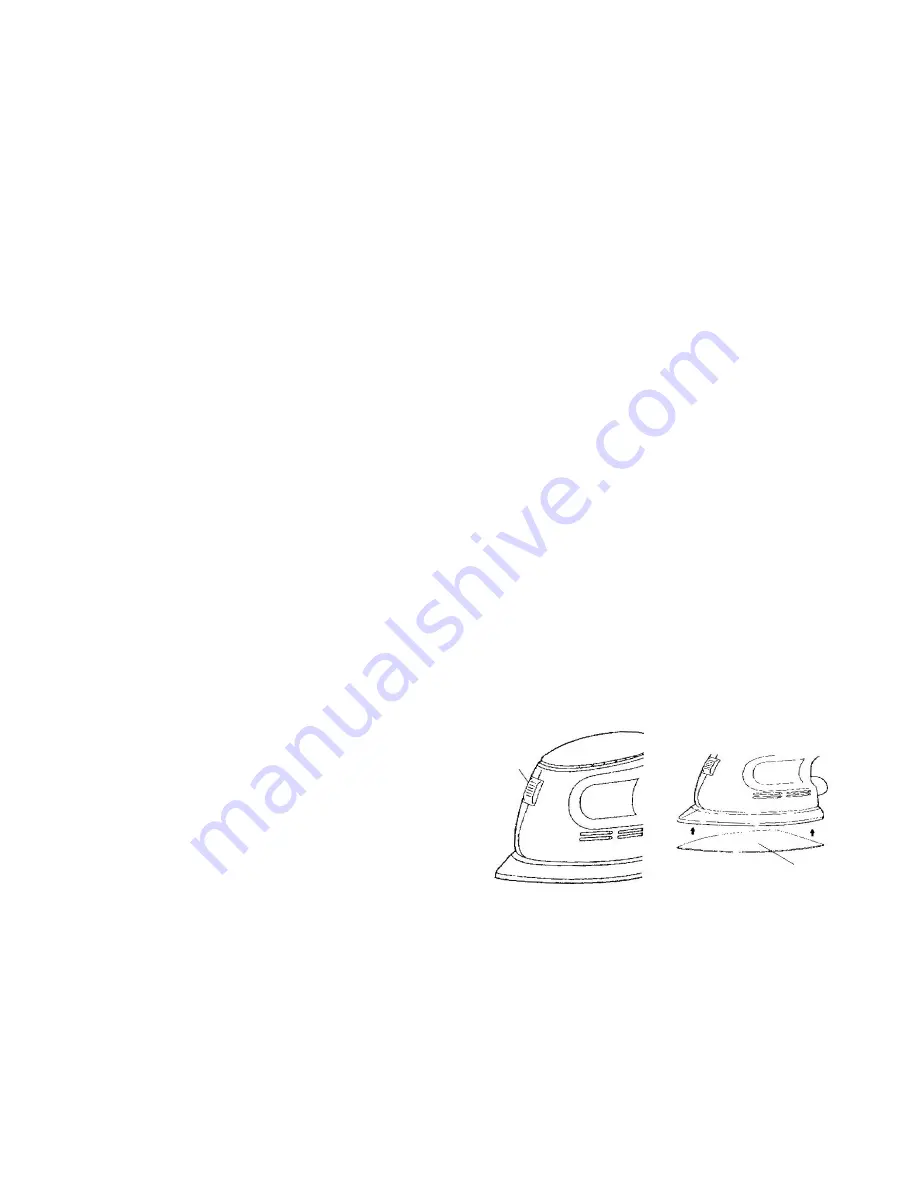
 2.  the sander uses a hook and loop backed 

sandpaper that is attached to  
the sanding base by simply pushing the 
sandpaper on to the base.

 There are no  

retainer clips to hold the paper in place.

 3.  to attach the sandpaper, simply align the dust 

extraction holes on the base with the holes in 
the paper and press firmly to all segments of the 
sheet ensuring a firm contact.

4.  Prior to attaching the sandpaper, make sure the 

base is free of dirt, dust and foreign matter.

5.  replacement sandpaper is available at your 

nearest Princess auto.

8056640

fIG. 1

On/Off 

Switch

fIG. 2

On/Off 

Switch

Summary of Contents for 8056640

Page 1: ...Palm Detail Sander Kit 8056640 Owner s manual Please read and understand all instructions before use Retain this manual for future reference ...

Page 2: ...able protective equipment 4 Store unused equipment When not in use tools must be stored in a dry location to prevent rust Always lock up tools and keep them out of reach of children Personal safety 1 Use eye breathing and ear protection Always wear ANSI approved impact safety goggles Wear a dust mask or respirator when working around metal or wood dusts Wear ANSI approved earplugs 2 Do not over re...

Page 3: ...ks when working on electrical equipment Prevent body contact with grounded surfaces such as pipes radiators cooking stoves and refrigerators There is an increased chance of electrical shock if your body is grounded 3 Double insulated tools are equipped with a polarized plug one blade is wider than the other This plug will fit in a polarized outlet only one way If the plug does not fit fully in the...

Page 4: ...ll help prevent breathing in the fine dust created while sanding CAUTION Some wood contains preservative such as copper chromium arsenate CCA which can be toxic When sanding these materials extra care should be taken to avoid inhalation and minimize skin contact 2 Always disconnect the sander cord plug from the receptacle before changing abrasive sheets OPERATING INSTRUCTIONS This sander is design...

Page 5: ... the sandpaper 2 A vacuum cleaner can be fitted to the dust extraction nozzle to minimize residual dust 3 This tool is designed for accepting a dust vacuum If a dust vacuum is to be used drill five holes on the sander paper The holes on the sand paper should match those on the sanding pad MAINTENANCE 1 Although the sander does not require user maintenance the sander should be kept clean Wipe the s...

Page 6: ...4 Switch 2 Sandpaper 15 Left housing 3 Hook loop base pad 16 Top cover 4 Base support 17 Screw 5 Bearing 18 Bearing 6 Balancer 19 Terminal block 7 Bearing 20 Cable clamp 8 Fan 21 Cable guard 9 Brush holder 22 Power cable 10 Rotor 23 Screw 11 Label 24 Screw 12 Switch cover 25 Right housing 13 Stator 26 Label 8056640 ...

Page 7: ...Trousse de ponceuse de paume 8056640 Manuel du Propriétaire Vous devez lire et comprendre toutes les instructions avant d utiliser l appareil Conservez ce manuel afin de pouvoir le consulter plus tard ...

Page 8: ...re ou les fumées 3 Quand vous utilisez cet outil tenez les spectateurs les enfants et les visiteurs à une distance prudente Ne les laissez pas manipuler des outils ou des rallonges Aucune personne qui ne porte pas l équipement de protection approprié devrait être dans l aire de travail 4 N oubliez pas de bien ranger l équipement non utilisé Quand on ne se sert pas d un outil il devrait être placé ...

Page 9: ...les bras et les épaules Vous trouverez ci dessous des conseils pour diminuer le risque de tels problèmes reliés à la vibration 1 Toute personne qui utilise n importe quel outil vibrant de façon régulière ou durant une période prolongée devrait d abord consulter un médecin puis subir des examens médicaux réguliers pour s assurer que des problèmes médicaux ne sont pas causés ou empirés par l emploi ...

Page 10: ...toxique Quand on ponce un tel matériau il faut prendre des précautions additionnelles pour éviter d inhaler cette substance et pour minimiser son contact avec la peau 2 Avant de changer la feuille de papier abrasif débranchez toujours la ponceuse en sortant sa fiche de la prise de courant INSTRUCTIONS D UTILISATION Cet outil a été conçu pour poncer et polir des surfaces difficiles à atteindre comm...

Page 11: ...d extraction 4 Cette ponceuse a été conçue pour accepter un aspirateur de poussière Quand on décide d employer un tel aspirateur il faut percer cinq trous dans la papier abrasif Ces trous dans le papier abrasif devraient correspondre à ceux qui se trouvent dans la plaque de ponçage ENTRETIEN 1 Bien que la ponceuse n exige aucun entretien de la part des utilisateurs il faut toutefois la garder bien...

Page 12: ...e la base 5 Roulement 6 Balancier 7 Roulement 8 Ventilateur 9 Porte balais 10 Rotor 11 Étiquette 12 Couvre commutateur 13 Stator DIAGRAMME DES PIÈCES LISTE DES PIÈCES Nº Description 14 Commutateur 15 Boîtier côté gauche 16 Couvercle supérieur 17 Vis 18 Roulement 19 Bloc à bornes 20 Serre câble 21 Garde câble 22 Câble d alimentation 23 Vis 24 Vis 25 Boîtier côté droit 26 Étiquette ...

Reviews: