background image

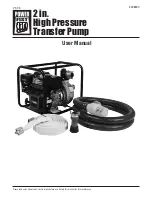
2 in. High Pressure Transfer Pump

9

Visit www.princessauto.com for more information

8408890

V 3.03

OPERATION

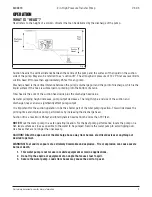
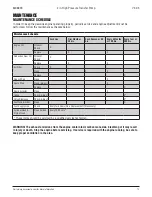
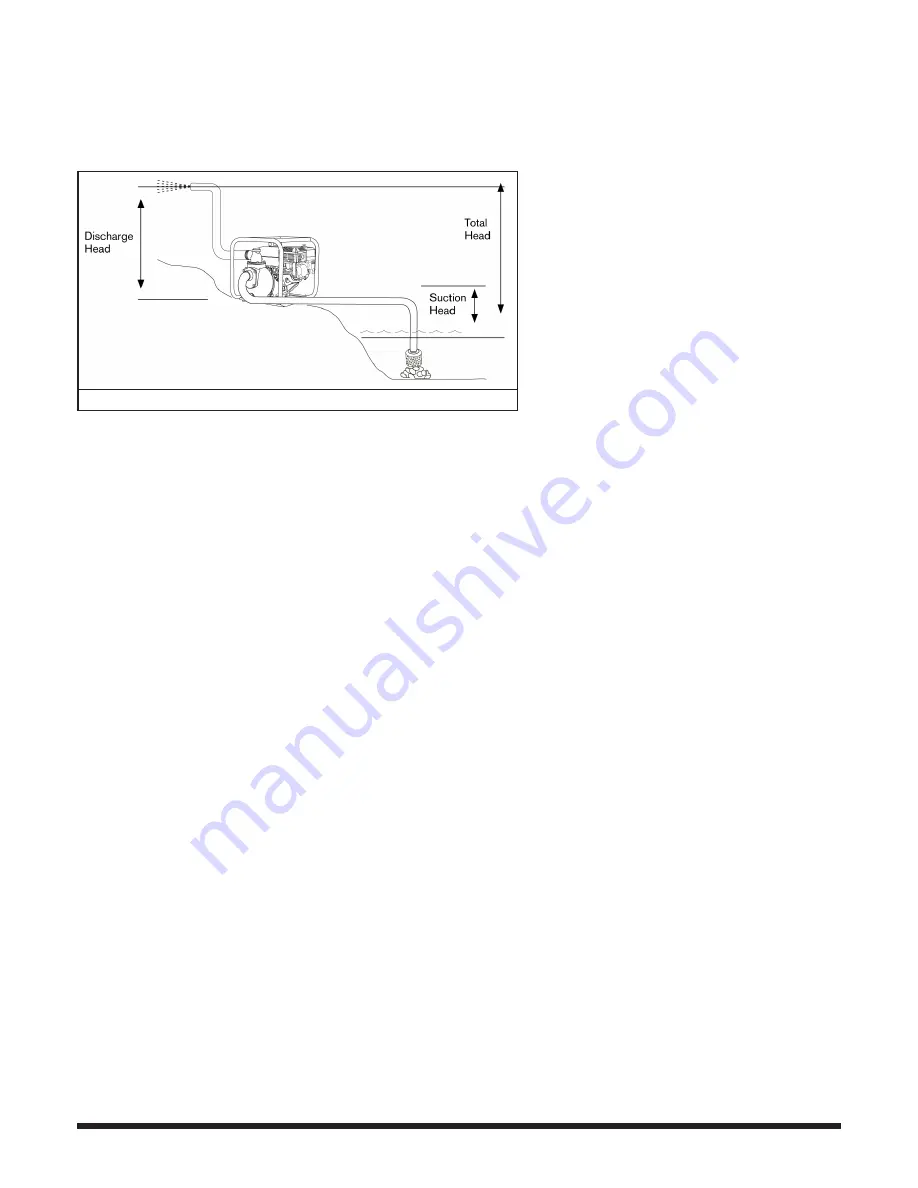
WHAT IS “HEAD”? 

Head refers to the height of a column of water that can be delivered by the discharge of the pump.

Fig. 6


Suction head is the vertical distance between the centre of the pump and the surface of the liquid on the suction 

side of the pump. May also be referred to as “suction lift”. The atmospheric pressure of 14.7 PSI at sea level limits 

suction head lift to less than approximately 26 feet for any pump.

Discharge head is the vertical distance between the pump’s discharge port and the point of discharge, which is the 

liquid surface if the hose is submerged or pumping into the bottom of a tank.

Total head is the sum of the suction head value plus the discharge head value.

As water pumping height increases, pump output decreases. The length, type, and size of the suction and 

discharge hoses can also significantly affect pump output.

It is important for the suction operation to be the shorter part of the total pumping action. This will decrease the 

priming time and improve pump performance by increasing the discharge head.

Suction lift is a maximum 26 feet and total dynamic head cannot be more than 197 feet.

NOTE: 

Move the water pump to a safe operating location. For the best pump performance, locate the pump on a 

flat, level surface as close as possible to the water to be pumped. Secure the water pump to avoid tipping over. 

Use hoses that are no longer than necessary.

CAUTION! Direct the open end of the discharge hose away from homes, electrical devices or anything not 

desired to get wet.

WARNING! Fuel and its vapours are extremely flammable and explosive. Fire or explosion can cause severe 

burns or death.

1.  This water pump is not for use in mobile equipment or marine applications.

2.  Do not tip the engine or equipment at an angle that causes fuel to spill.

3.  Secure the water pump. Loads from hoses may cause the unit to tip over.

Summary of Contents for 8408890

Page 1: ...Please read and understand all instructions before use Retain this manual for future reference 8408890 V 3 03 User Manual 2 in High Pressure Transfer Pump ...

Page 2: ...l PAHP 2070R IMPORTANT SAFETY PRECAUTIONS WARNING Read and understand all instructions before using this tool The operator must follow basic precautions to reduce the risk of personal injury and or damage to the tool Before allowing someone else to use this tool make sure they are aware of all safety information WARNING The warnings cautions and instructions discussed in this instruction manual ca...

Page 3: ...a tool 4 Do not operate any machine tool when tired or under the influence of drugs alcohol or medications 5 Do not overreach when operating a tool Proper footing and balance enables better control in unexpected situations SPECIFIC SAFETY PRECAUTIONS 1 Running the engine gives off carbon monoxide an odourless colourless poison gas Breathing carbon monoxide can cause headache fatigue dizziness vomi...

Page 4: ...r hoses b Never operate a water pump without the protective housing or covers 11 Excessively high operating speeds increase the risk of injury and damage to the water pump Excessively low speeds impose a heavy load a Do not tamper with the governed speed b Do not modify the water pump c Do not allow unqualified persons or children to operate or service the water pump 12 Be sure the pump chamber is...

Page 5: ... the parts carefully to make sure the machine was not damaged while shipping 3 Do not discard the packaging material until you have carefully inspected and satisfactorily operated the machine WARNING If any part is missing do not operate the machine until the missing parts are replaced Failure to do so could result in serious personal injury ASSEMBLY Your water pump requires some set up and is rea...

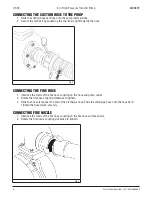
Page 6: ...hose Fig 2 CONNECTING THE FIRE HOSE 1 Interlock the claws of the fire hose coupling on the hose and pump outlet 2 Rotate the fire hose coupling clockwise to tighten 3 Slide the hose clamp over the end of the discharge hose Slide the discharge hose onto the hose barb Tighten the hose clamp securely CONNECTING FIRE NOZZLE 1 Interlock the claws of the fire hose coupling on the fire hose and fire nozz...

Page 7: ...too low add the recommended engine oil up to the oil filling neck 4 Reinstall the dipstick Fig 4 Engine Oil Alarm The engine oil alarm is designed to function when the engine oil in the crankcase is insufficient Lack of engine oil may damage the engine Once the oil level in the crankcase is too low the engine oil alarm will stall the engine automatically to reduce damage while the engine switch is...

Page 8: ...securely Fig 5 CAUTION Fuel may damage oil paint and plastic Be careful not to spill fuel when refueling Any damage due to oil spilling is not covered under the warranty Light knocking or spark exploding sound may be heard during engine overloading this is normal If a knocking or spark exploding sound occurs at a steady speed under normal load change the brand of gasoline if such a phenomena still...

Page 9: ...f the suction and discharge hoses can also significantly affect pump output It is important for the suction operation to be the shorter part of the total pumping action This will decrease the priming time and improve pump performance by increasing the discharge head Suction lift is a maximum 26 feet and total dynamic head cannot be more than 197 feet NOTE Move the water pump to a safe operating lo...

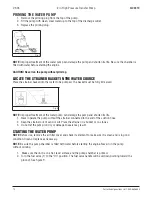
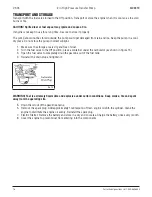
Page 10: ...ed Fig 8 NOTE Improper treatment of the water pump can damage the pump and shorten its life 1 Never operate the pump without the strainer connected to the end of the suction hose 2 Keep the strainer out of sand or silt Place the strainer in a bucket or on stones 3 Do not let the pump run dry or damage to seals may result STARTING THE WATER PUMP NOTE Before use remove the air filter cover and check...

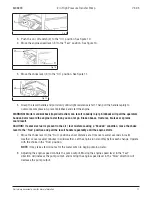
Page 11: ...e faster than you can let go Broken bones fractures bruises or sprains could result CAUTION If excessive fuel is present in the air fuel mixture causing a flooded condition move the choke lever to the Run position and pull the recoil handle repeatedly until the engine starts 7 Move the choke lever to the Run position a short distance at a time over several seconds in warm weather or over several m...

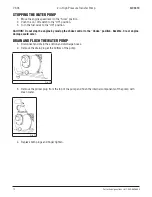
Page 12: ...he Off position CAUTION Do not stop the engine by moving the choke control to the Choke position Backfire fire or engine damage could occur DRAIN AND FLUSH THE WATER PUMP 1 Disconnect and drain the suction and discharge hoses 2 Remove the drain plug at the bottom of the pump Fig 12 3 Remove the primer plug from the top of the pump and flush the internal components of the pump with clean water Fig ...

Page 13: ...l Oil Level Check X Replace X X Air Filter Check X Clean X X Replace X Deposit Cup Clean X Spark Plug Clean Adjust X Replace X Spark Arrester Clean X Idling Check Adjust X Valve Clearance Check Adjust X Fuel Tank Filter Clean X Fuel Supply Line Check Every Two Years Do a Replacement If Necessary Cylinder Head Piston Head Clean Carbon Every 125 hours These items should be serviced by a qualified se...

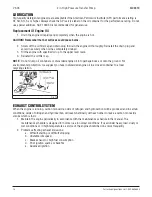
Page 14: ...filler cap NOTE Do not dump oil containers or discarded engine oil into garbage boxes or onto the ground For environmental protection we suggest you take in discarded engine oil in a closed container to a local recycling station Fig 14 EXHAUST CONTROL SYSTEM When the engine is running carbon monoxide oxide of nitrogen and hydrocarbon will be produced and in certain conditions oxide of nitrogen and...

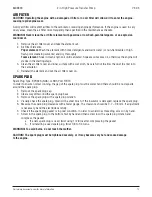
Page 15: ...ul not to allow the dust to enter into the carburetor 4 Reinstall the element and put the air filter cover on SPARK PLUG Spark Plug Type BPR6ES NGK or NHSP LD F7RTC In order to ensure normal running the gap of the spark plug must be correct and there should be no deposits around the spark plug 1 Remove the spark plug cap 2 Clear away dirt around the spark plug base 3 Remove the spark plug with a s...

Page 16: ...a is dry and free of dust 2 Turn the fuel valve to the Off position place a container under the carburetor as shown in figure 15 3 Open the fuel valve to completely drain the gasoline out of the fuel tank 4 Reinstall the drain plug and tighten it Fig 15 WARNING Fuel is extremely flammable and explosive under certain conditions Keep smoke fire and spark away from the operating site 5 Drain the oil ...

Page 17: ...and add fresh gasoline Drain the gasoline 1 out of the carburetor cup Drain the gasoline 2 out of the sediment bowl After removing from storage first drain the used gasoline to a proper container and add fresh gasoline before starting Loosen the drain bolt and completely drain the gasoline out of the carburetor to a proper container and screw the drain plug back tightly Remove the sediment bowl af...

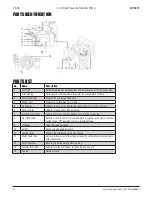
Page 18: ...ir intake 6 Recoil Starter Used for staring the engine manually 7 Engine Speed Lever Used to adjust the engine speed to control the pump output 8 On Off Switch Set this switch to the On position before using the recoil starter Set the switch to the Off position to stop a running engine 9 Oil Drain Drain the engine oil here 10 Oil Fill Check and add engine oil here 11 Suction Inlet Connect the rein...

Page 19: ... 3 03 Manuel d utilisateur Vous devez lire et comprendre toutes les instructions avant d utiliser l appareil Conservez ce manuel afin de pouvoir le consulter plus tard Pompe de transfert à haute pression de 2 po ...

Page 20: ...GNES DE SÉCURITÉ IMPORTANTES AVERTISSEMENT Veuillez lire et comprendre toutes les instructions avant d utiliser cet outil L utilisateur doit respecter les précautions de base lorsqu il utilise cet outil afin de réduire le risque de blessure et ou de dommage à l outil Avant de permettre à un autre individu d utiliser cet outil assurez vous qu il est avisé de toutes les consignes de sécurité AVERTIS...

Page 21: ...ment de travail pour éviter les blessures ou le bris de l appareil Restez alerte portez attention à vos gestes et faites preuve de bon sens 3 Tenez les vêtements les bijoux les cheveux etc à l écart des pièces mobiles pour éviter qu ils ne se coincent dans l outil 4 N utilisez pas l appareil ou l outil si vous êtes fatigué ou sous l effet de drogues d alcool ou de médicaments 5 N utilisez pas l ou...

Page 22: ... réservoir contient du carburant a Remisez à l écart des fournaises des poêles des chauffe eau des sécheuses ou de tout appareil présentant un témoin lumineux ou toute autre source d allumage capable d allumer les vapeurs de carburant 9 Un contact avec la surface du silencieux peut entraîner des brûlures graves La chaleur et les gaz d échappement peuvent provoquer l allumage des matières combustib...

Page 23: ...5 Vérifiez si le système d alimentation présente des fuites ou des signes de détérioration tel un tuyau effiloché ou spongieux des colliers de serrage desserrés ou manquants un réservoir ou un capuchon endommagé Corrigez tous les défauts avant d actionner la pompe à eau UTILISATION ET ENTRETIEN DE L OUTIL Ne modifiez aucune partie de l appareil Toutes les pièces et tous les accessoires sont conçus...

Page 24: ...SCHÉMA ÉLECTRIQUE Fig 1 Câblage N Noir J Jaune BRANCHEMENT DU TUYAU D ASPIRATION À LA POMPE 1 Glissez le dispositif de blocage de came du tuyau d aspiration sur celui qui se trouve au niveau de l admission de la pompe 2 Fixez le dispositif de blocage de came en plaçant les deux leviers bien serrés contre le tuyau Fig 2 ...

Page 25: ...LA BUSE POUR TUYAU D INCENDIE 1 Insérez les griffes du raccord de tuyau d incendie sur le tuyau et sur la buse d incendie 2 Tournez le raccord de la buse d incendie dans le sens horaire pour le serrer Fig 4 INSPECTION PRÉALABLE À L UTILISATION HUILE MOTEUR ATTENTION Utilisez de l huile moteur à 4 temps présentant la classe SE selon la classification de service API ou l équivalent Vérifiez l étique...

Page 26: ...e le niveau d huile à l intérieur du carter moteur est trop bas l alarme d huile moteur entraînera automatiquement le calage du moteur afin de réduire les dommages pourvu que l interrupteur du moteur se trouve à la position ON marche REMARQUE Si vous ne parvenez pas à redémarrer le moteur vérifiez premièrement le niveau d huile moteur ATTENTION L utilisation du moteur à essence alors qu il présent...

Page 27: ... la peau ou de respirer les émanations de carburant AVERTISSEMENT Évitez de trop remplir le réservoir de carburant le carburant ne devrait pas atteindre le goulot de remplissage Après le remplissage assurez vous de réinstaller solidement le capuchon du réservoir de carburant Fig 5 ATTENTION Le carburant peut endommager la peinture à l huile et le plastique Prenez garde de ne pas renverser le carbu...

Page 28: ... importe la pompe La tête de refoulement représente la distance verticale entre l orifice de refoulement de la pompe et le point de refoulement soit la surface du liquide si le tuyau s y trouve inséré ou s il pompe depuis le fond du réservoir La hauteur totale équivaut à la hauteur d aspiration combinée à la hauteur de refoulement Alors que la hauteur de pompage augmente le débit de la pompe dimin...

Page 29: ...pre et claire jusqu au haut de l orifice de sortie de refoulement 3 Réinstallez le bouchon d amorçage Fig 7 REMARQUE Un traitement inadéquat de la pompe à eau peut endommager celle ci en plus de réduire sa durée de vie Assurez vous que la chambre est pleine d eau avant de démarrer le moteur ATTENTION Ne faites jamais fonctionner la pompe sans l avoir amorcée Placez le panier de la crépine à l inté...

Page 30: ...e du moteur no 3 à la position Fast rapide Voir la figure 10 Fig 10 5 Placez le levier d étrangleur no 4 à la position ON marche Voir la figure 11 Fig 11 6 Saisissez la poignée de rappel et tirez doucement jusqu à ce que vous ressentiez une faible résistance Retirez ensuite la main rapidement afin de contrer la compression empêcher tout effet de rebond et démarrer le moteur AVERTISSEMENT Un effet ...

Page 31: ... on le déplace à la position Slow lent le débit de la pompe diminue ARRÊT DE LA POMPE À EAU 1 Placez le levier de vitesse du moteur à la position Slow lent 2 Poussez l interrupteur de MARCHE ARRÊT à la position OFF arrêt 3 Mettez le robinet de carburant à la position OFF arrêt ATTENTION N arrêtez pas le moteur en plaçant la commande de l étrangleur à la position d étranglement Un retour de flamme ...

Page 32: ...ns procédez au remplacement au besoin Culasse et tête de piston Éliminez le carbone Après toutes les 125 heures On recommande de confier l entretien de ces articles à un technicien de service qualifié AVERTISSEMENT Les gaz d échappement du moteur renferment du monoxyde de carbone un gaz toxique dont l inhalation peut entraîner des blessures ou même la mort Arrêtez le moteur avant de procéder à l e...

Page 33: ... été conçu pour une utilisation normale dans des conditions normales Si vous utilisez le véhicule sous une charge énorme dans des conditions poussiéreuses ou humides ou à des températures élevées procédez à l entretien du moteur plus fréquemment 2 Problèmes touchant les émissions de gaz d échappement a Démarrage ou arrêt difficile b Vitesse instable au ralenti c Fumée d échappement noire ou consom...

Page 34: ...llement 7 Vissez la bougie au bas à la main pour commencer et ensuite au moyen d une clé pour bougie et comprimez ensuite le joint d étanchéité a Si vous utilisez une bougie neuve tournez la de 1 2 tour après avoir comprimé le joint d étanchéité b Si vous réinstallez une bougie usagée tournez la de 1 8 à 1 4 tour AVERTISSEMENT Ne touchez pas le silencieux pour éviter les brûlures ATTENTION La boug...

Page 35: ...ndée 1 mois Pas nécessaire 1 à 2 mois Vidangez l essence usagée et ajoutez de l essence fraîche 2 mois à 1 an Vidangez l essence usagée et ajoutez de l essence fraîche Vidangez l essence 1 par la coupelle du carburateur Vidangez l essence 2 par le bol de sédiments Plus de 1 an Vidangez l essence usagée et ajoutez de l essence fraîche Vidangez l essence 1 par la coupelle du carburateur Vidangez l e...

Page 36: ...sé pour démarrer le moteur manuellement 7 Levier de vitesse du moteur Utilisé pour régler la vitesse du moteur afin de contrôler le débit de la pompe 8 Interrupteur de MARCHE ARRÊT Placez cet interrupteur à la position ON marche avant d utiliser le lanceur à rappel Placez l interrupteur à la position OFF arrêt pour arrêter un moteur en marche 9 Vidange d huile Vidangez l huile moteur ici 10 Rempli...

Reviews: