V4.0
3.9 Gallon Backpack Sprayer
8706012
Visit www.princessauto.com for more information
7
CARE & MAINTENANCE
1. Maintain the tool with care. A tool in good condition is efficient, easier to
control and will have fewer problems.
2. Inspect the tool components periodically. Repair or replace damaged or
worn components. Only use identical replacement parts when servicing.
3. Follow instructions for lubricating and changing accessories.
4. Only use accessories intended for use with this tool.
5. Maintain the tool’s labels and name plates. These carry important information.
If unreadable or missing, contact Princess Auto Ltd. for replacements.
WARNING! Only qualified service personnel should repair the tool. An
improperly repaired tool may present a hazard to the user and/or others.
DISASSEMBLY AND REASSEMBLY
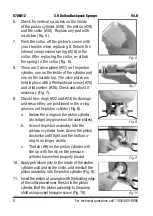
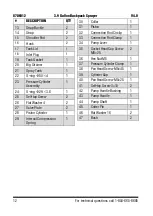
1. Remove the cotter pin (#45) and pump
handle (#43).
2. Lay the unit on its back with the pump face
towards you. Loosen the hose clamp and remove
the sprayer hose from the spray tank (#21).
3. Remove the Pressure Cylinder clamp (#37).
Rotate the cylinder cap (#39) to access the
pump lever (#34).
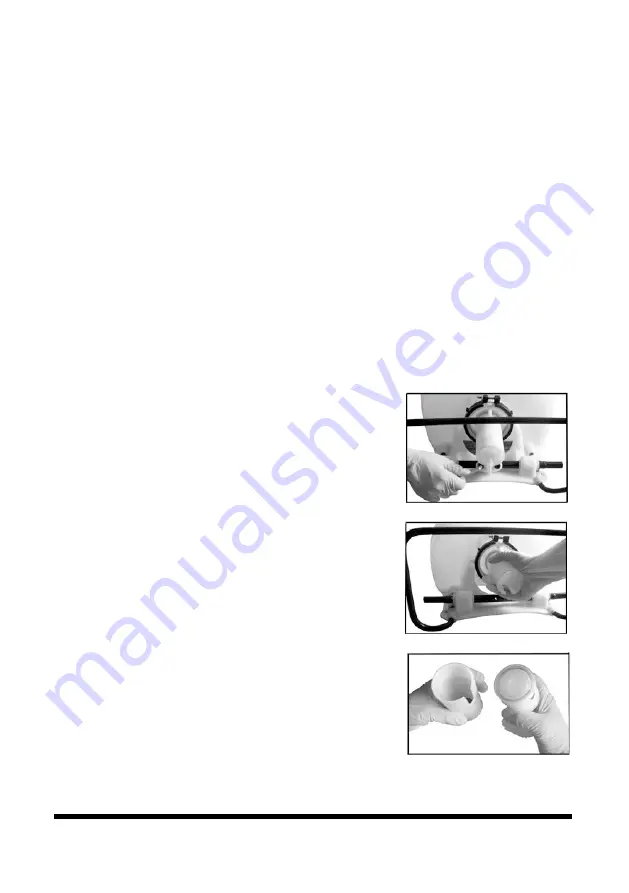
4. Use an Allen wrench to remove both socket head
cap screws (#35) from the pump lever. Pull the
piston assembly out of the piston cylinder (Fig. 3).
5. Remove the piston cylinder assembly by turning
the piston cylinder counter-clockwise (Fig. 4).
CAUTION! The piston cylinder may have
sharp edges that can cut. Wear gloves to
protect your hands.
Fig. 3
Fig. 4
Fig. 5

