background image

8904807 

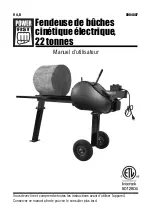
22 Ton Electric Kinetic Log Splitter 

V4.0 

For technical questions call 1-800-665-8685 

ELECTRICAL SAFETY 

WARNING! Do not touch or handle a live tool with any part of your body 
that is wet or damp. Wet skin reduces resistance to electrical current, 
increasing the danger of a serious or fatal shock. 
WARNING! To reduce risk of electric shock, be certain that the plug is 
connected to a properly grounded receptacle. 

1.  Disconnect the tool from the power supply before making any 

adjustments, changing accessories, cleaning, servicing or when 

storing. Such preventive safety measures reduce the risk of starting the 

tool accidentally. 

2.  Protect yourself against electric shocks when working on electrical 

equipment. Avoid body contact with grounded surfaces. There is an 

increased chance of electrical shock if your body is grounded. 

3.  Do not expose the tool to rain, snow, frost or any other damp or wet 

conditions. Water entering a tool will increase the risk of electric shock. 

4.  Do not disconnect the power cord in place of using the power switch. 

This will prevent an accidental start-up when the power cord is plugged 

into the power supply. 
a.  In the event of a power failure, turn off the machine as soon as the 

power is interrupted. The possibility of accidental injury could 

occur if the power returns and the unit is not switched off. 

5.  Do not alter any parts of the tool or accessories. All parts and 

accessories are designed with built-in safety features that may be 

compromised if altered. 

6.  Make certain the power source conforms to requirements of your 

equipment (see Specifications). 

7.  When wiring an electrically driven tool, follow all electrical and safety 

codes, as well as the most recent Canadian Electrical Code (CE) and 

Canadian Centre for Occupational Health and Safety (CCOHS). 

8.  This tool is only for use on 120 V (single phase) and is equipped with a 

three-prong grounded power supply cord and plug. Check with a 

qualified electrician if you are in doubt as to whether the outlet is 

properly grounded. If the tool should electronically malfunction or 

Summary of Contents for 8904807

Page 1: ...V4 0 8904807 Please read and understand all instructions before use Retain this manual for future reference 22 Ton Electric Kinetic Log Splitter...

Page 2: ...ize 5 ft INTRODUCTION The 22 Ton Electric Kinetic Log Splitter is ideal for splitting logs up to 21 x 20 in The twin handle operation makes sure the operator is safe when the tool is active with its q...

Page 3: ...ICE This notice indicates that a specific hazard or unsafe practice will result in equipment or property damage but not personal injury WORK AREA 1 Operate in a safe work environment Keep your work ar...

Page 4: ...ate matter 8 This tool can cause hearing damage Wear hearing protection gear with an appropriate Noise Reduction Rating to withstand the decibel levels PERSONAL PRECAUTIONS Control the tool personal m...

Page 5: ...og splitter to keep pieces from flying up and possibly causing injury 10 Never bend or reach over the log splitter to retrieve a log 11 Never place any part of your body between the ram and the splitt...

Page 6: ...tool will increase the risk of electric shock 4 Do not disconnect the power cord in place of using the power switch This will prevent an accidental start up when the power cord is plugged into the pow...

Page 7: ...e in conjunction with a Ground Fault Circuit Interrupter GFCI It is recommended that the GFCI should have a rated residual current of 30 mA or less 2 Do not operate this tool if the power cord is fray...

Page 8: ...Failure to do so could result in a malfunction and personal injury Remove the parts and accessories from the packaging and inspect for damage IDENTIFICATION KEY A Mobility Handle B Splitting Wedge C...

Page 9: ...Always operate the log splitter from the rear during the splitting task to protect yourself from ejected splinters or pieces of wood expecially when splitting irregular or knotty wood BEFORE USE 1 Ver...

Page 10: ...sh the Clutch Handle toward the log and then hold it in position 7 Push the Ram Release Handle forward towards the log The Ram will release and push the log through the Splitting Wedge 8 Release both...

Page 11: ...the meshing parts of the gear shaft 2 and rack 33 with light machine oil weekly or every 30 hours 2 Use a little oil to prevent rust on other metal parts DRIVE BELT ADJUSTMENT REPLACEMENT Numbered ref...

Page 12: ...sted Solution s Log splitter will not start 1 Power cord is not plugged in 2 Fuse or circuit tripped 3 Damaged power cord 4 Burned or failed power switch 1 Plug in saw to power source 2 Replace fuse o...

Page 13: ...V4 0 22 Ton Electric Kinetic Log Splitter 8904807 Visit www princessauto com for more information 13 PARTS BREAKDOWN...

Page 14: ...21 Long Pin 10 2 22 Outer Roller 1 23 Safety Clutch Handle 1 24 Operating lever Roller 1 25 Plastic Handle 1 26 Connecting Rod A 2 27 Circlip 10 8 28 Short Pin 1 29 Lock Lever 1 PART QTY 30 Plastic Ha...

Page 15: ...ket L 1 64 Tray Bracket R 1 65 Carry Handle 1 66 Bottom Head Bolt M6 8 67 Flat Washer 26 68 Socket Head Bolt 10 69 Spring Washer 12 70 Round Tube 1 71 Hex Bolt M8x110 2 PART QTY 72 Lock Nut M8 2 73 Pi...

Page 16: ...8904807 22 Ton Electric Kinetic Log Splitter V4 0 16 For technical questions call 1 800 665 8685...

Page 17: ...V4 0 22 Ton Electric Kinetic Log Splitter 8904807 Visit www princessauto com for more information 17...

Page 18: ...8904807 22 Ton Electric Kinetic Log Splitter V4 0 18 For technical questions call 1 800 665 8685...

Page 19: ...7 Vous devez lire et comprendre toutes les instructions avant d utiliser l appareil Conservez ce manuel afin de pouvoir le consulter plus tard Manuel d utilisateur Fendeuse de b ches cin tique lectriq...

Page 20: ...oue 10 x 3 5 po 4 Taille 5 pi INTRODUCTION La fendeuse de b ches cin tique lectrique de 22 tonnes est id ale pour fendre des b ches jusqu 21 x 20 po Le fonctionnement deux poign es permet de s assurer...

Page 21: ...essures corporelles graves ou m me la mort si on omet de prendre les pr cautions n cessaires ATTENTION Cet avis indique une situation possiblement dangereuse qui peut entra ner des blessures mineures...

Page 22: ...vail et pour r duire les effets des vibrations de l outil a Ne portez pas de gants lorsque vous utilisez un outil dans lequel le tissu pourrait demeurer coinc entra nant ainsi la main 4 Portez des v t...

Page 23: ...Utilisez le bon outil pour la t che effectuer Cet outil a t con u pour une utilisation sp cifique vitez de modifier ou d alt rer cet outil ou de l utiliser une fin autre que celle pour laquelle il a...

Page 24: ...utilis e par une seule personne Ne laissez jamais une personne faire fonctionner la fendeuse de b ches pendant qu une autre personne positionne la b che dans la fendeuse 15 Ne tentez pas de mettre une...

Page 25: ...si votre corps est mis la terre 3 N exposez pas l outil la pluie la neige au gel ou d autres conditions humides ou mouill es Si l eau p n tre l int rieur d un outil le risque de choc lectrique devien...

Page 26: ...des rallonges ou des limiteurs de surtension que lorsque le cordon d alimentation de l outil est trop court pour atteindre la source d nergie depuis l aire de travail a Lorsque vous vous servez d un...

Page 27: ...d Disposez le cordon lectrique de fa on qu il ne touche pas l outil et qu il ne risque pas de se prendre dans la pi ce travailler Le cordon doit toujours se trouver derri re l outil 5 Veillez ce que...

Page 28: ...M Moteur N Courroie d entra nement O Ressort de rappel du v rin P Volant moteur 2 ASSEMBLAGE ET INSTALLATION Les num ros entrecoup s entre parenth ses fig 1 1 se rapportent un point pr cis d une illus...

Page 29: ...contre les clats de bois sp cialement lors du fendage du bois irr gulier ou noueux AVANT L UTILISATION 1 V rifiez si la fendeuse de b ches se trouve sur une surface plane et stable avant de l utiliser...

Page 30: ...is fig 4 5 Pour des raisons de s curit le fendage d une b che est une op ration qui n cessite deux mains Placez une main sur la poign e d embrayage de s curit fig 5 1 et l autre main sur la poign e de...

Page 31: ...tactes sur l outil Elles comportent des renseignements importants Si elles sont illisibles ou manquantes communiquez avec Princess Auto Ltd pour les remplacer AVERTISSEMENT Seul un personnel d entreti...

Page 32: ...Mettez la courroie d entra nement sous tension en glissant et en loignant le moteur du volant moteur R glez la courroie d entra nement jusqu l obtention d une fl che de 3 8 po fig 7 1 8 Serrez les qu...

Page 33: ...le disjoncteur 3 Communiquez avec le soutien technique 4 Communiquez avec le soutien technique La b che ne se fend pas 1 La b che est mal positionn e sur le chariot 2 La b che d passe la dimension max...

Page 34: ...8904807 Fendeuse de b ches cin tique lectrique 22 tonnes V 4 0 16 En cas de questions techniques appelez le 1 800 665 8685 R PARTITION DES PI CES...

Page 35: ...nt rieur 1 21 Goupille longue 10 2 22 Rouleau ext rieur 1 23 Poign e d embrayage de s curit 1 24 Rouleau du levier de commande 1 25 Poign e en plastique 1 26 Bielle A 2 NO DESCRIPTION QT 27 Anneau las...

Page 36: ...teau 1 63 Support de plateau gauche 1 64 Support de plateau droit 1 65 Poign e de transport 1 66 Boulon t te ovale 8 67 Rondelle plate 26 68 Boulon barillet 10 69 Rondelle ressort 12 NO DESCRIPTION QT...

Reviews: