


8937732
11 ft Drywall Hoist with Tilting Action
V4.0
6
For technical questions call 1-800-665-8685
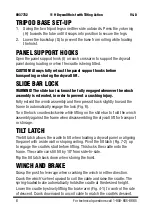
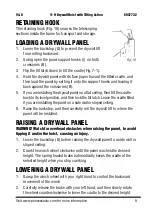
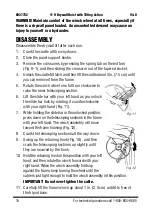
ASSEMBLY
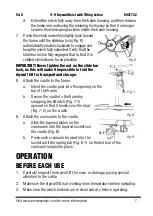
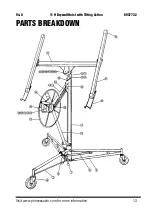
Dashed numbers in parenthesis (Fig. 1-1) refer to a specific point in an
illustration or image.
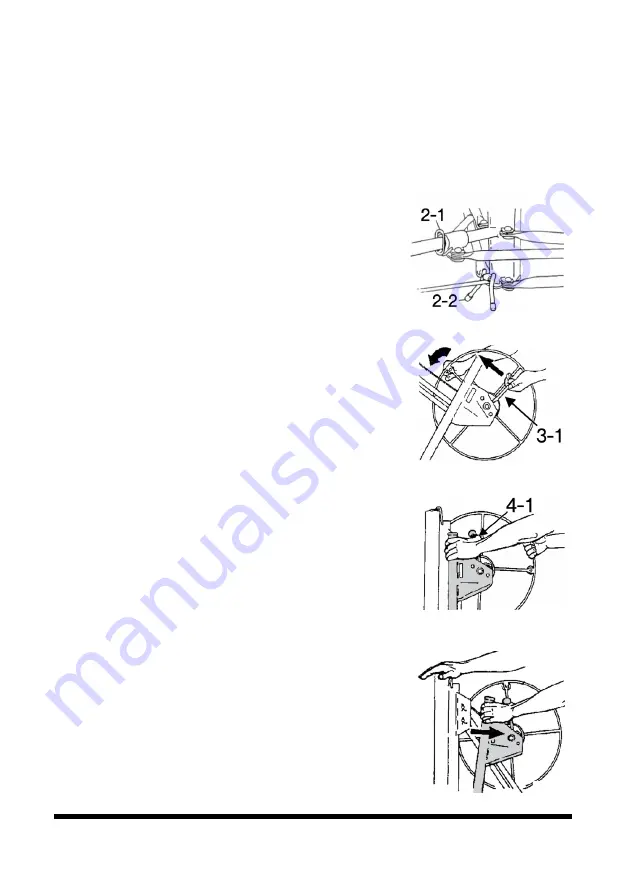
1. Set the tripod base (F) on its casters on the floor.
2. Press down on the slide yoke ring (G) (Fig. 2-1),
and hold it down while you swing the two
forward tripod legs to the sides until the yoke
ring snaps into place in the locking hole on the
bottom of the slide tube.
3. Lower the backstop (G) (Fig. 2-2).
4. Position the frame assembly so the winch assembly is above the
stationary center leg, then lower the frame
about 1 in. (2.5 cm), until it is seated in the
base’s tube. Verify that the frame assembly is
pushed all the way down.
5. Attach the handle to the winch wheel. Tighten
the nut, and then back it off until the handle
turns freely.
6. Move the winch assembly into its working
position.
a. Hold the winch wheel and brake arm
(Fig. 3-1). Release the brake by rotating
the winch wheel forward slightly while
lifting the brake arm.
b. Raise the brake arm all the way up, and
then grasp the winch post with your
fingers (Fig. 4) while firmly gripping the
brake handle with your thumb (Fig. 4-1).
c. Place your right hand on top of the frame
(Fig. 5). Continue gripping the brake arm
as needed to prevent cable backlash, and
then pull the winch assembly all the way
toward you.
Fig. 2
Fig. 3
Fig. 4
Fig. 5


